
Introduction #
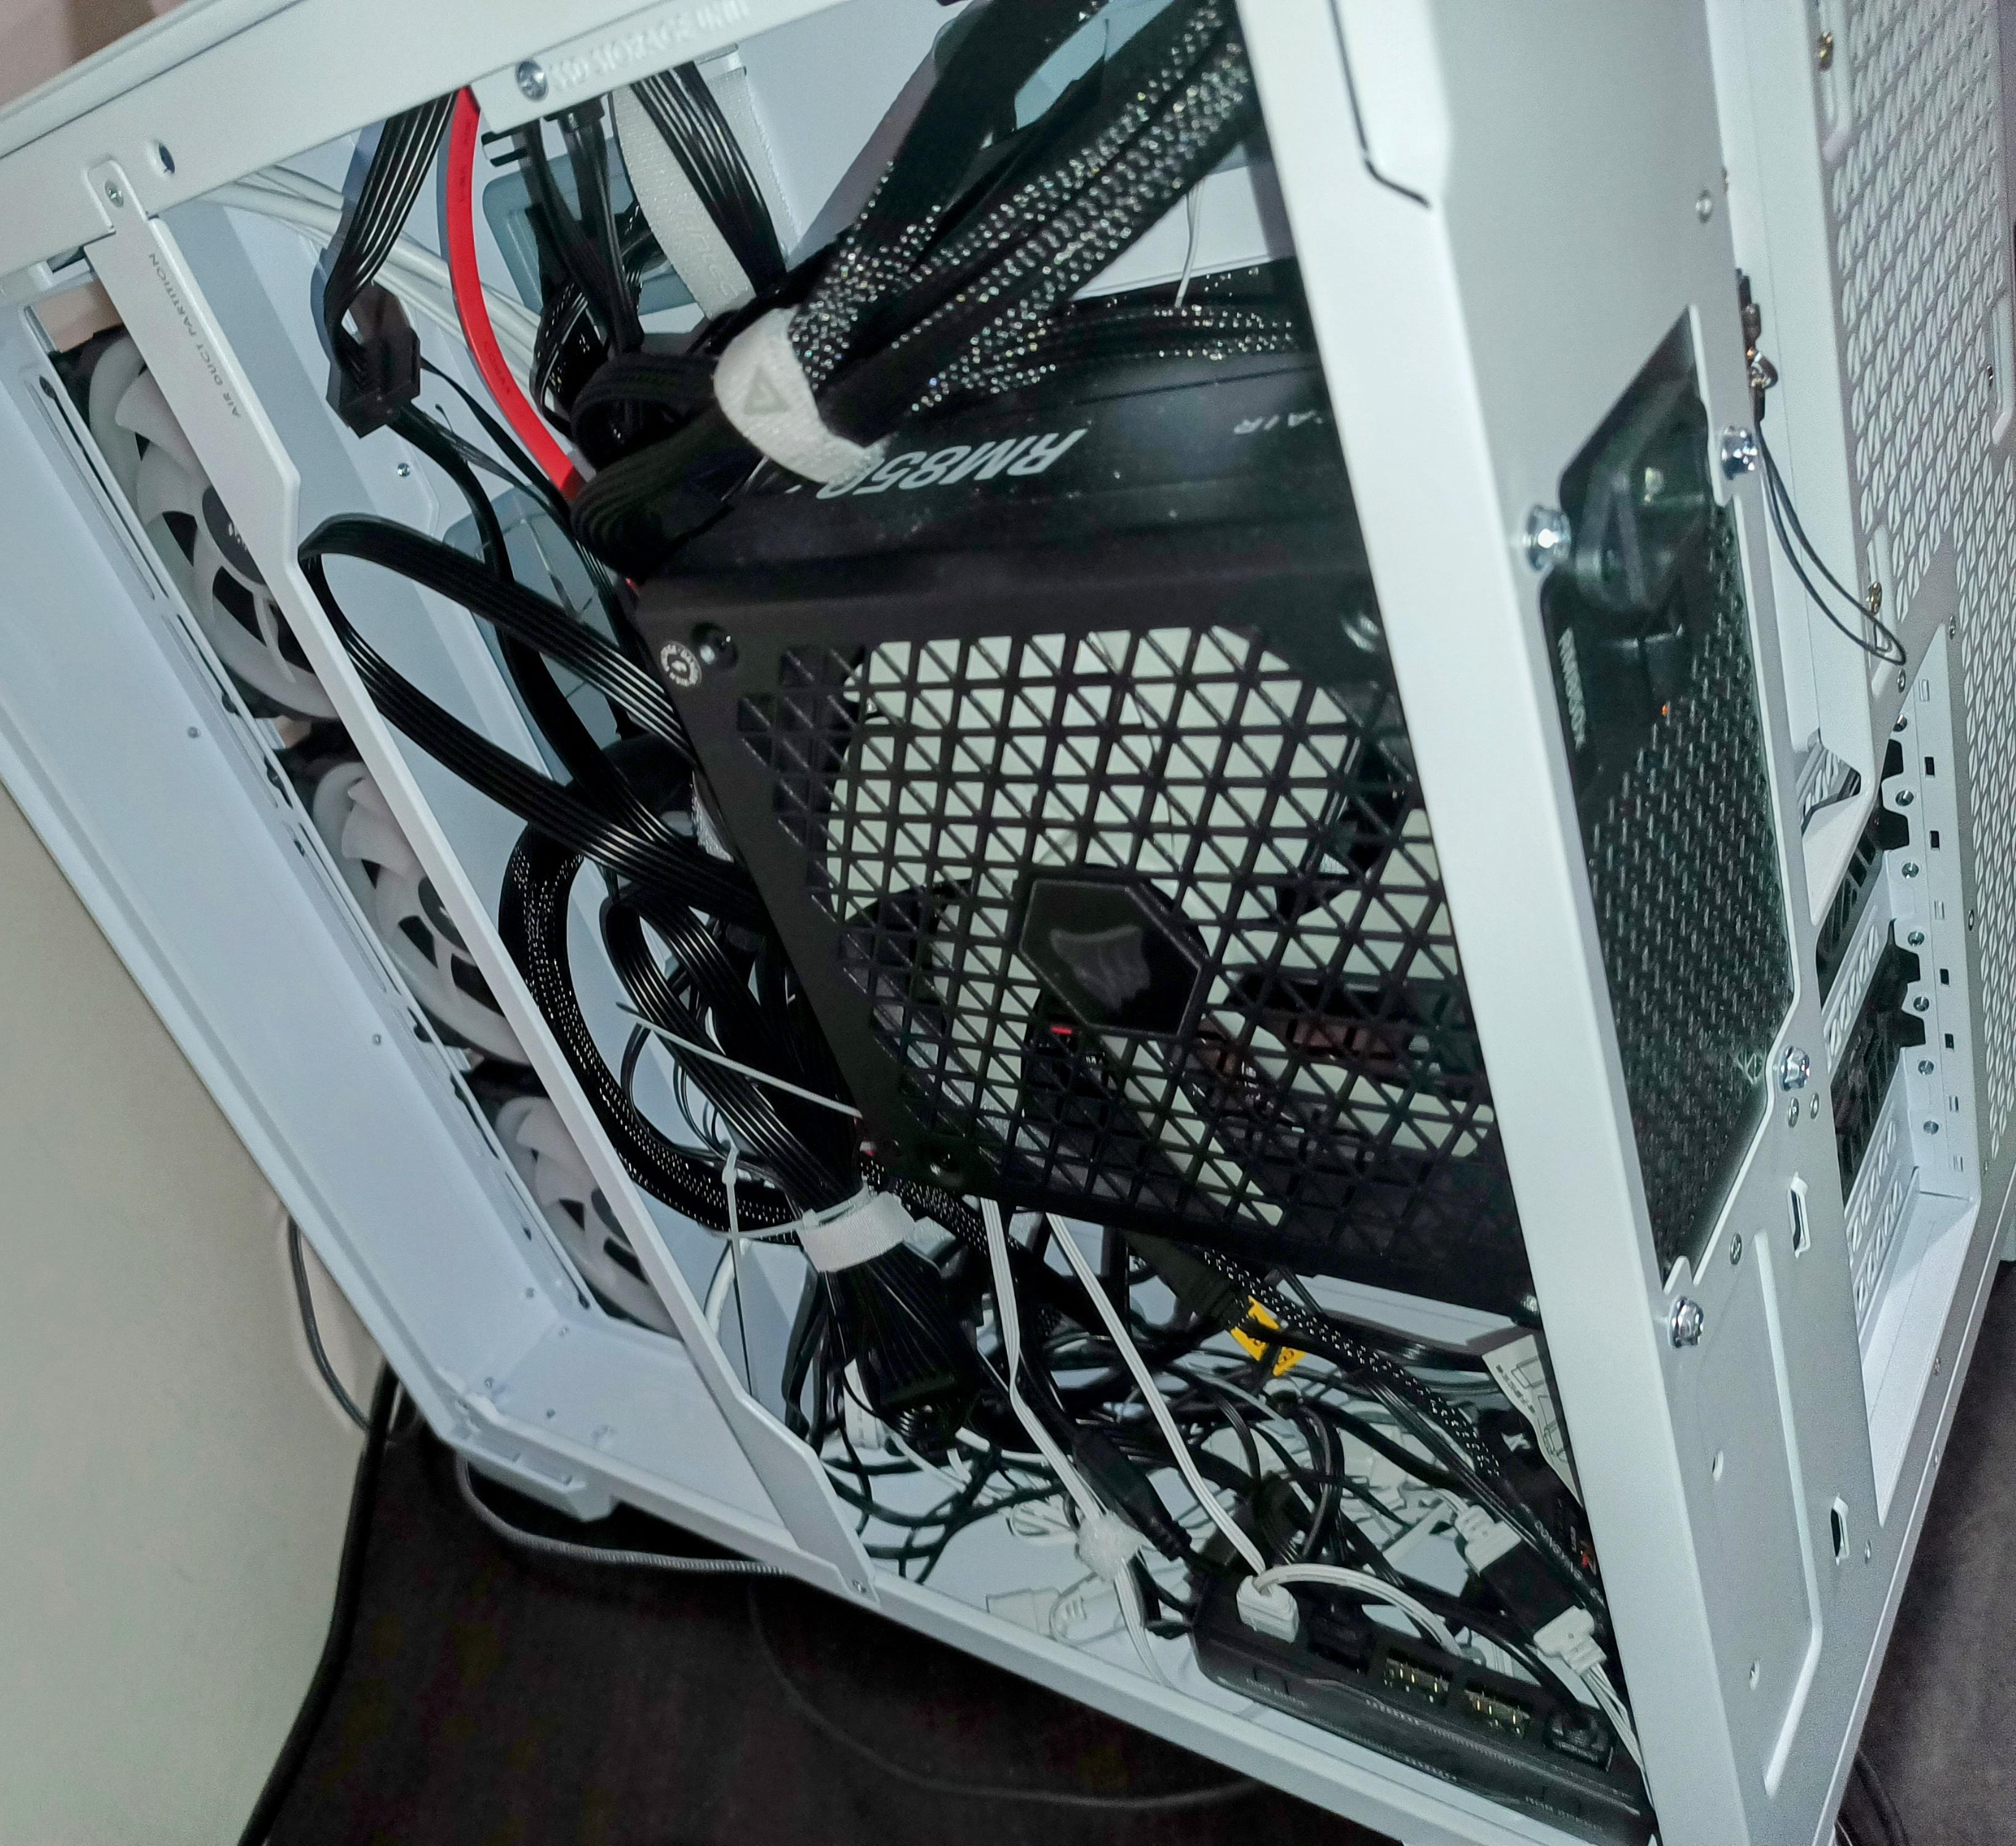
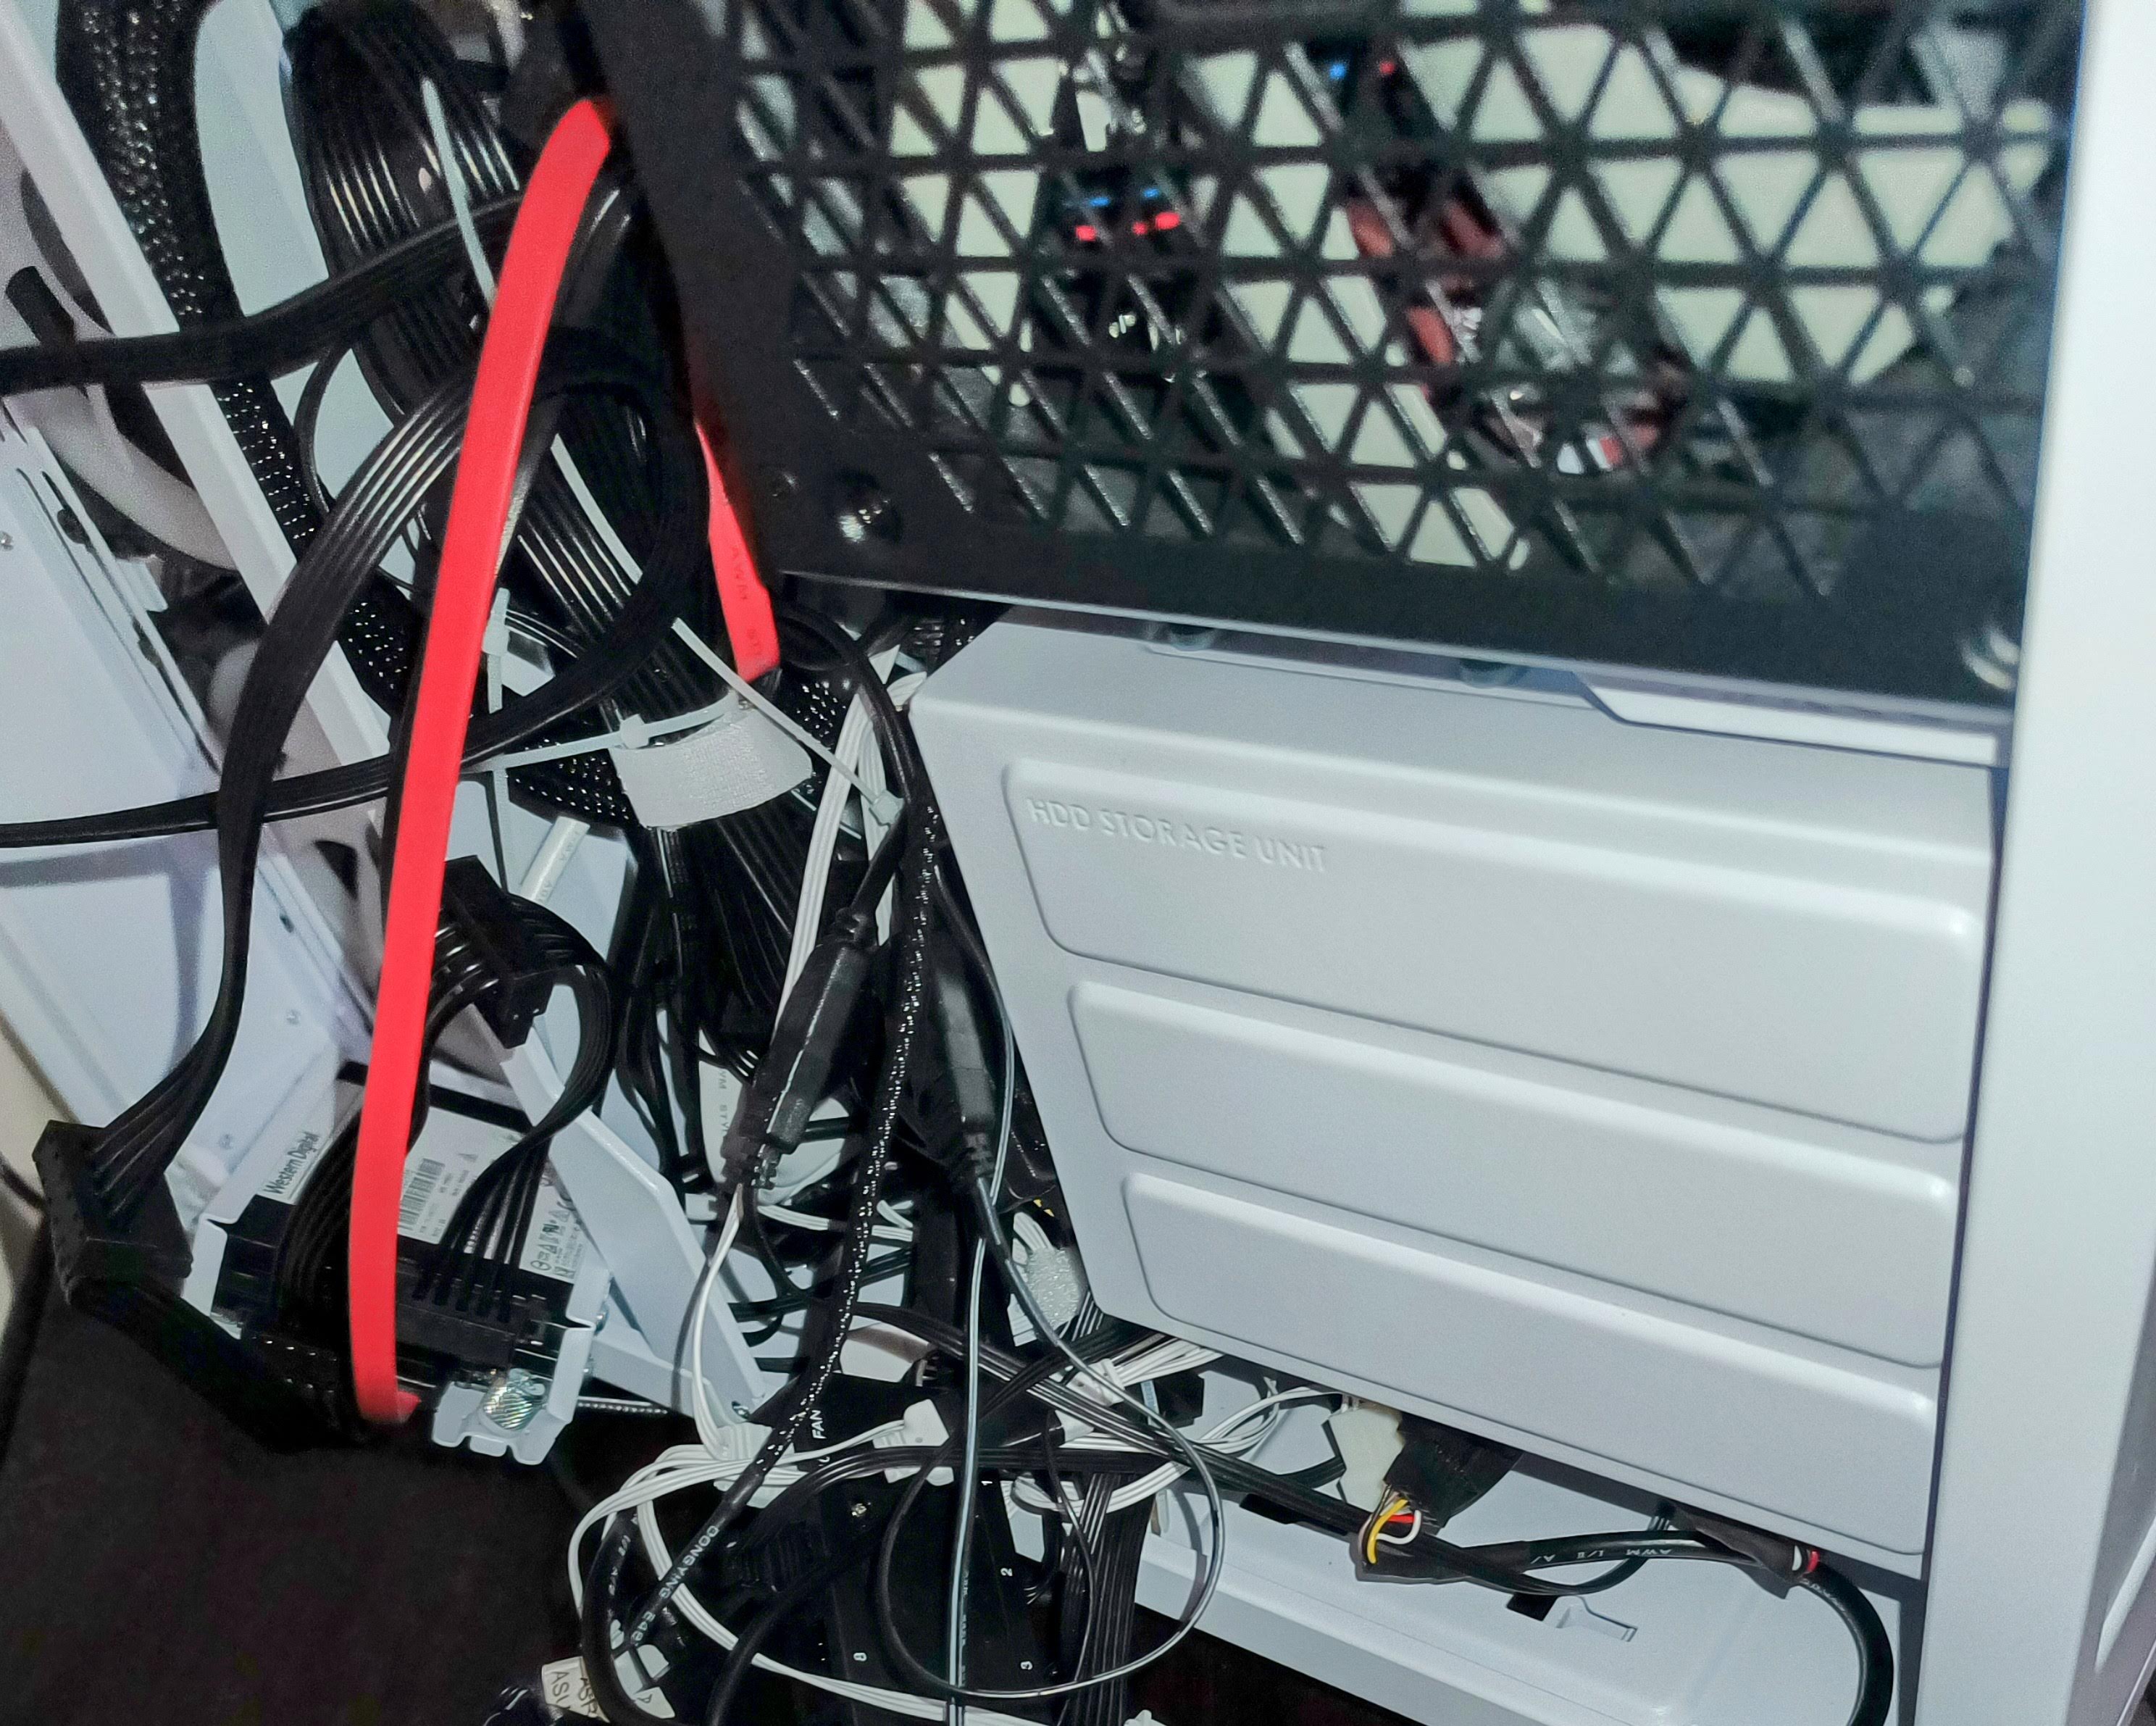
So for a while, I’d been wanting to declutter my PC, especially at the back, which was currently filled with a mess of cables and RGB/fan hubs. Seeing as I was planning on adding in another hard drive, which would come with its own SATA power and data cables, I thought it would be a great time to declutter and get rid of all my RGB at the same time.
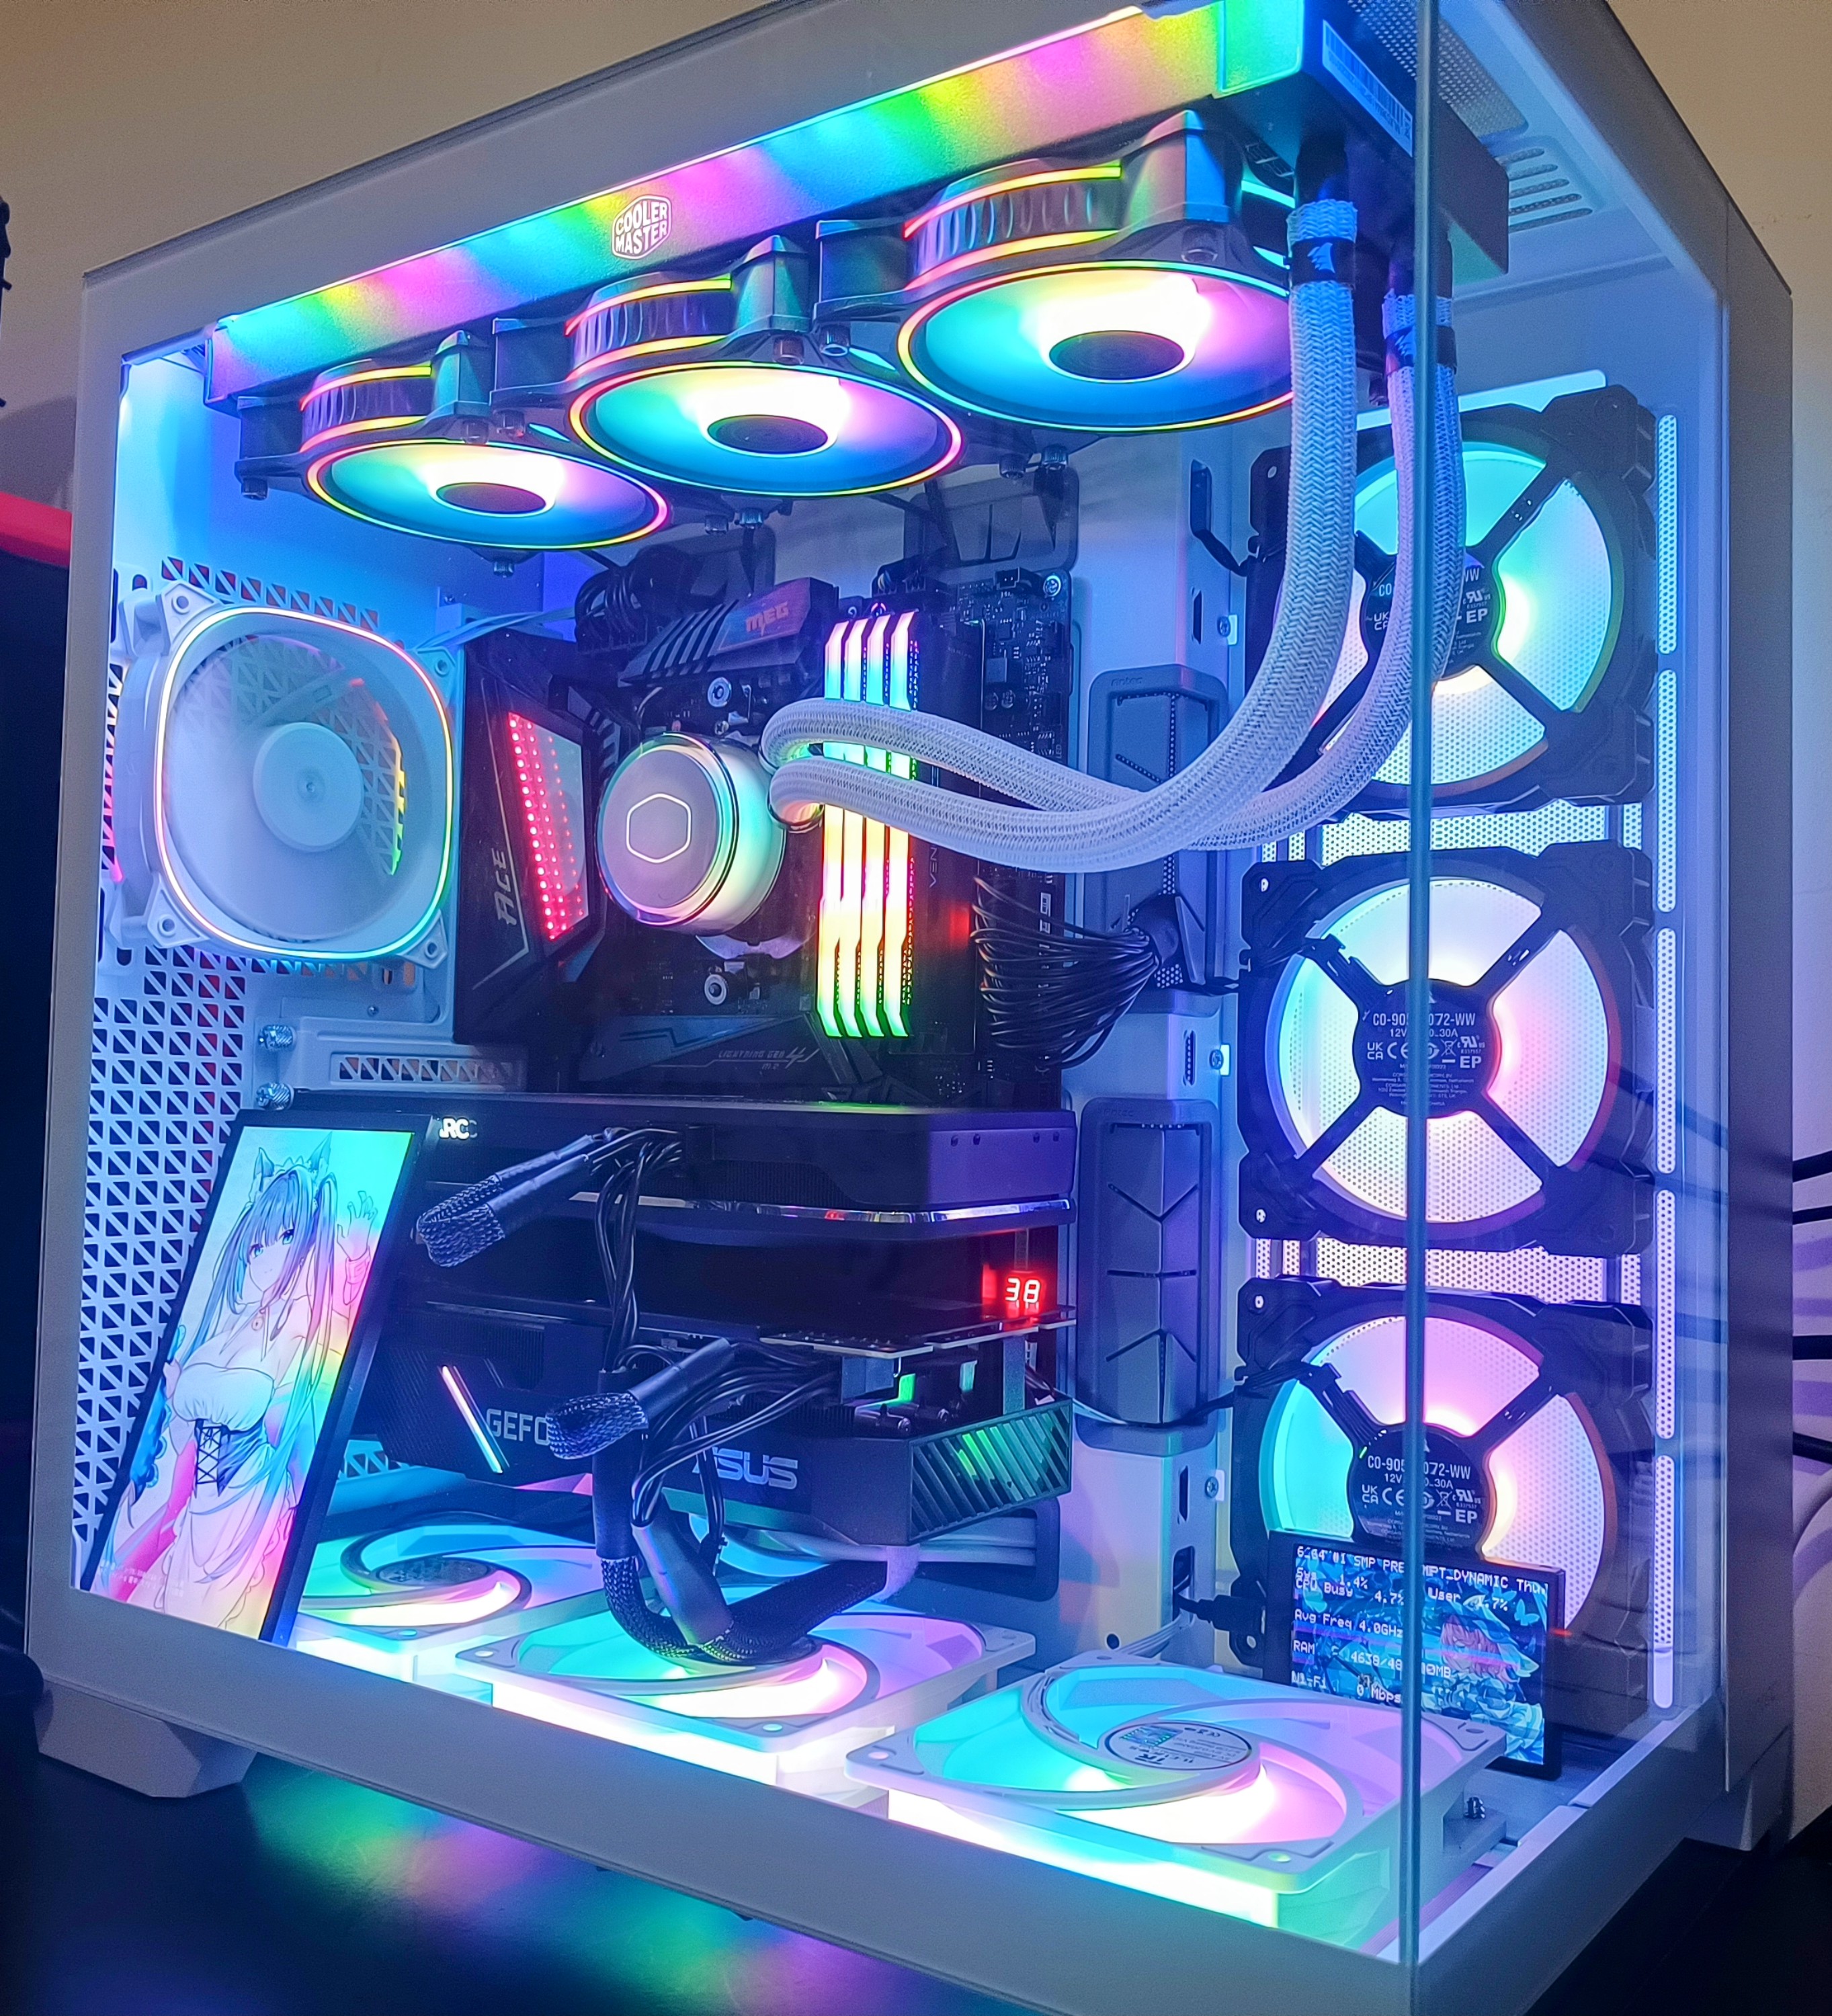
A little look at the mess of cables from before:
Old Setup #
Before the change, I was rocking the following:
- Cooler Master ML360 Illusion AIO
- 3 x CM MF120 Halo
- CM A1 ARGB Hub
- 3 x Corsair LL120
- Corsair Lighting Node Core
- Generic (EZ-DIY-FAB) ARGB and PWM fan hub
- 3 x Thermalright C12CW-S
- 1 x Inwin Sirius Extreme Pure
- 1 x ARGB Anime waifu
Going back even further to when I was rocking the Antec DF600 case, in the place of the 3 Thermalright fans were 2 from EZ-DIY-FAB (which is where the hub came from), and in the Inwin’s place was yet another LL120 (shout-out to Ben/UntitledDuck for all the LL120s).
Now onto how it was all wired up. A diagram with a short explanation will probably come in handy here since you know, a picture’s worth a thousand words ;):
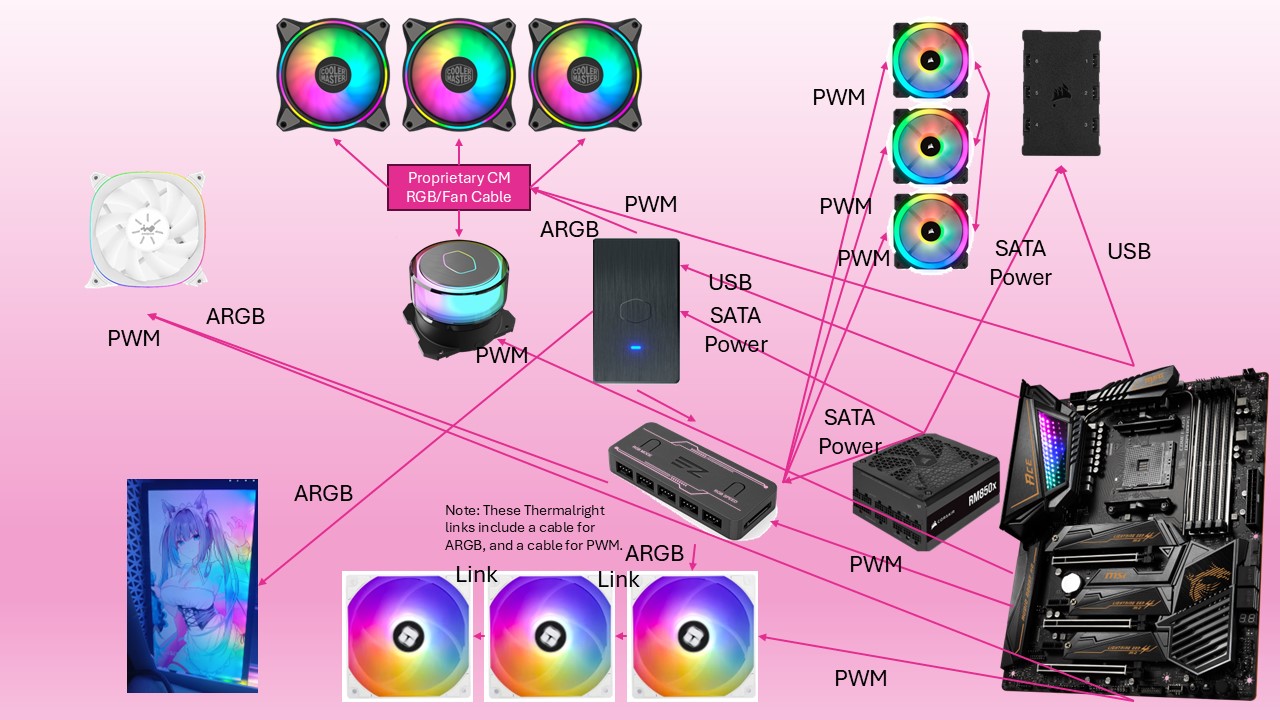
As you can see from this silly little PowerPoint diagram, there was a lot of cable mess going on all over the place. Basically, I had three different hubs, all of which needed a SATA power connection from my power supply. My top fans attached to my radiator, as well as my AIO pump were all connected to a proprietary Cooler Master RGB and fan connector, of which one end went to an ARGB slot on the Cooler Master ARGB hub (which was hooked up to a USB 2.0 header on my motherboard), and two cables (one from the proprietary connector, and one from the pump itself) went straight into my motherboard.
There was also the three Corsair LL120s which I had hooked up to a Lighting Node Core (also connected to my motherboard via a USB 2.0 header) for RGB control, and the generic fan/ARGB hub for PWM control, which was connected to the Cooler Master hub for ARGB, and to my motherboard for PWM control. My bottom Thermalright fans were linked up to each other with their ARGB and PWM sharing cables, with one of them hooked up to the generic hub for ARGB, and straight to the motherboard for PWM.
The odd ones out were my ARGB waifu and my rear exhaust fan - the waifu was plugged in to the CM hub, and the rear fan to the generic hub for ARGB, and the motherboard for PWM. Wow, that was a mouthful.
You might also be wondering about why I had so many different ARGB hubs in particular to begin with.
Brushing away the fact that the Corsair fans neeeded the Lighting Node thanks to their proprietary connections, I definitely could’ve done away with the Cooler Master A1 Hub (not the proprietary cable adapter which converts the connection to a standard ARGB Gen 2 connector), but I sort of needed it for the best possible lighting control. This is because OpenRGB from around this gen of MSI boards (I say that because it was like that on my B450 Carbon Max too) doesn’t support resizing ARGB zones (i.e., the JRAINBOW connector(s)) - what this means is that ARGB plugged into these connectors will behave as normal RGB without any addressable elements, so the whole thing could only be a single colour, rather than multiple colours per LED, which left me with the only option of routing everything through the CM hub which connects via a USB header in order to have addressable control over all the fans, which is a big reason for the extra clutter throughout.
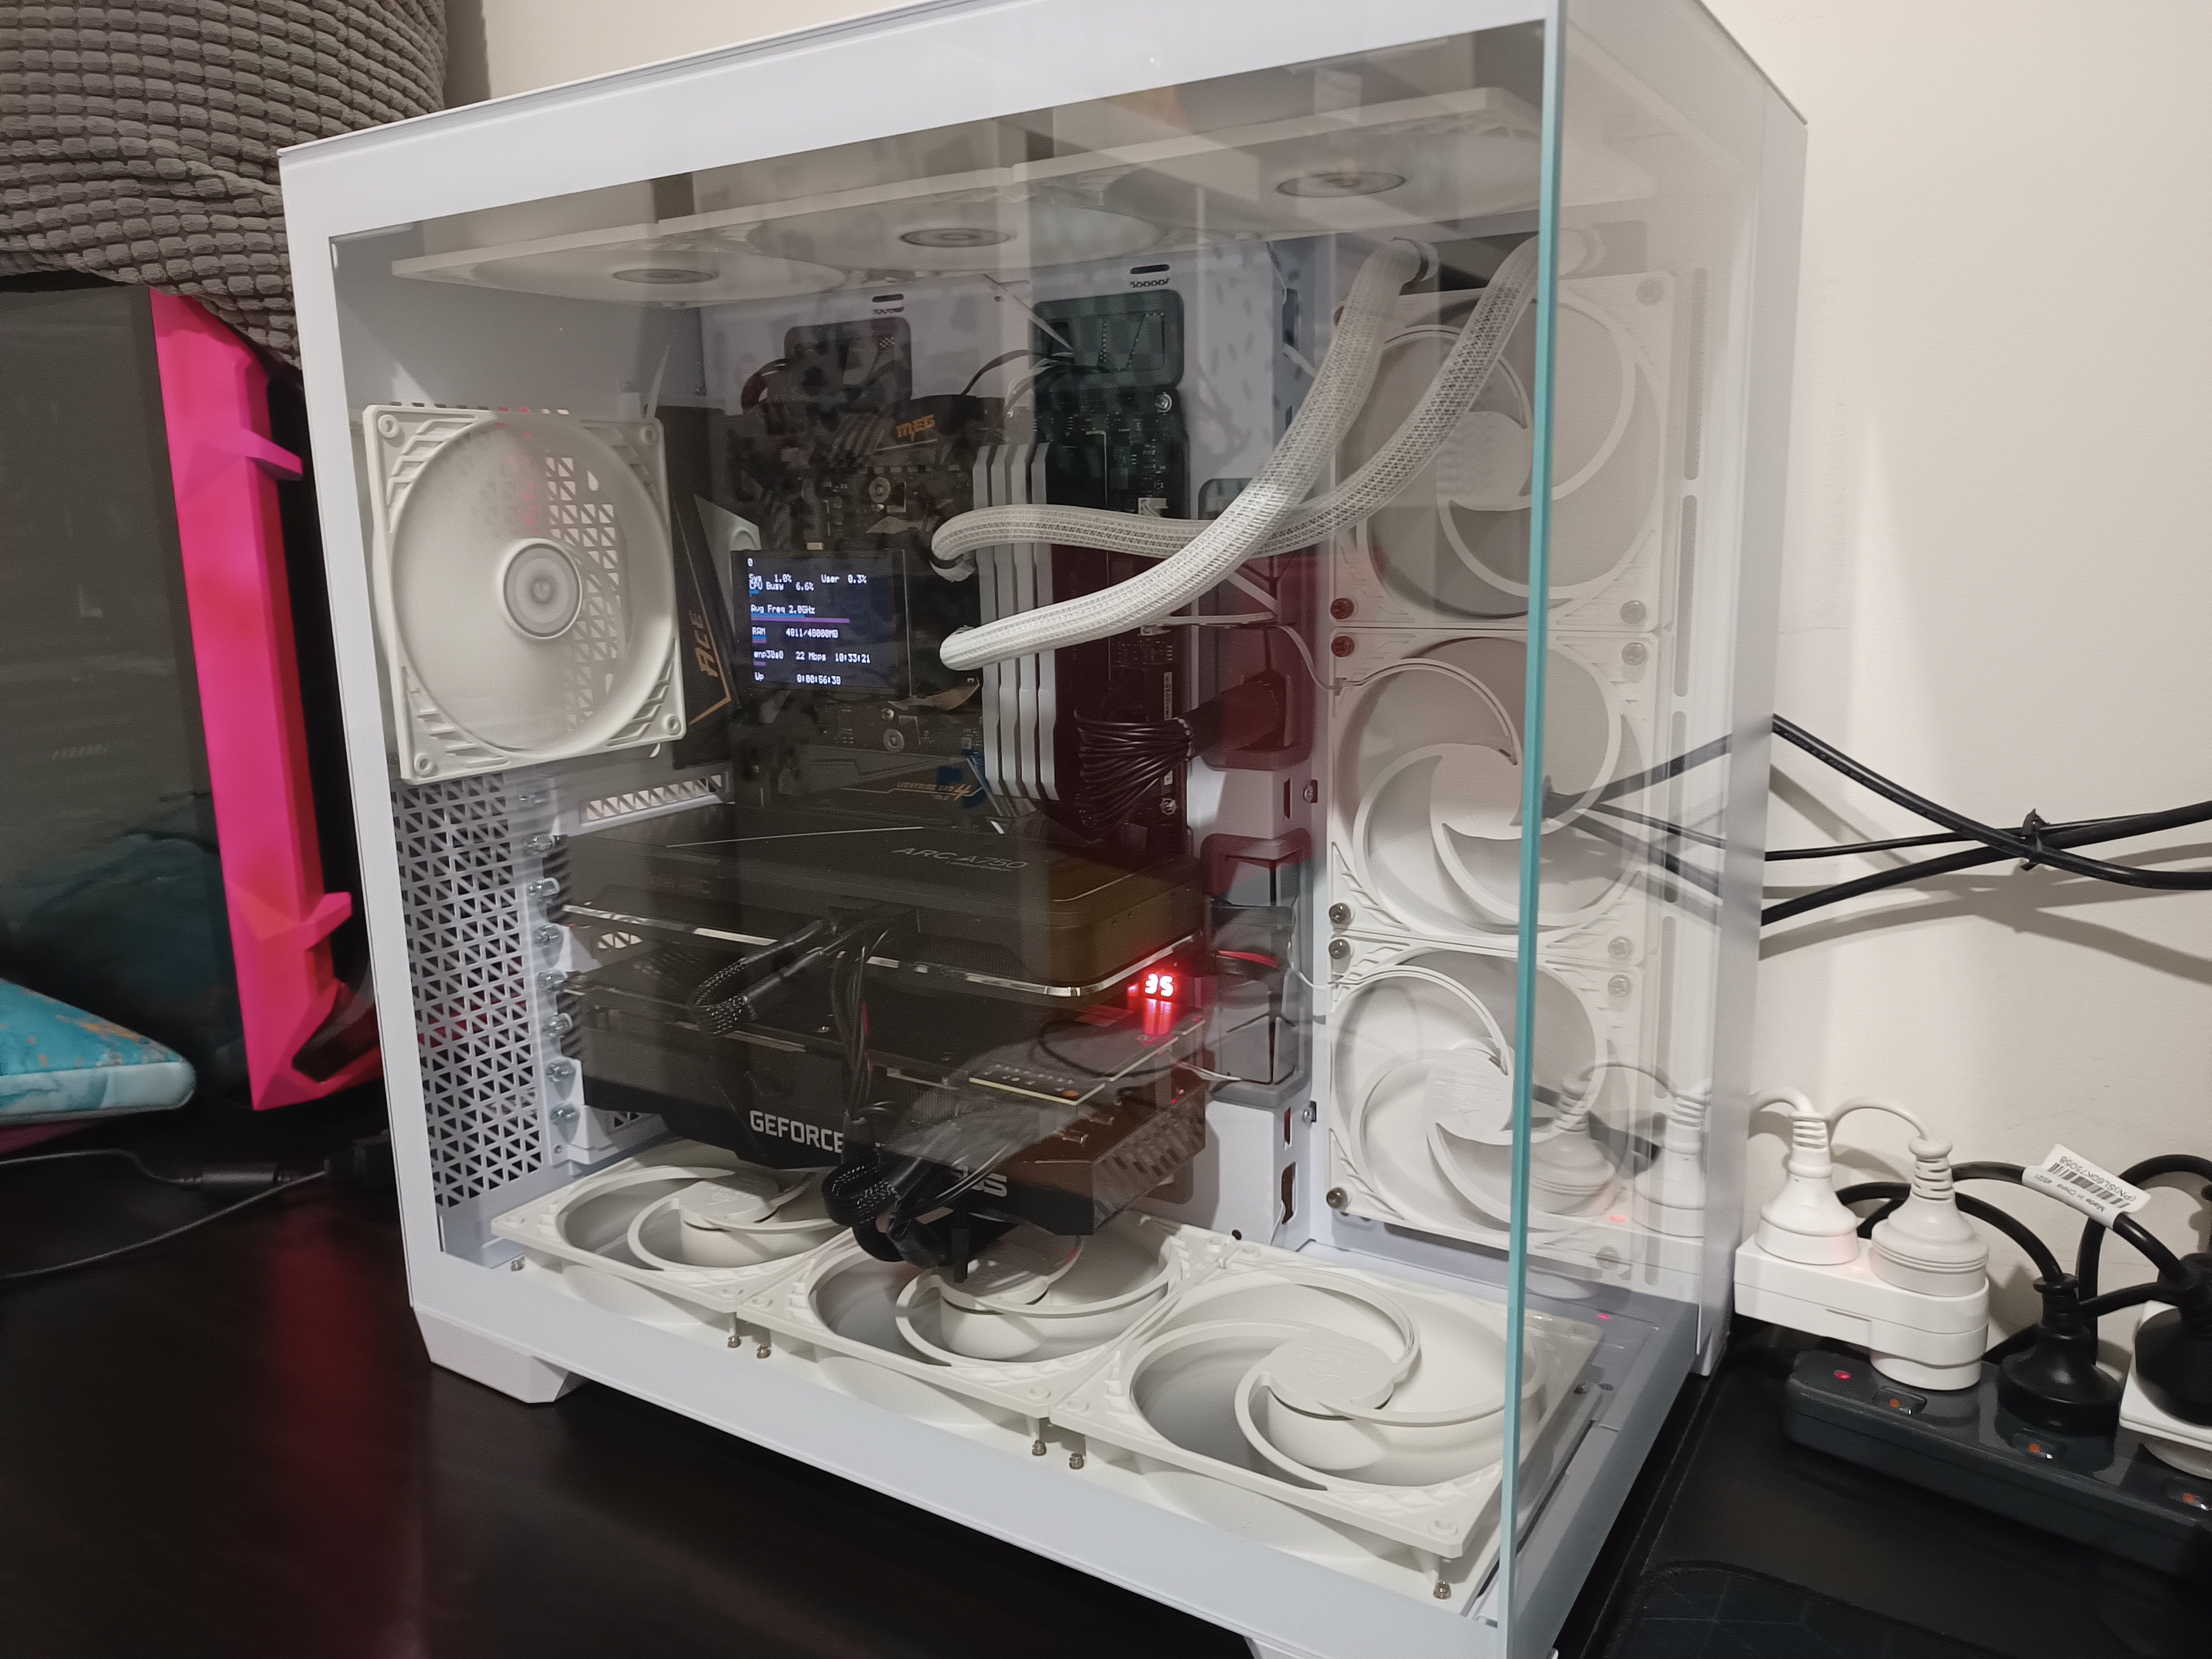
New Setup #
After de-RGBifying and changing everything up, I was left with the following:
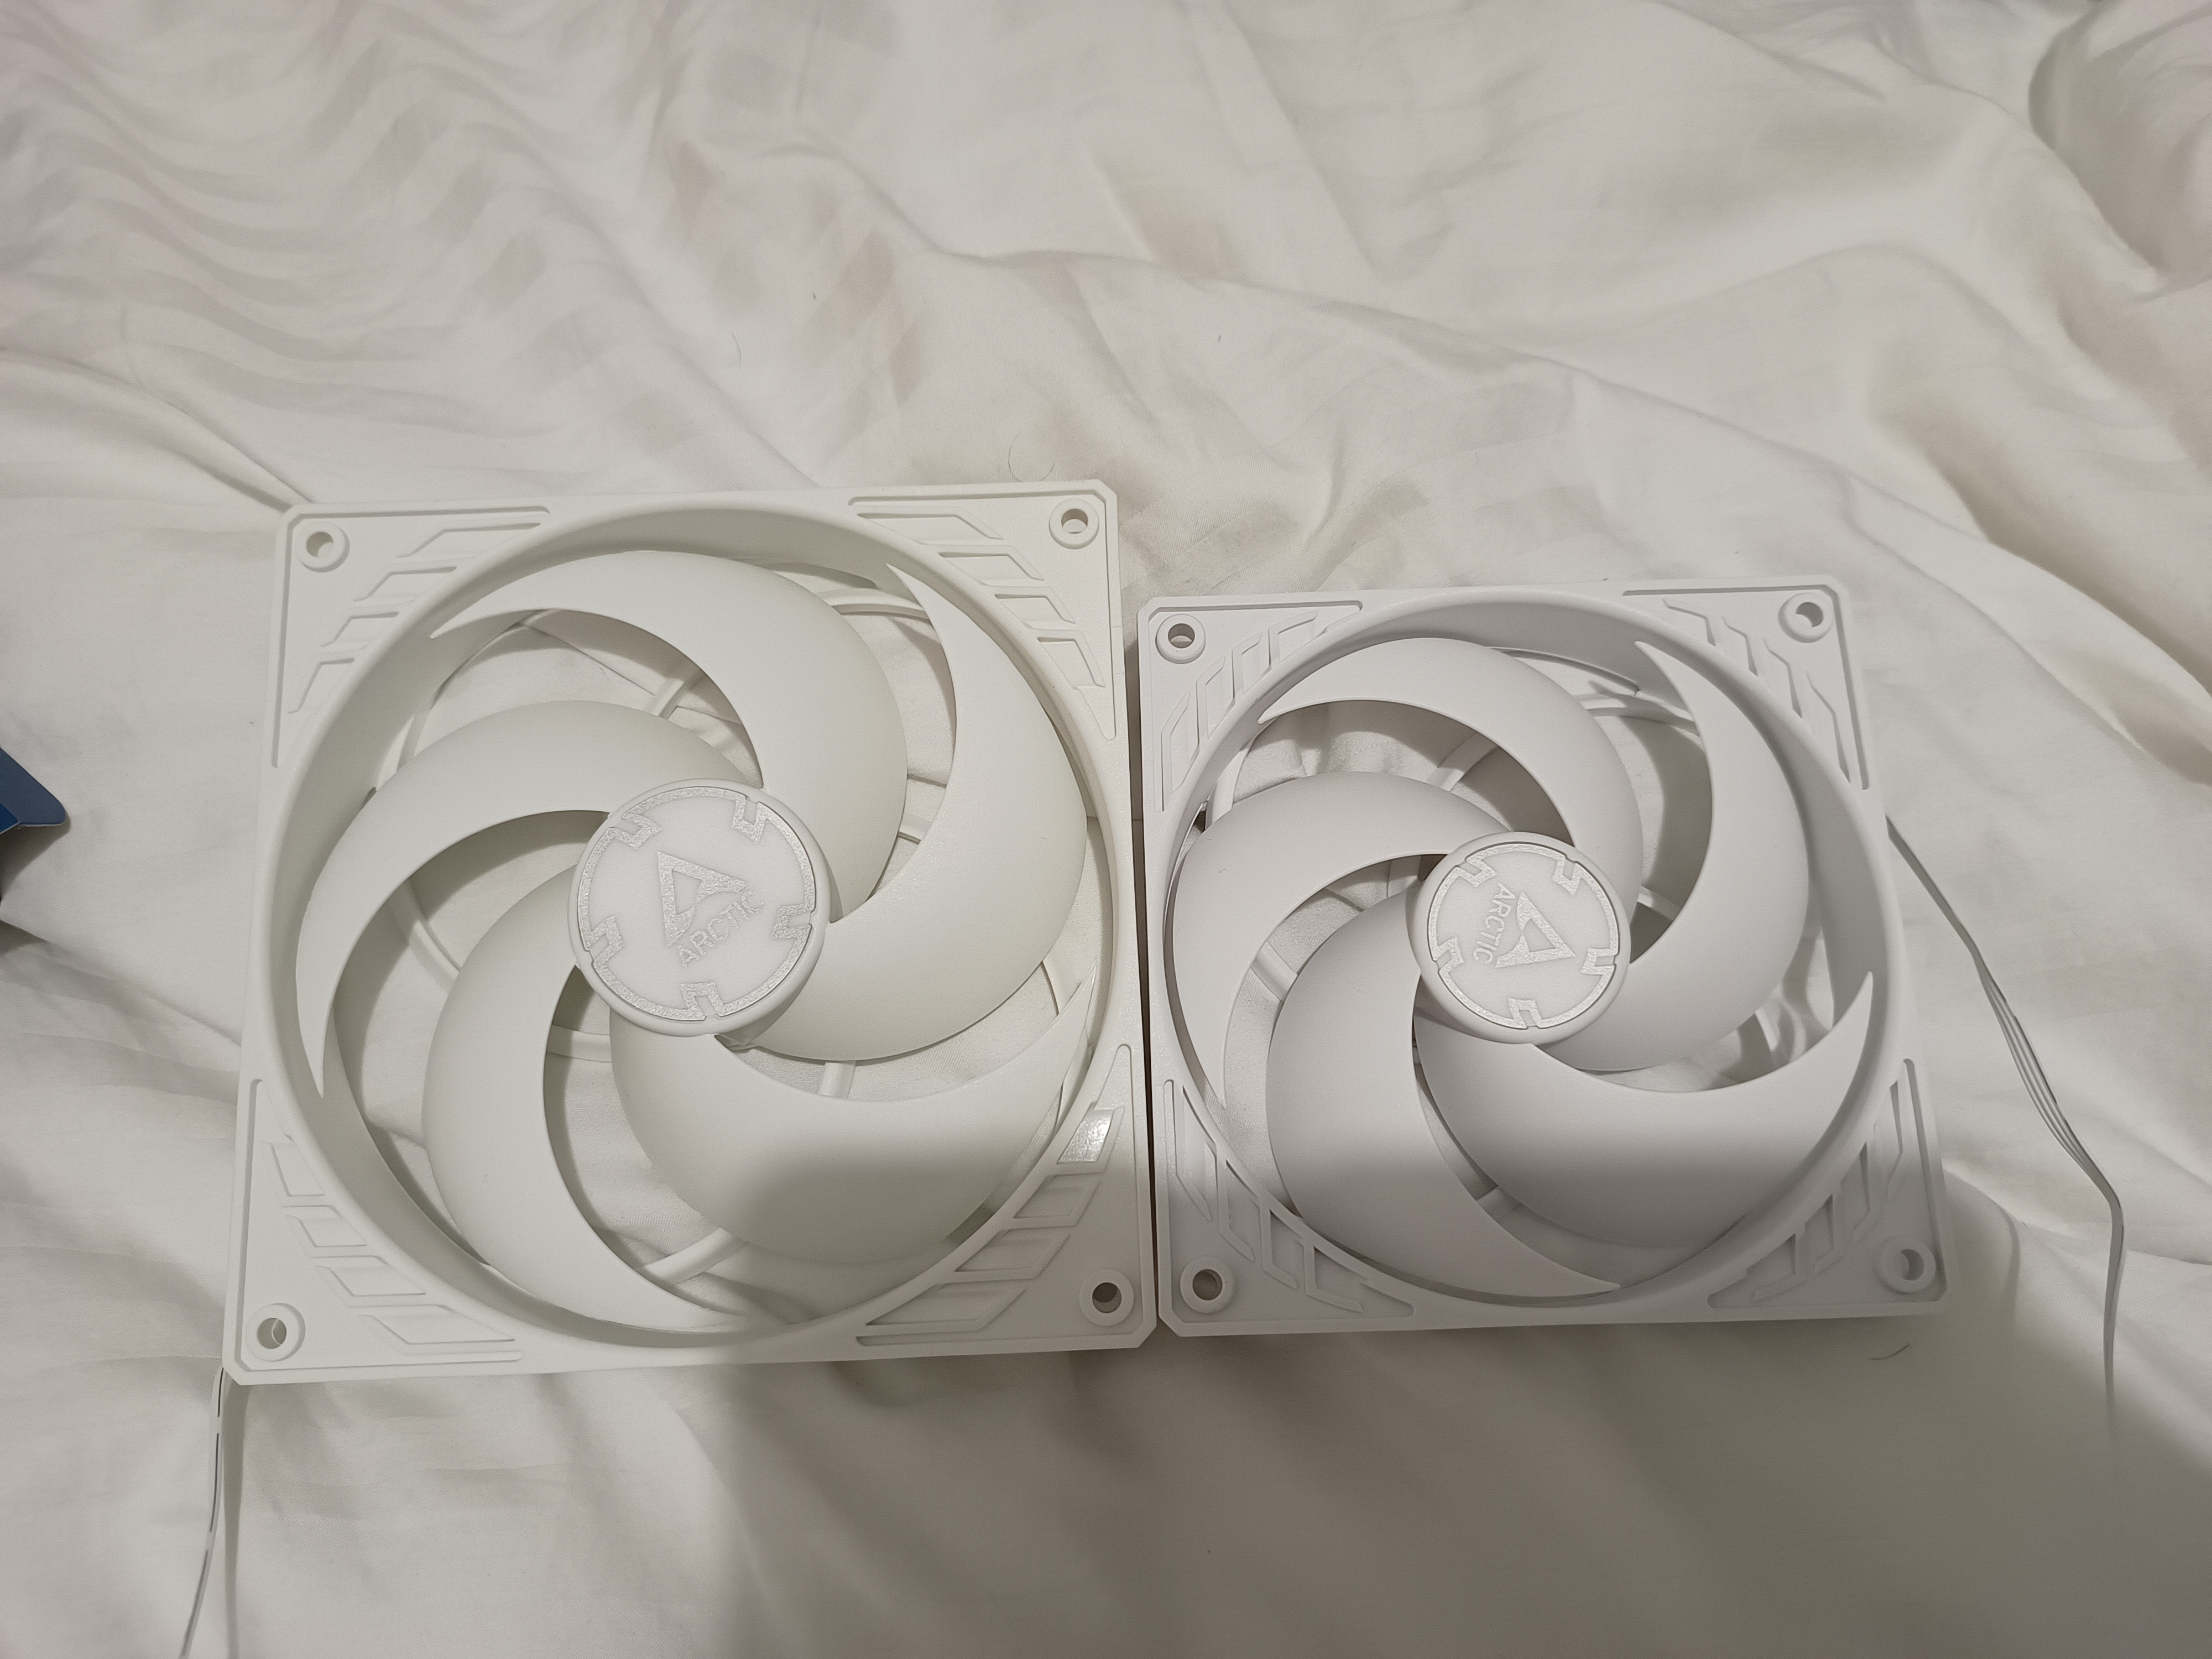
- 3 x Arctic P12 PWM PST (120mm)
- 7 x Arctic P14 PWM PST (140mm)
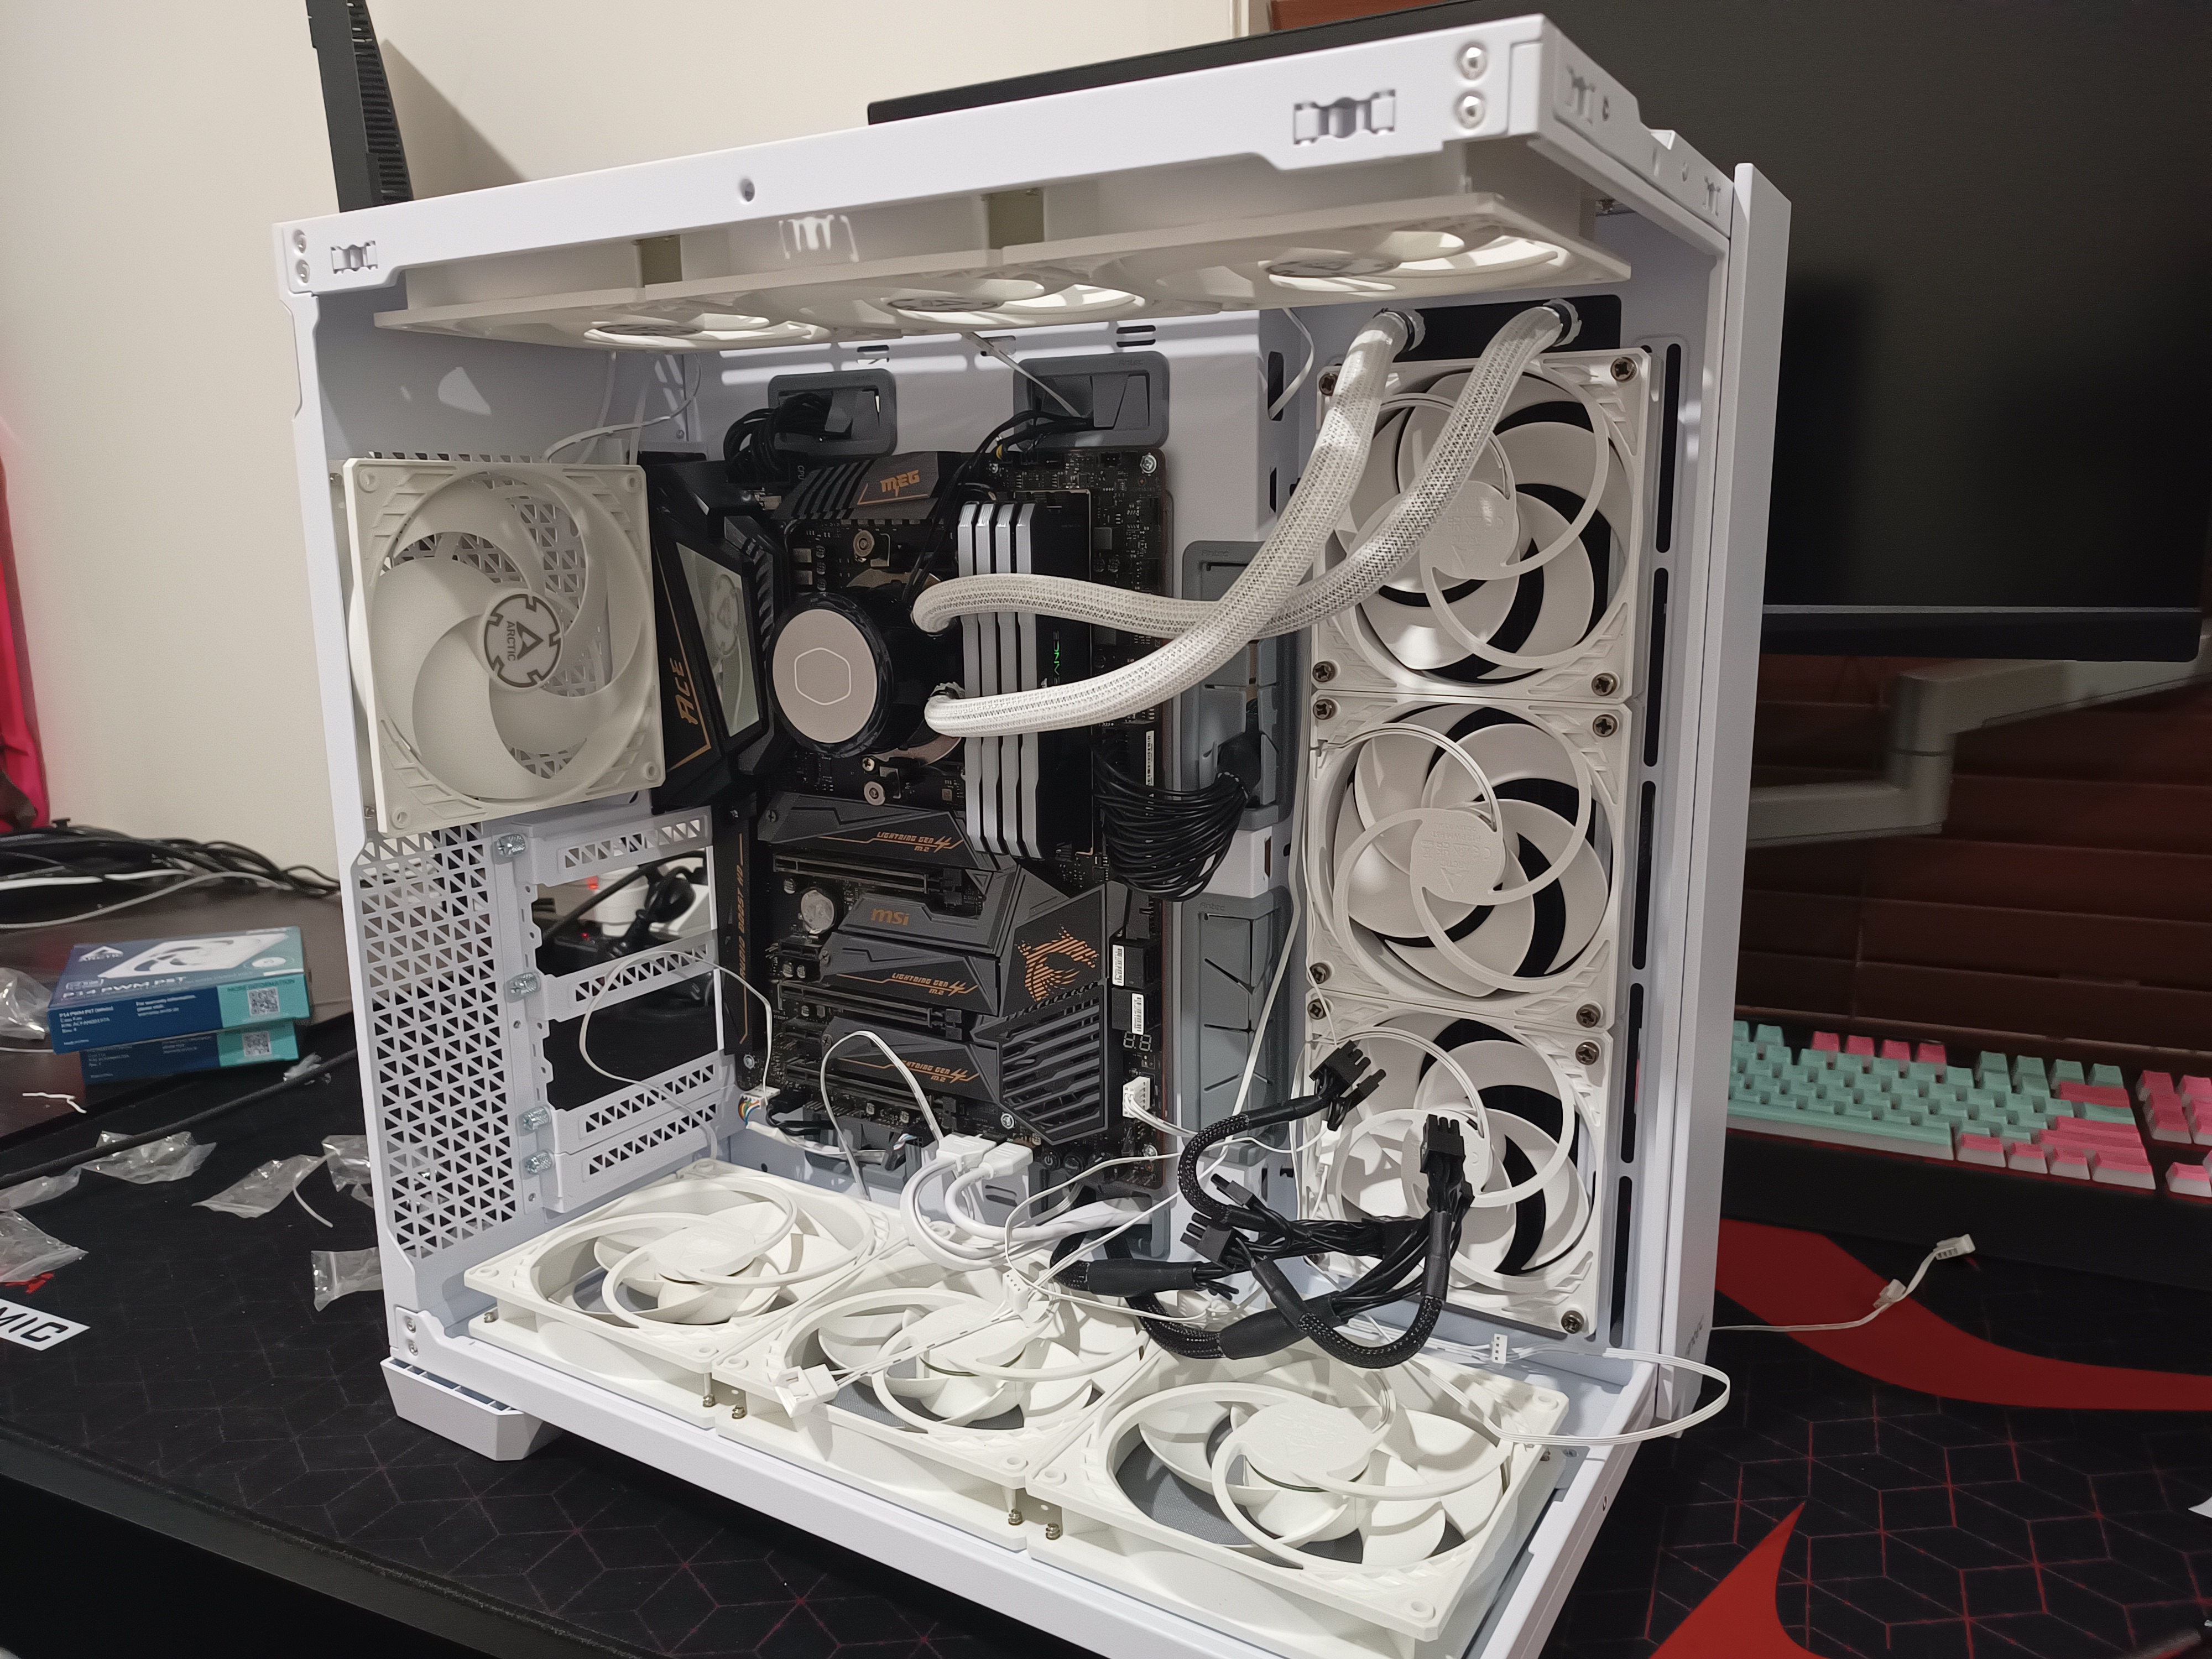
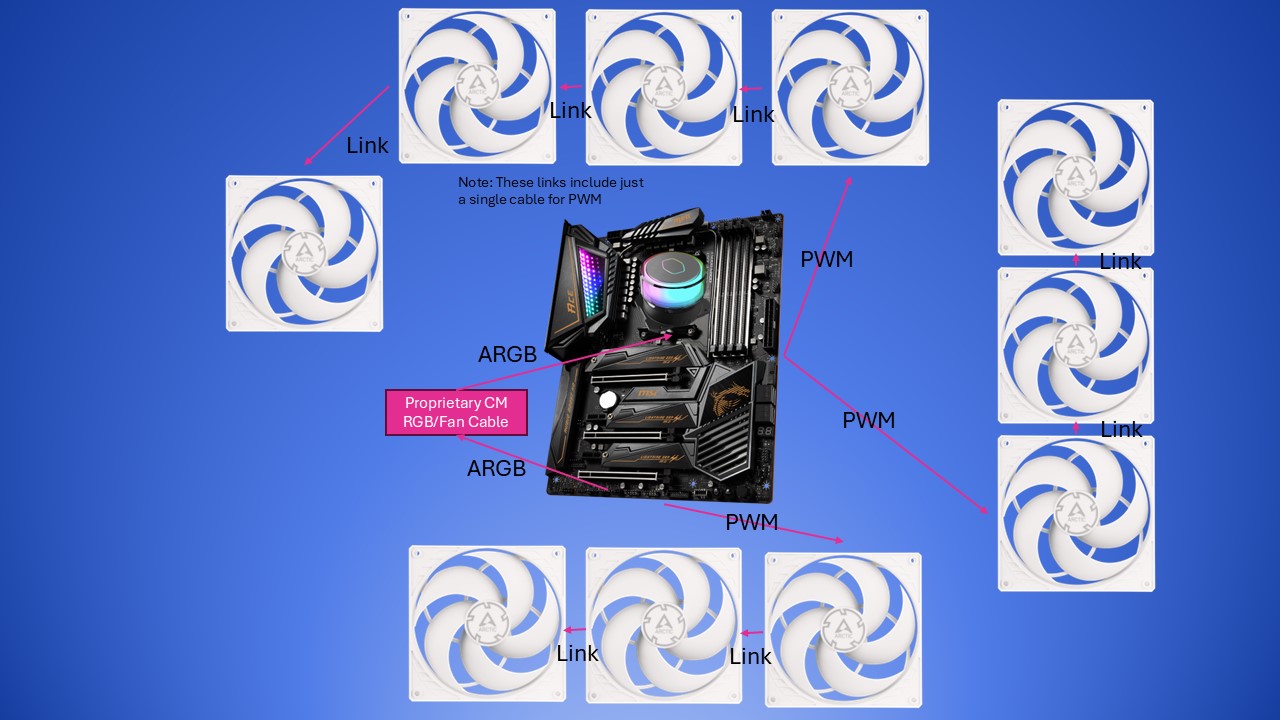
And with that came a lot less cabling to have to worry about. Plus, thanks to these fans having PWM sharing, I was able to hook them up to each other to further minimise clutter. However, rather than hook everything up to the each other, I decided to group everything up for a total of 3 fan connections into the motherboard - with the 3 120mm fans on my radiator going into one group, the 3 fans at the bottom, and the 4 exhaust fans in their own respective groups as well.
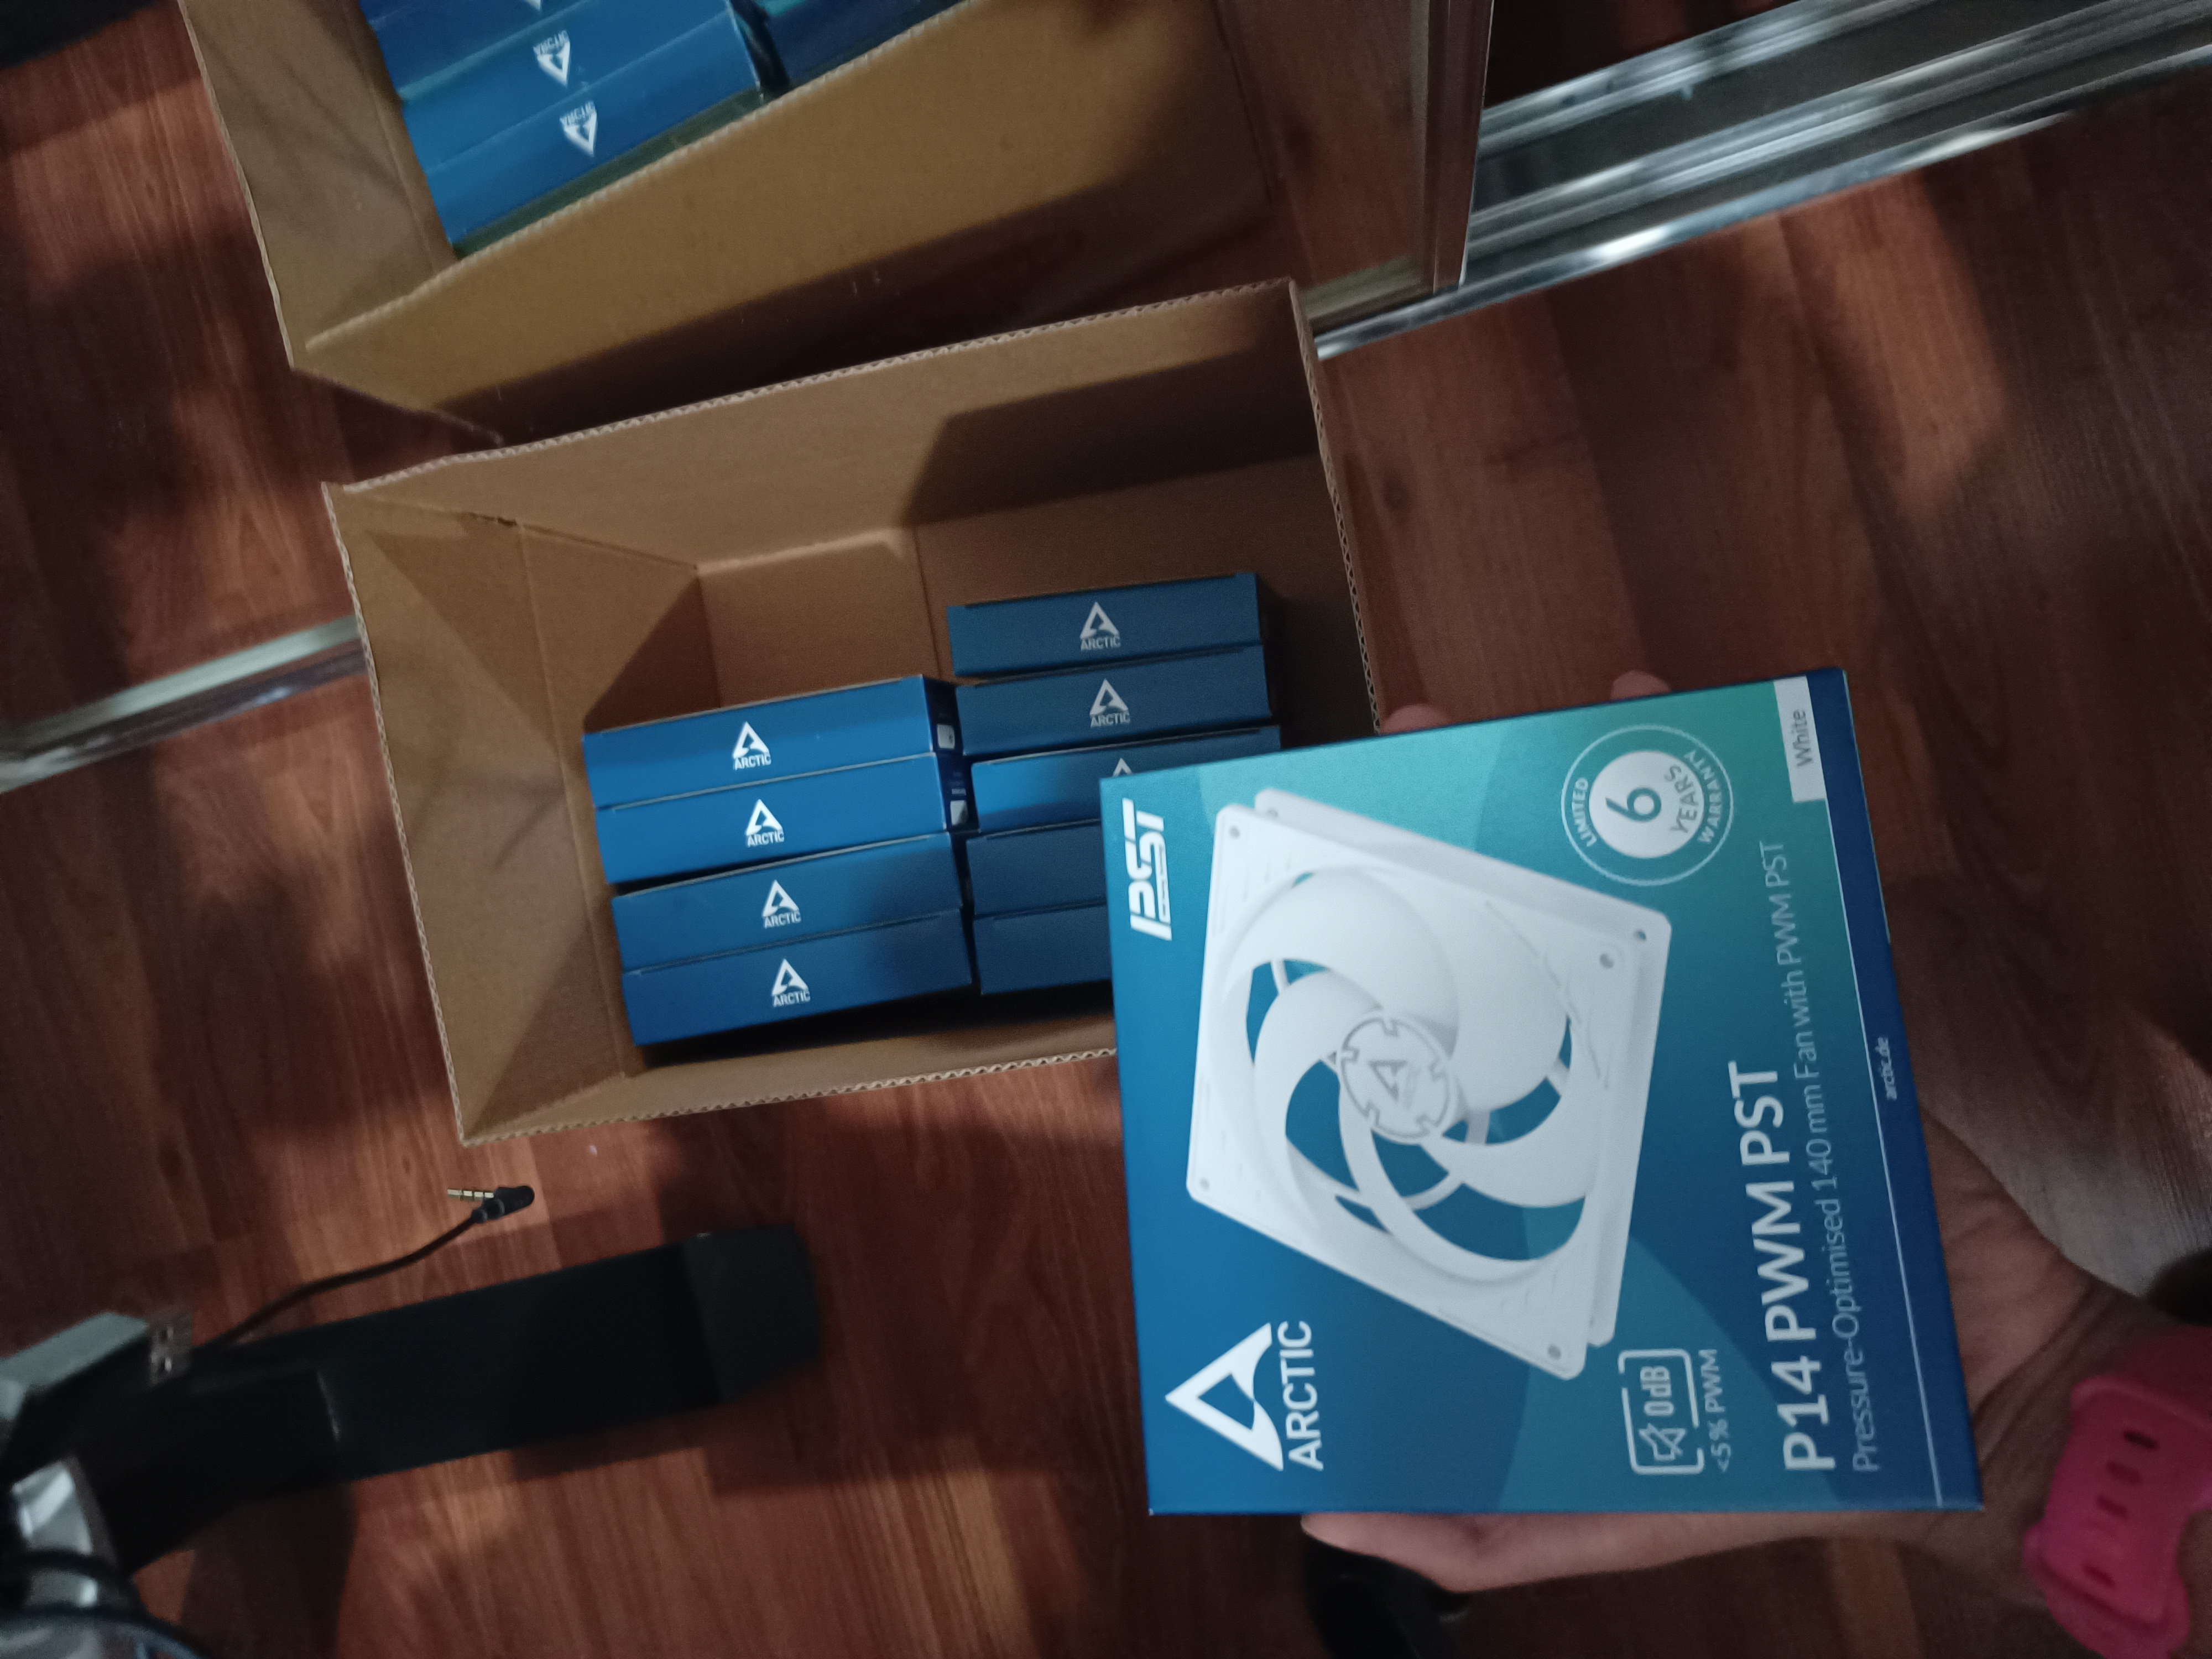
Box of the fans (guy at the shop when I went in for click and collect said he also got rid of his RGB after he got bored of it lol):
Size comparison between the P12 and P14:
Also, I decided to move my radiator to the side from the top for a couple of reasons - firstly due to it hiding the black which sort of wen’t against the outer white and black centre look of the build, as well as me preferring to have better cooling for the CPU rather than my GPUs, due to me mainly doing CPU-intensive tasks with my computer nowadays, rather than stuff that works the GPU first and foremost such as gaming.
Thanks to the radiator getting fresh air that’s just been sucked in by the intake fans, this setup keeps the CPU cooler opposed to the radiator receiving hot exhaust air from a top-mounted setup, the trade-off obviously being a slightly hotter GPU. I kinda wanted to go with a tubes-down setup here as well, but unfortunately my AIO’s tubes weren’t quite long enough for this, probably since the AIO i was rocked was designed before the advent of fish tank cases, so I had to settle with tubes up (which is slightly worse in terms of bubble formation).
Tubes being too short to go tubes down:
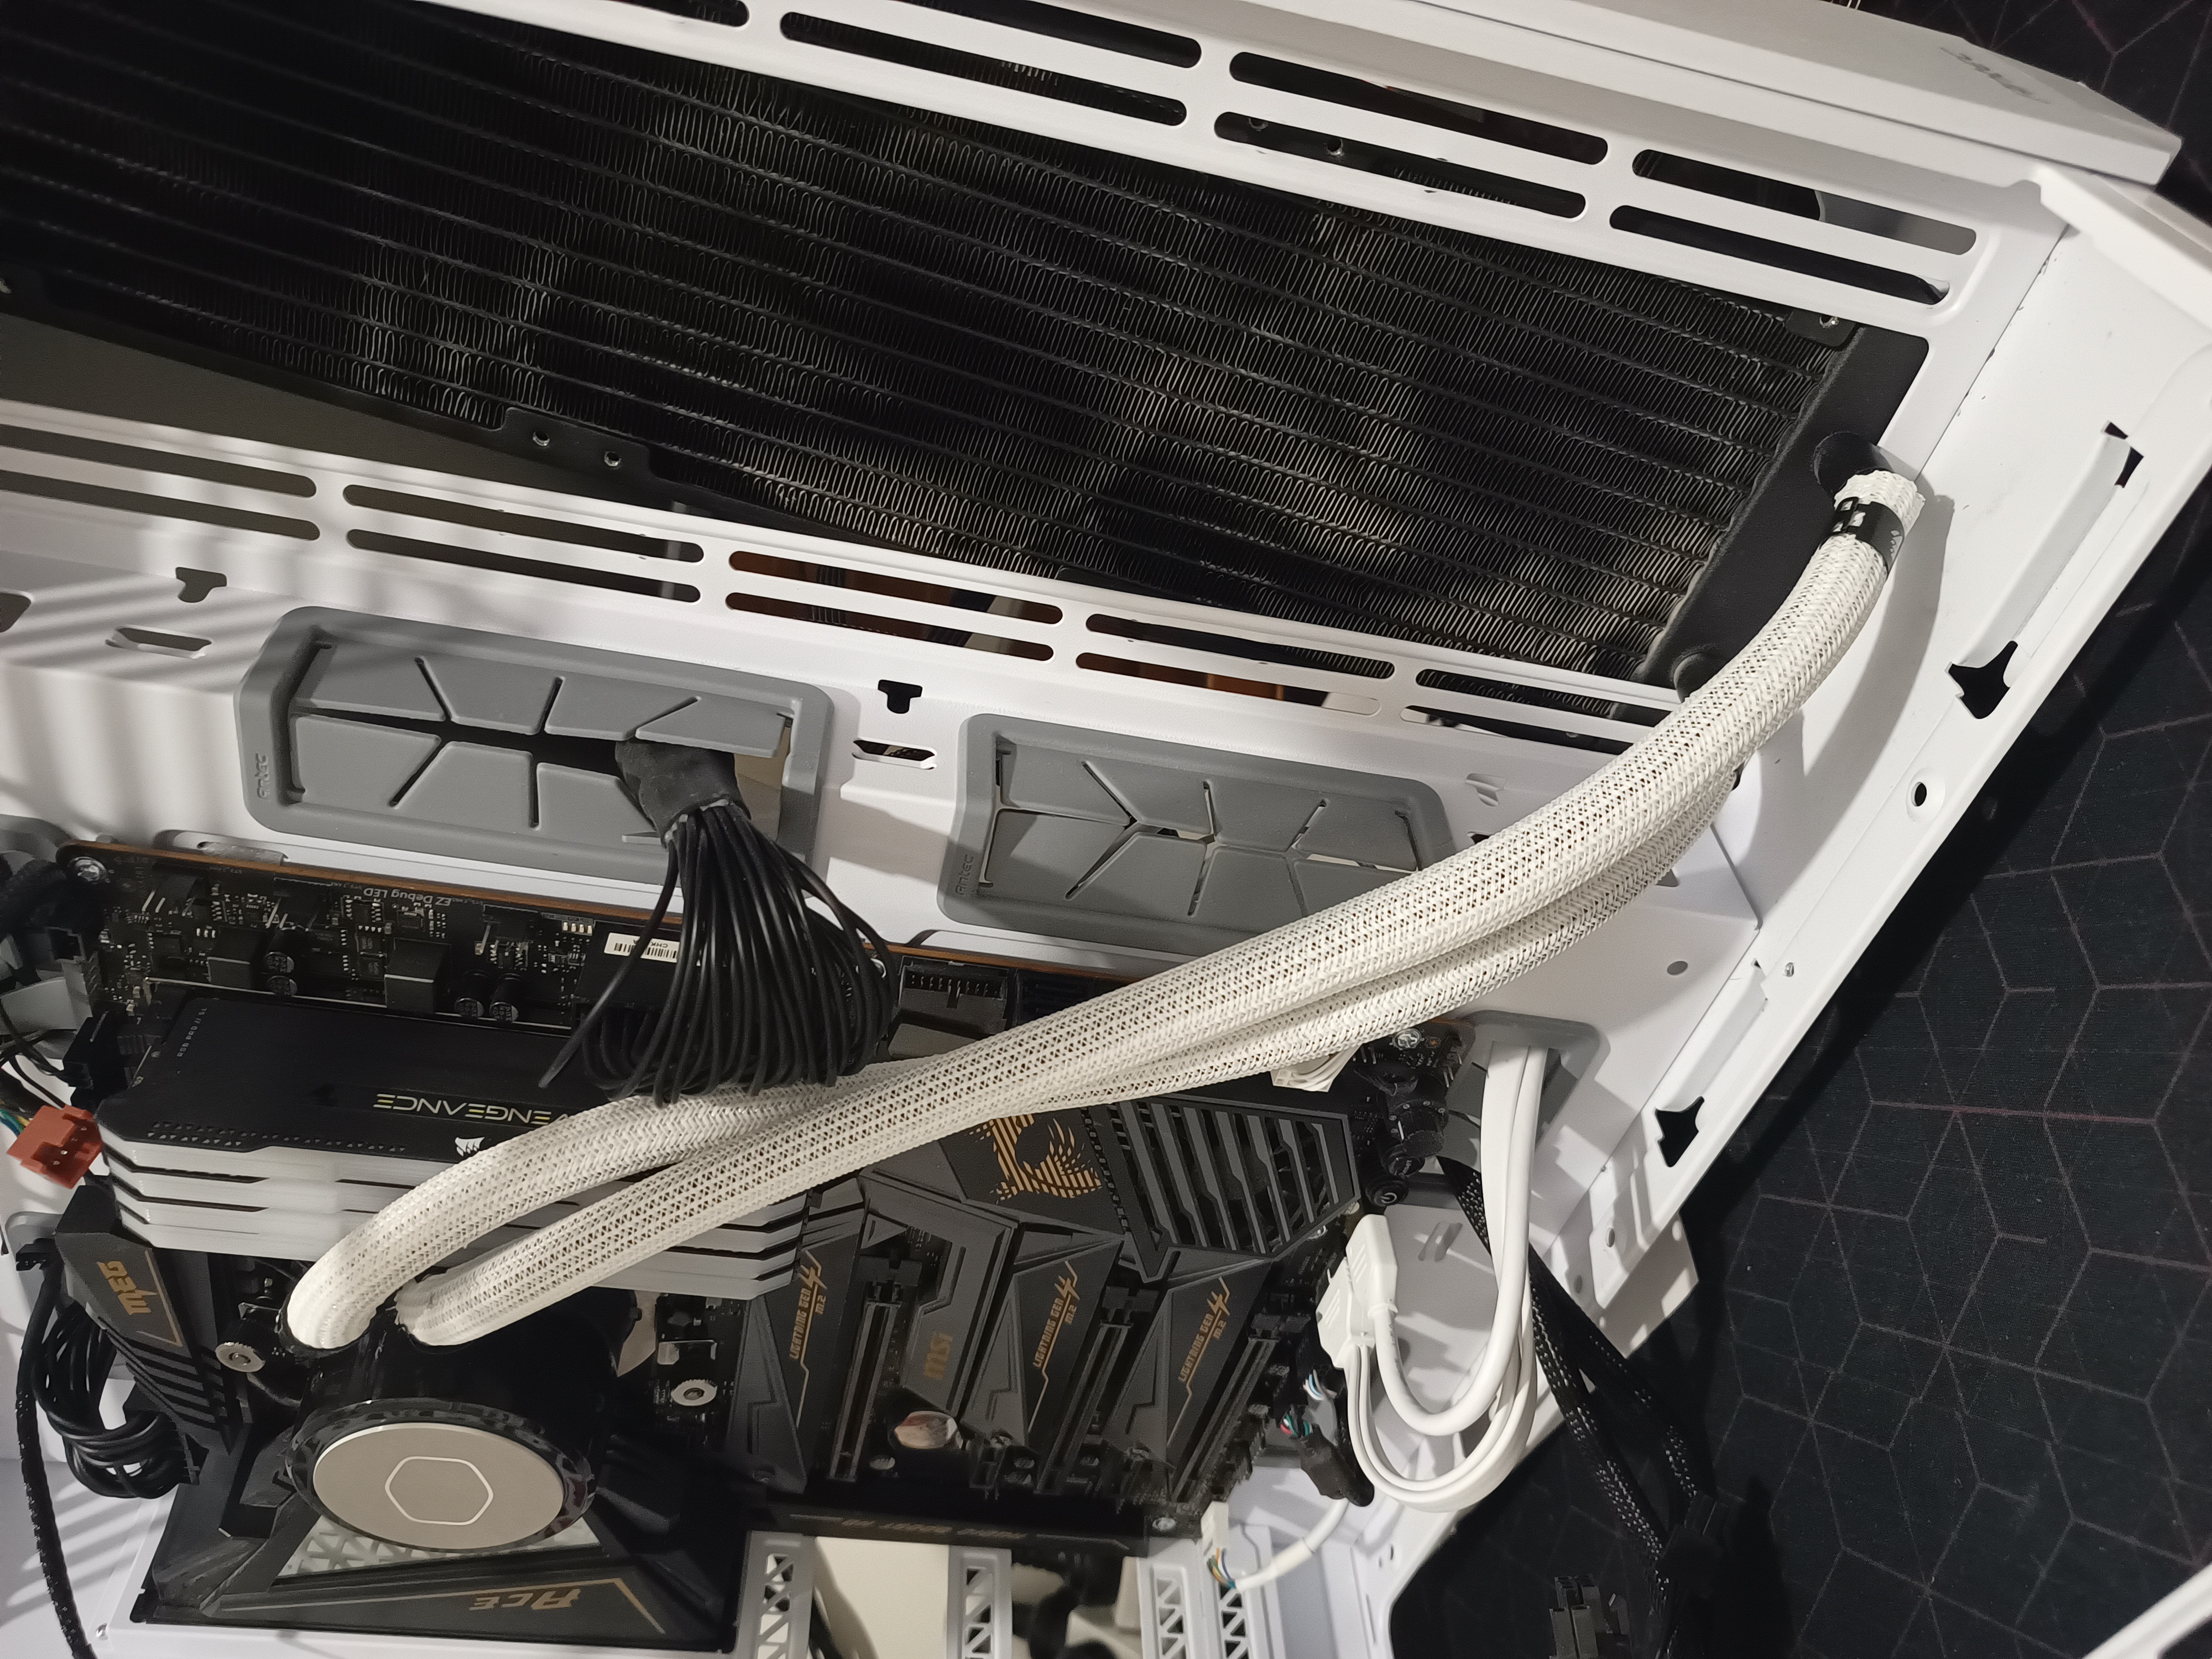
Tubes up works fine:
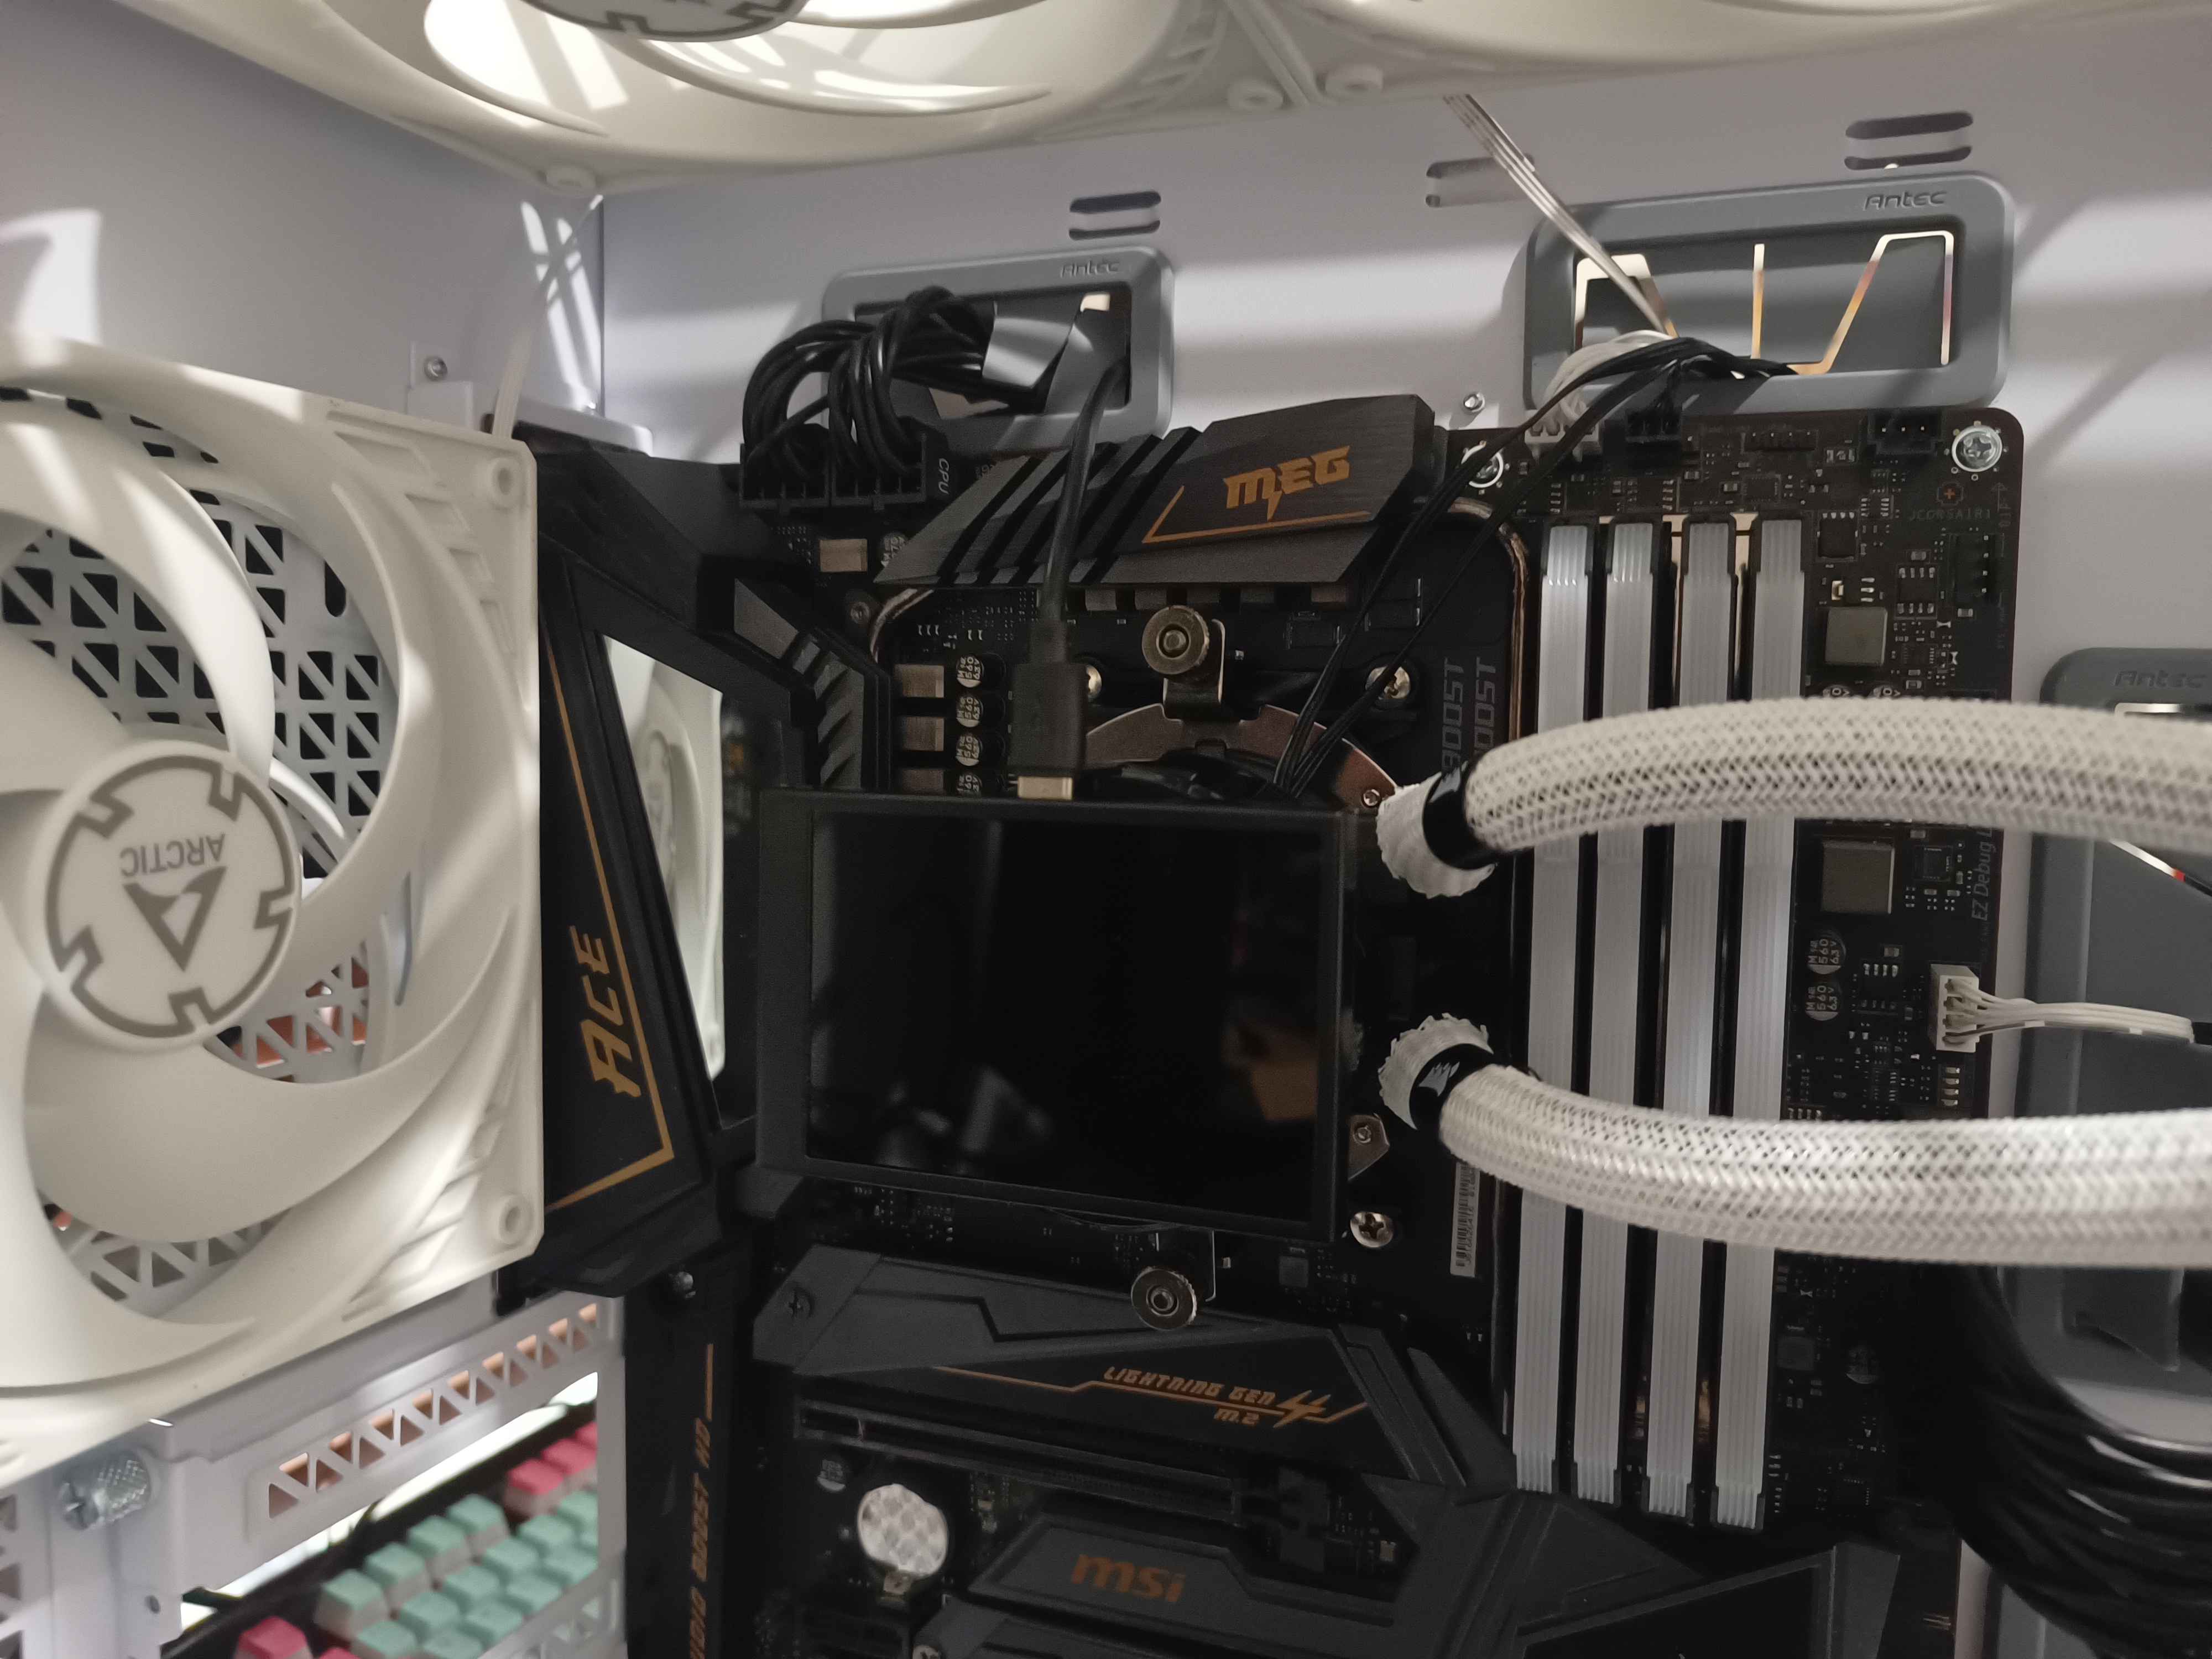
Here’s another silly little diagram of the new setup - I opted to keep the proprietary CM cable adaptor to still have some degree of ARGB control on the pump’s RGB, although I wasn’t too concerned with this since I stuck my little system monitor screen on my pump, rather than leaving it off to the side like before, for better visibility and since I think it just looks cooler. Although I plugged the ARGB directly into my motherboard’s header this time, meaning that as I mentioned above, I basically couldn’t control the LEDs individually, making it behave more like normal RGB than ARGB:
Screen in the new position:
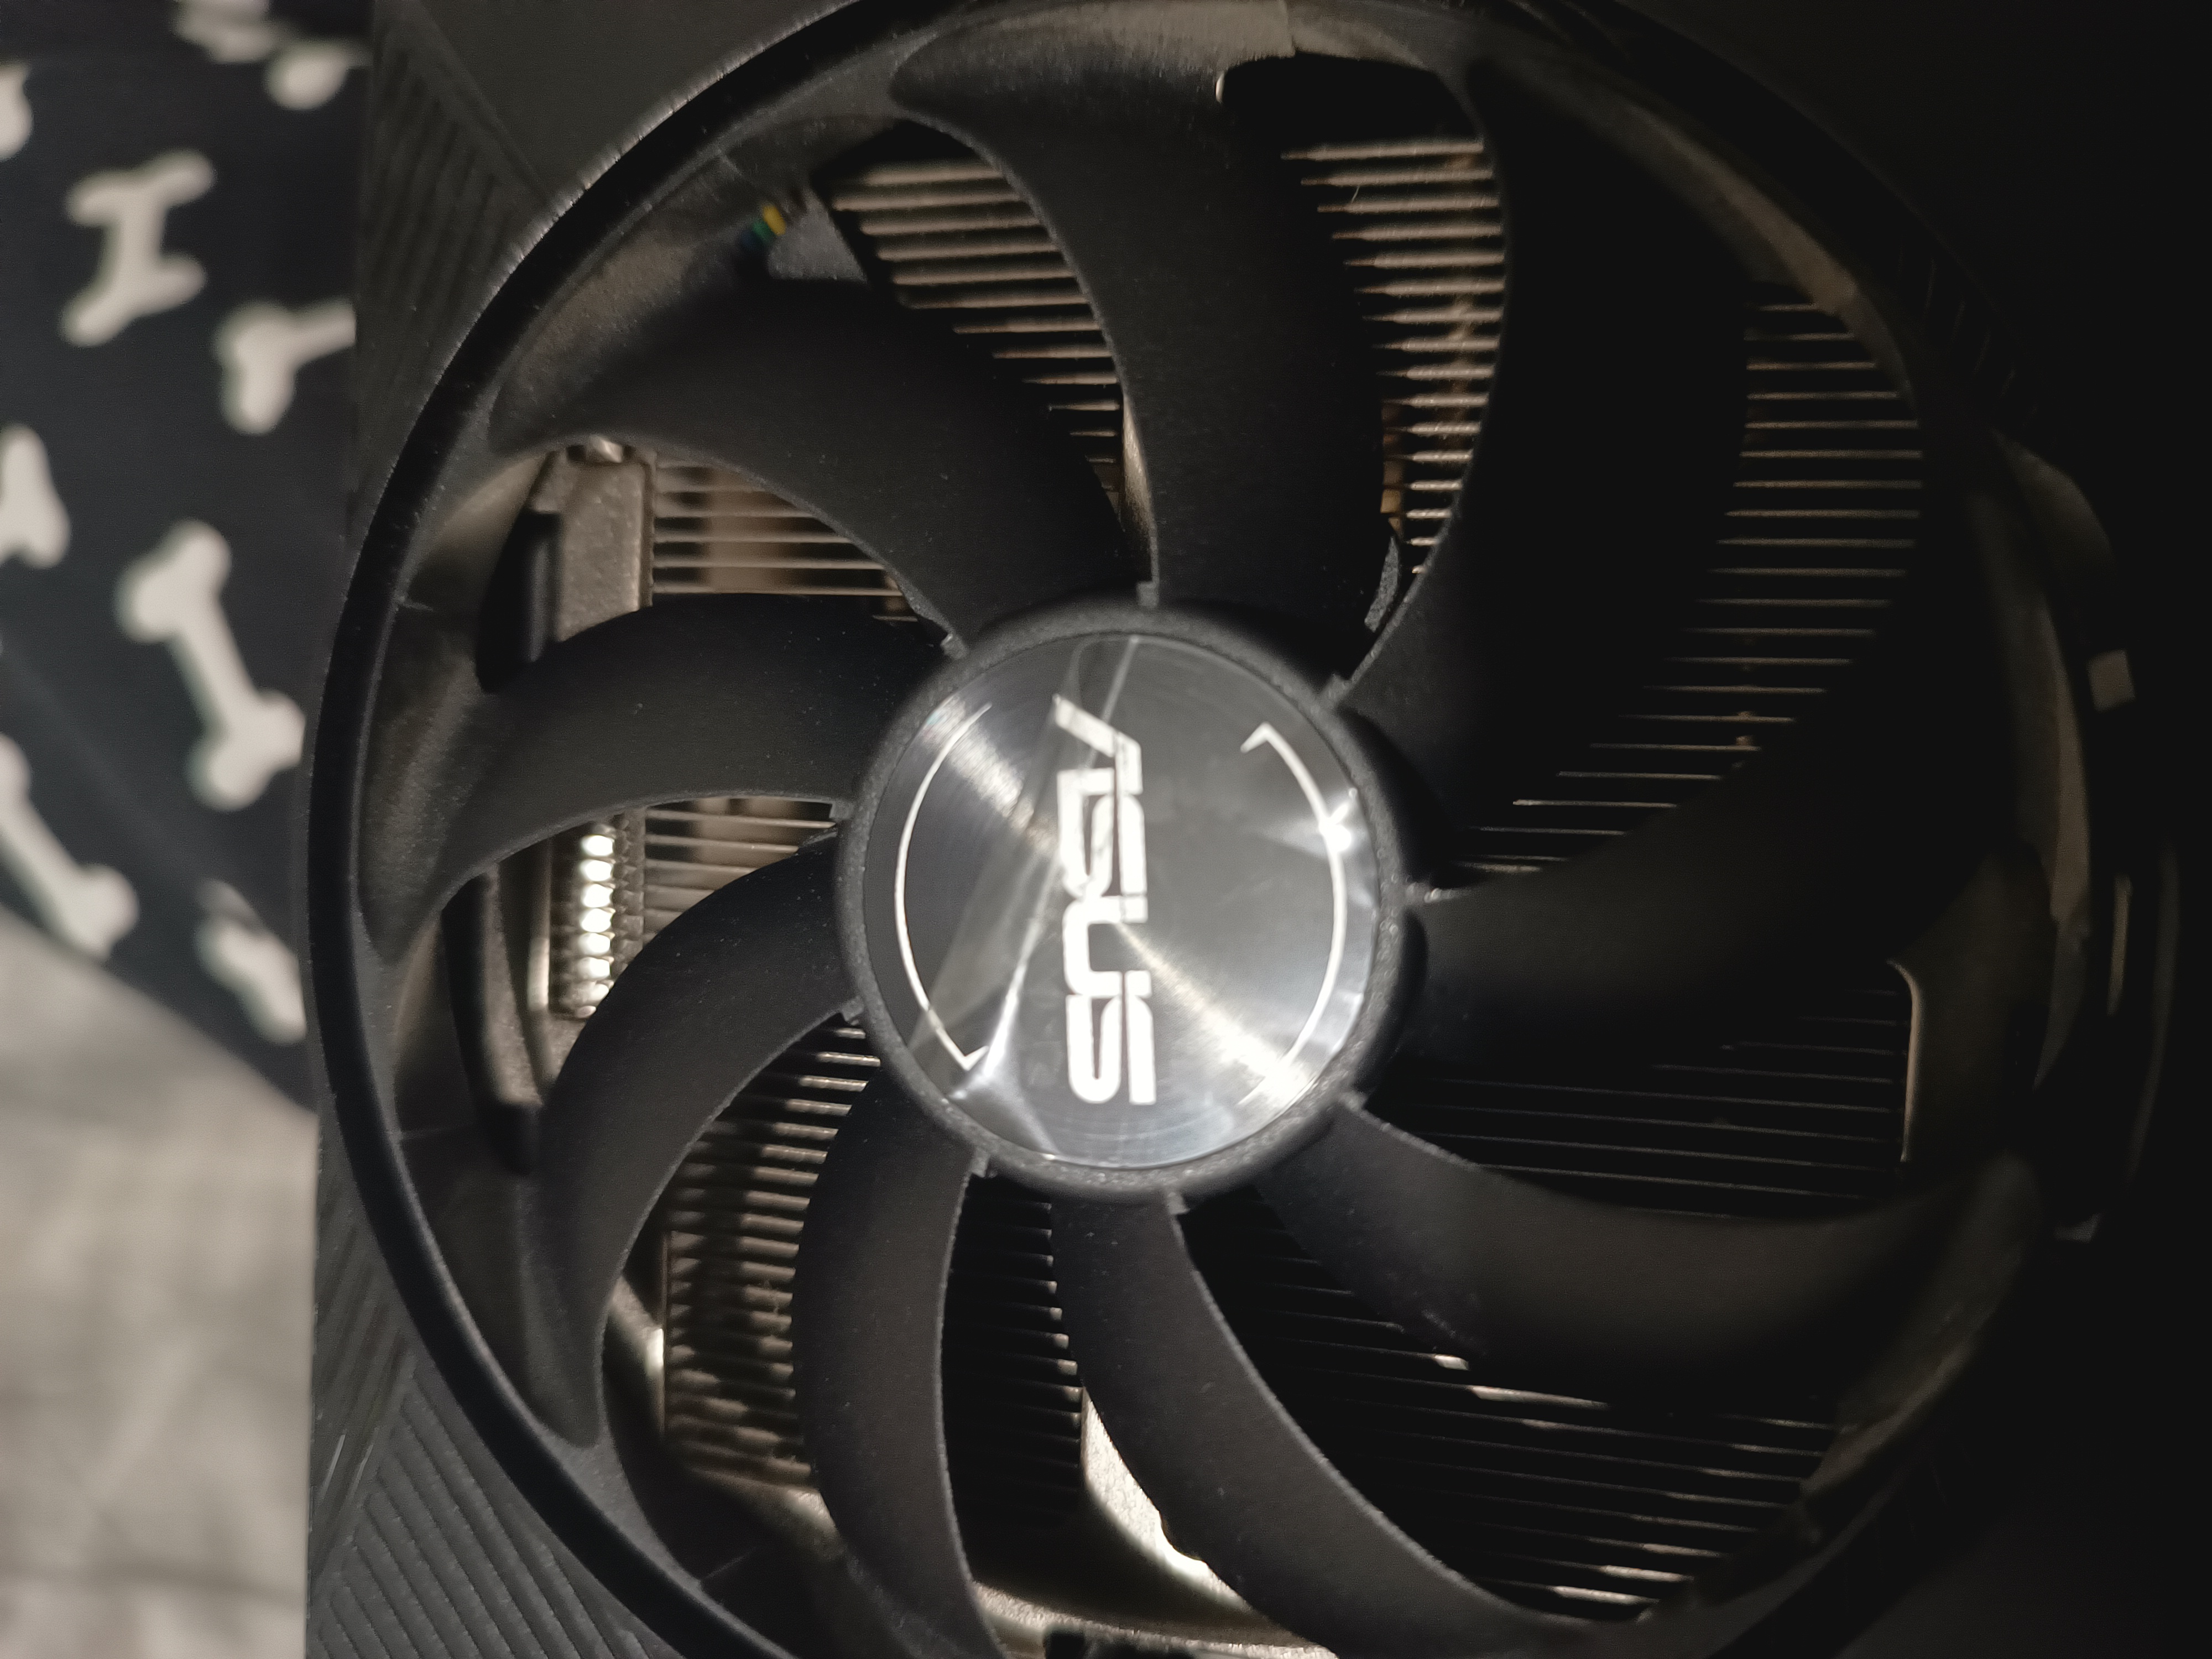
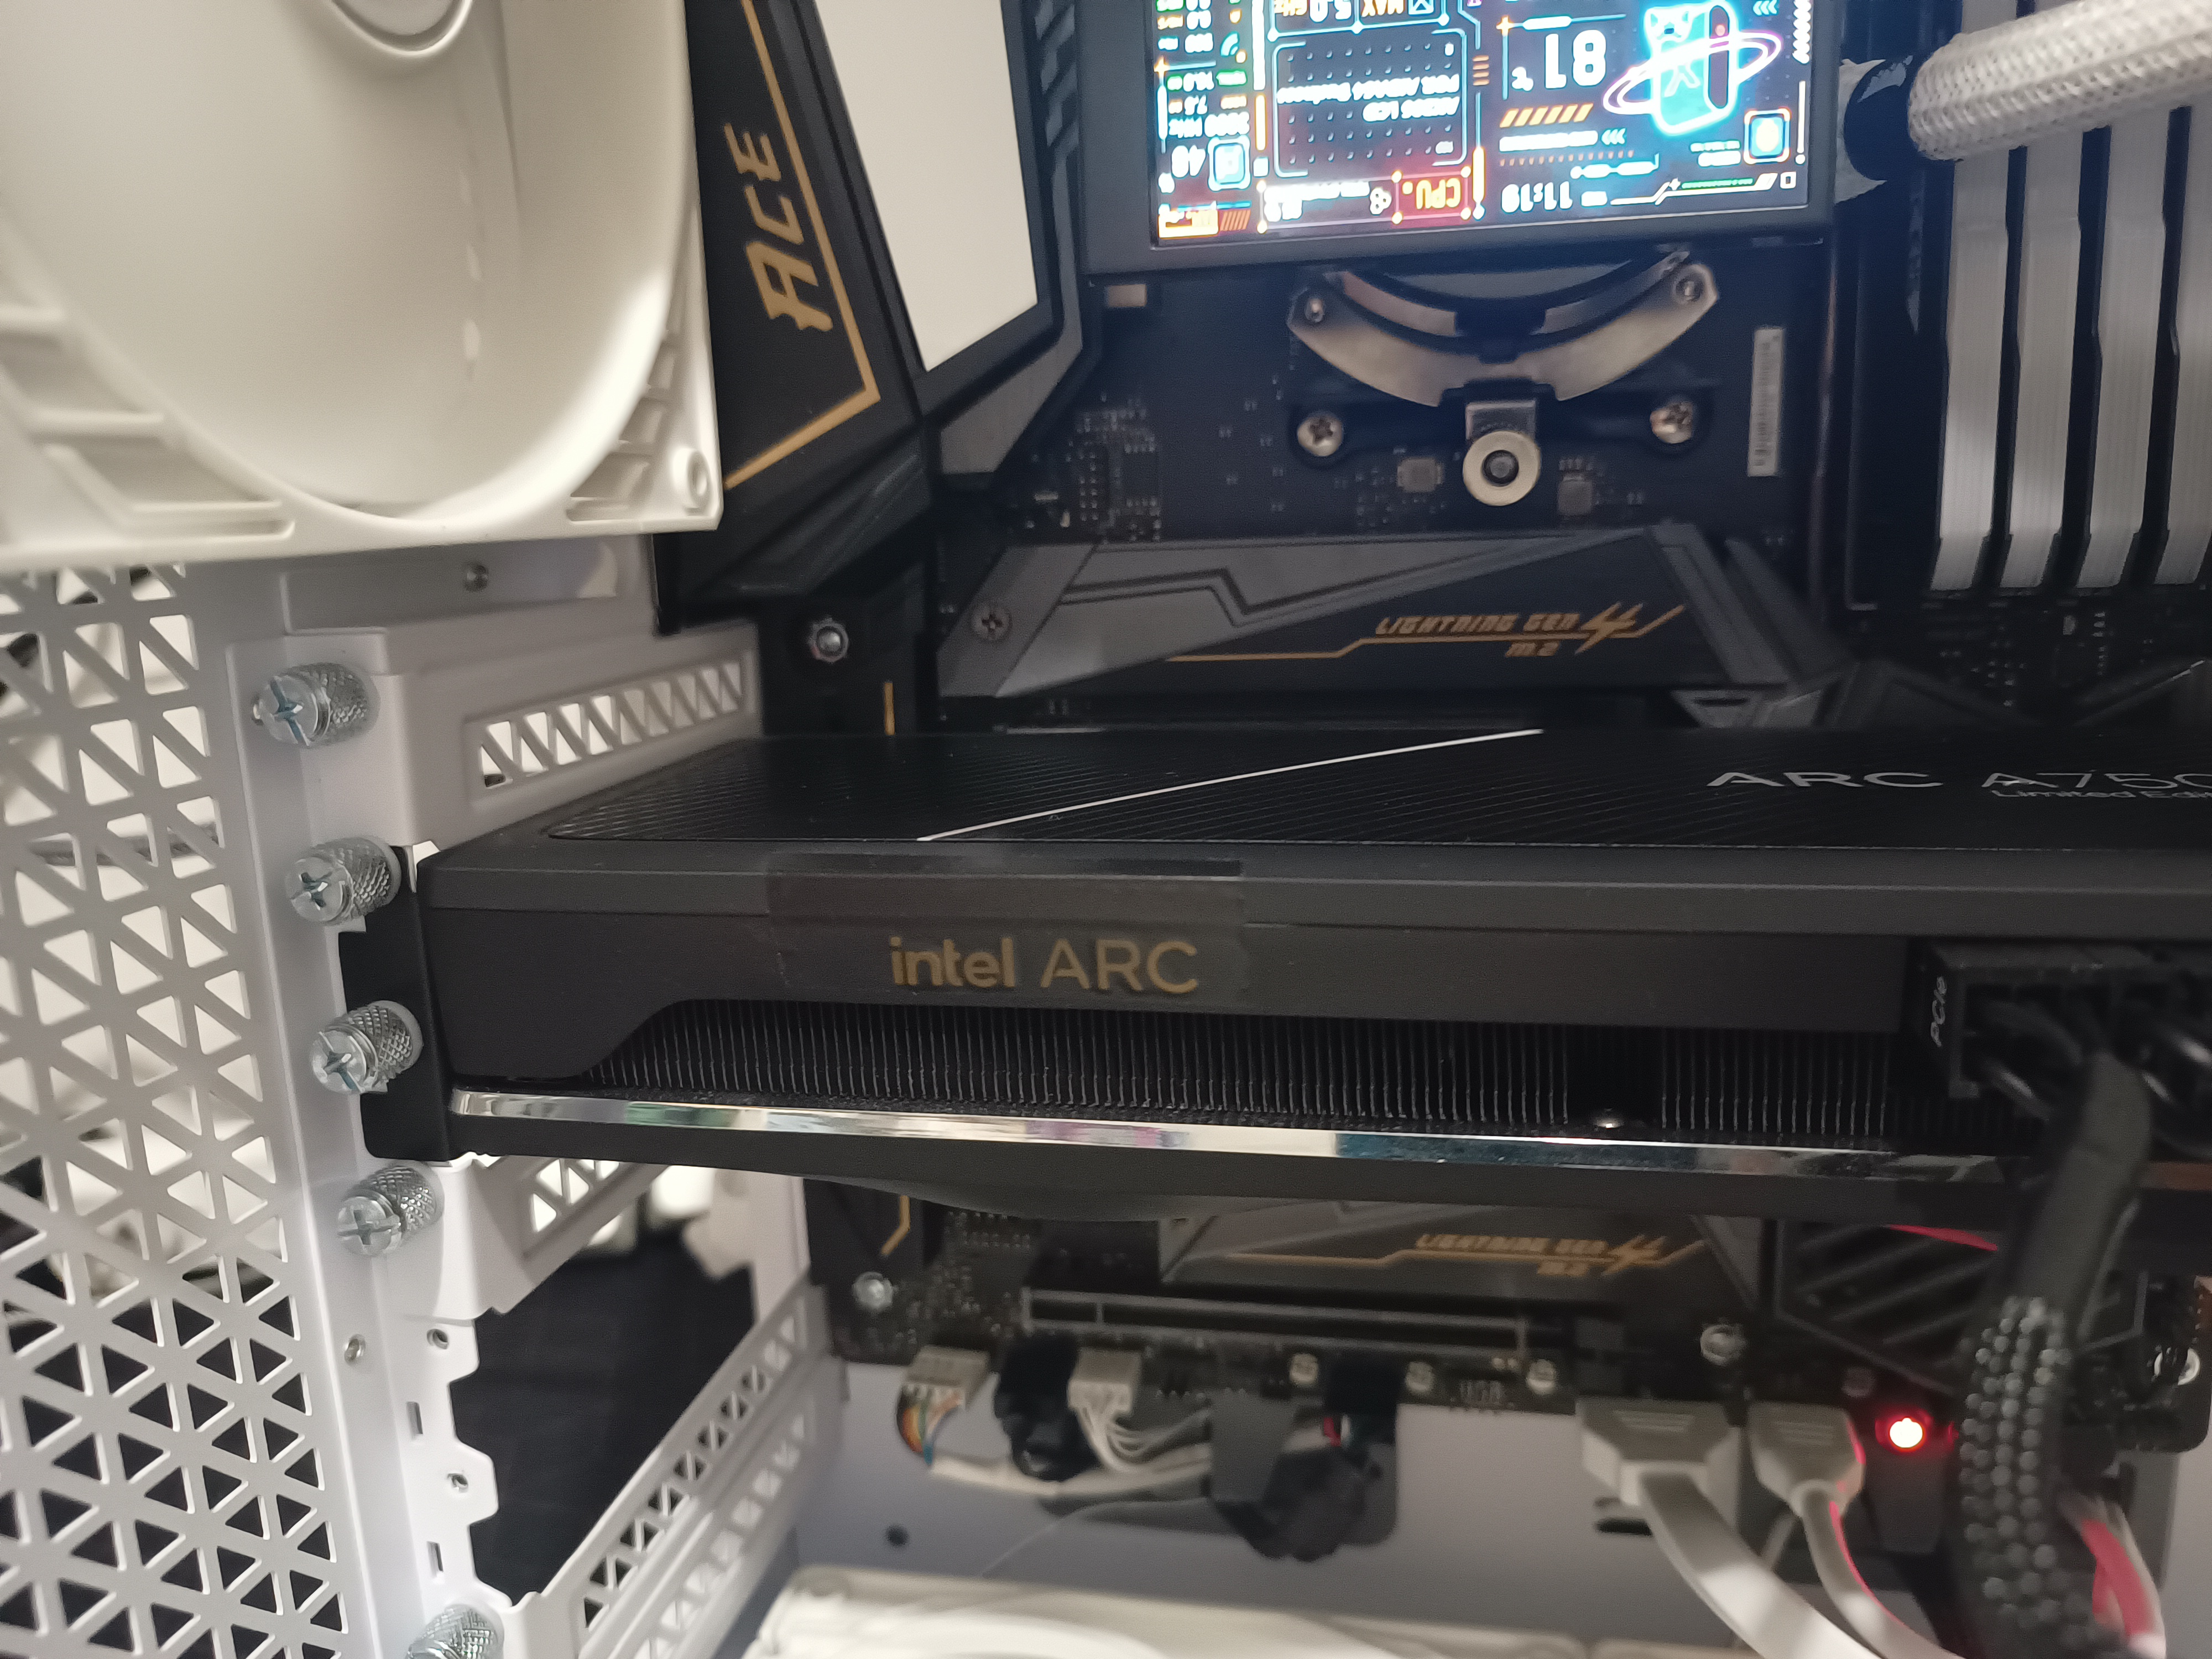
I also went ahead and disconnected a little connector on my Asus Dual 2070S which powered a little blue-pink gradient non-controllable LED, since it was kinda annoying to have it light up at night (PS. I realised that after 4 years of owning this GPU, I never peeled off the little bits of plastic film on fans, all good though since this 99% didn’t affect temps), as well as covering the once again non-controllable illuminated Intel Arc Logo on the A750, since in the case of this card, all the connectors are somewhere beneath the glued on back-plate (honestly a cringe move from Intel, but at least the card is sexy).
Forgetting to peel off plastic on the 2070S:
Electrical tape on the Arc:
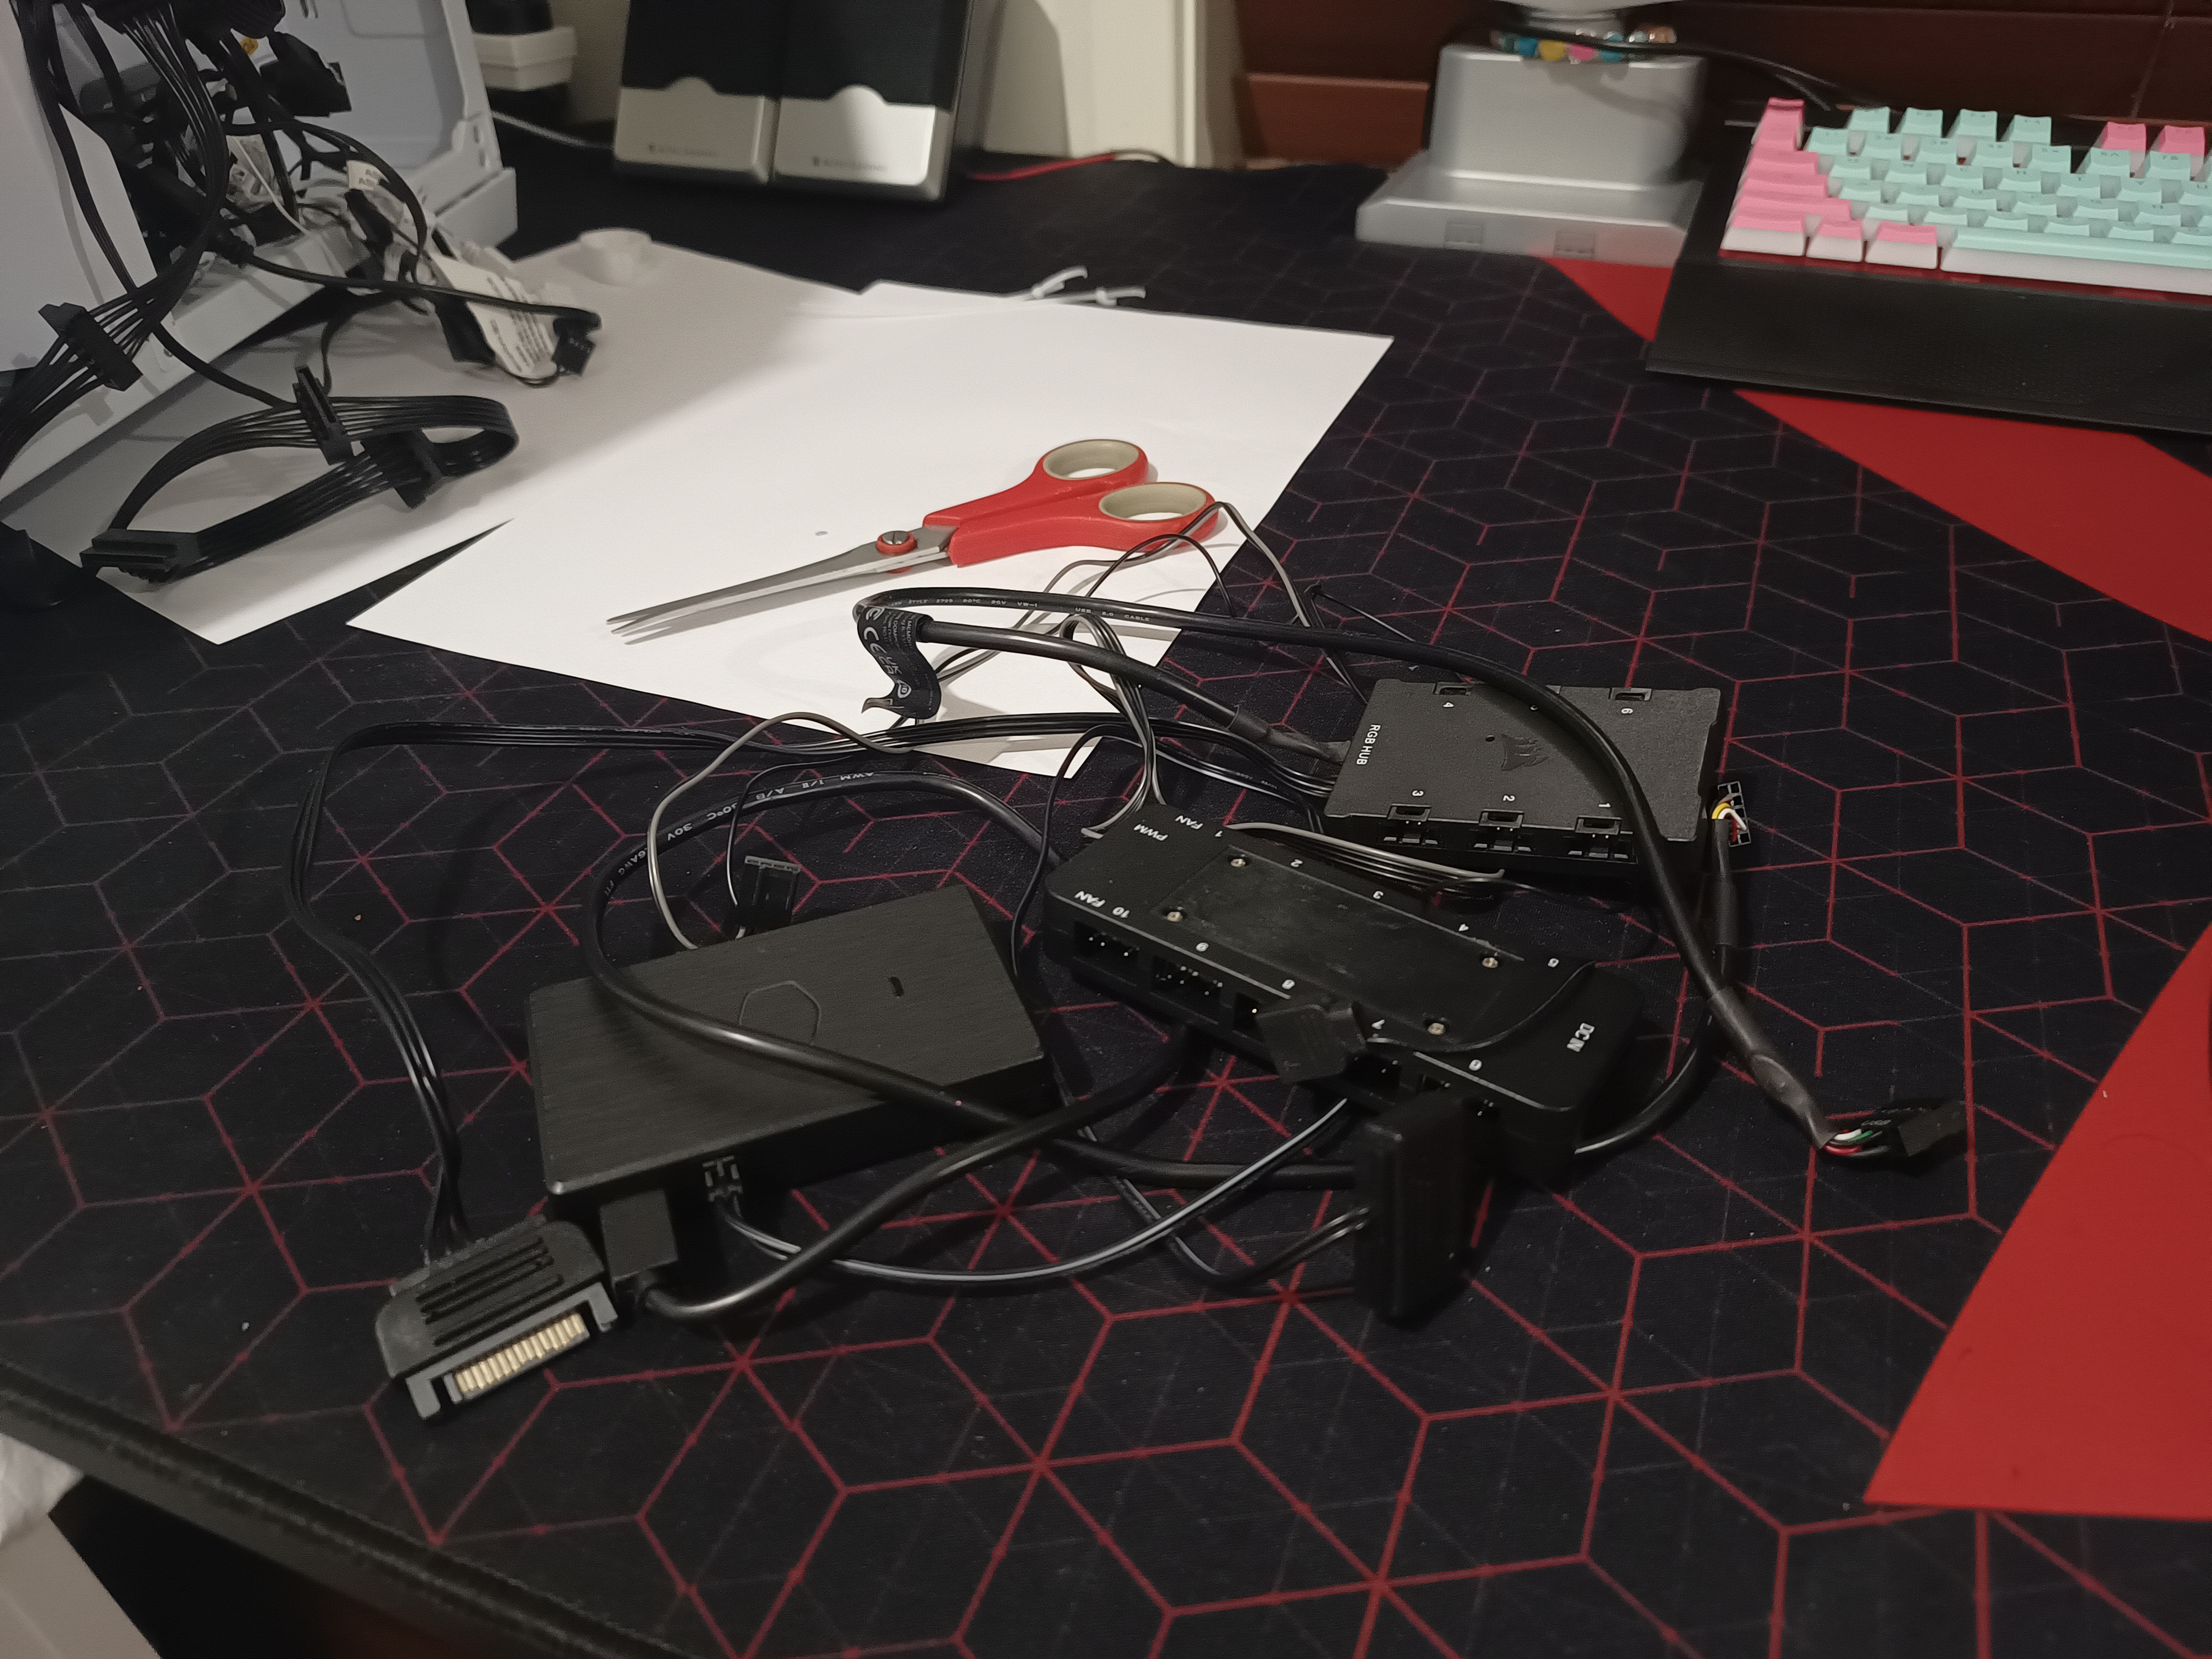
All the ARGB/Fan hubs/controllers taken out:
Conclusion #
In the end, I haven’t really minded having no more RGB to be honest, although according to the gamer kids I’ve probably lost a lot of aura and FPS or whatever. I think it’s nice being able to rest easy knowing that there aren’t any magnets from some of the hubs/controllers potentially messing around with my hard drives at the back though, as well as having a little less software running in the background (this is probably a much bigger deal if you’re on Windows and using manufacturer software which is almost always super bloated, buggy and a mess, but honestly OpenRGB is pretty lightweight and cool).
Here’s a before and after comparison with final product:
Obviously nowhere near as flashy or eye-catchy as before, but hey, form over function!
Thanks for reading.