
Background #
After playing around quite a bit with lcd4linux on the AliExpress AX206 screen, which you can read more about here, I remembered that I had a similar ‘picture frame’ (the AliExpress screen was based off a picture frame in terms of hardware), which might’ve been compatible with dpf-ax, a sort of patch that’s able to program said picture frames “based on the AX206 CPU” to be controllable via lcd4linux and other “linux based software” as the readme puts it.
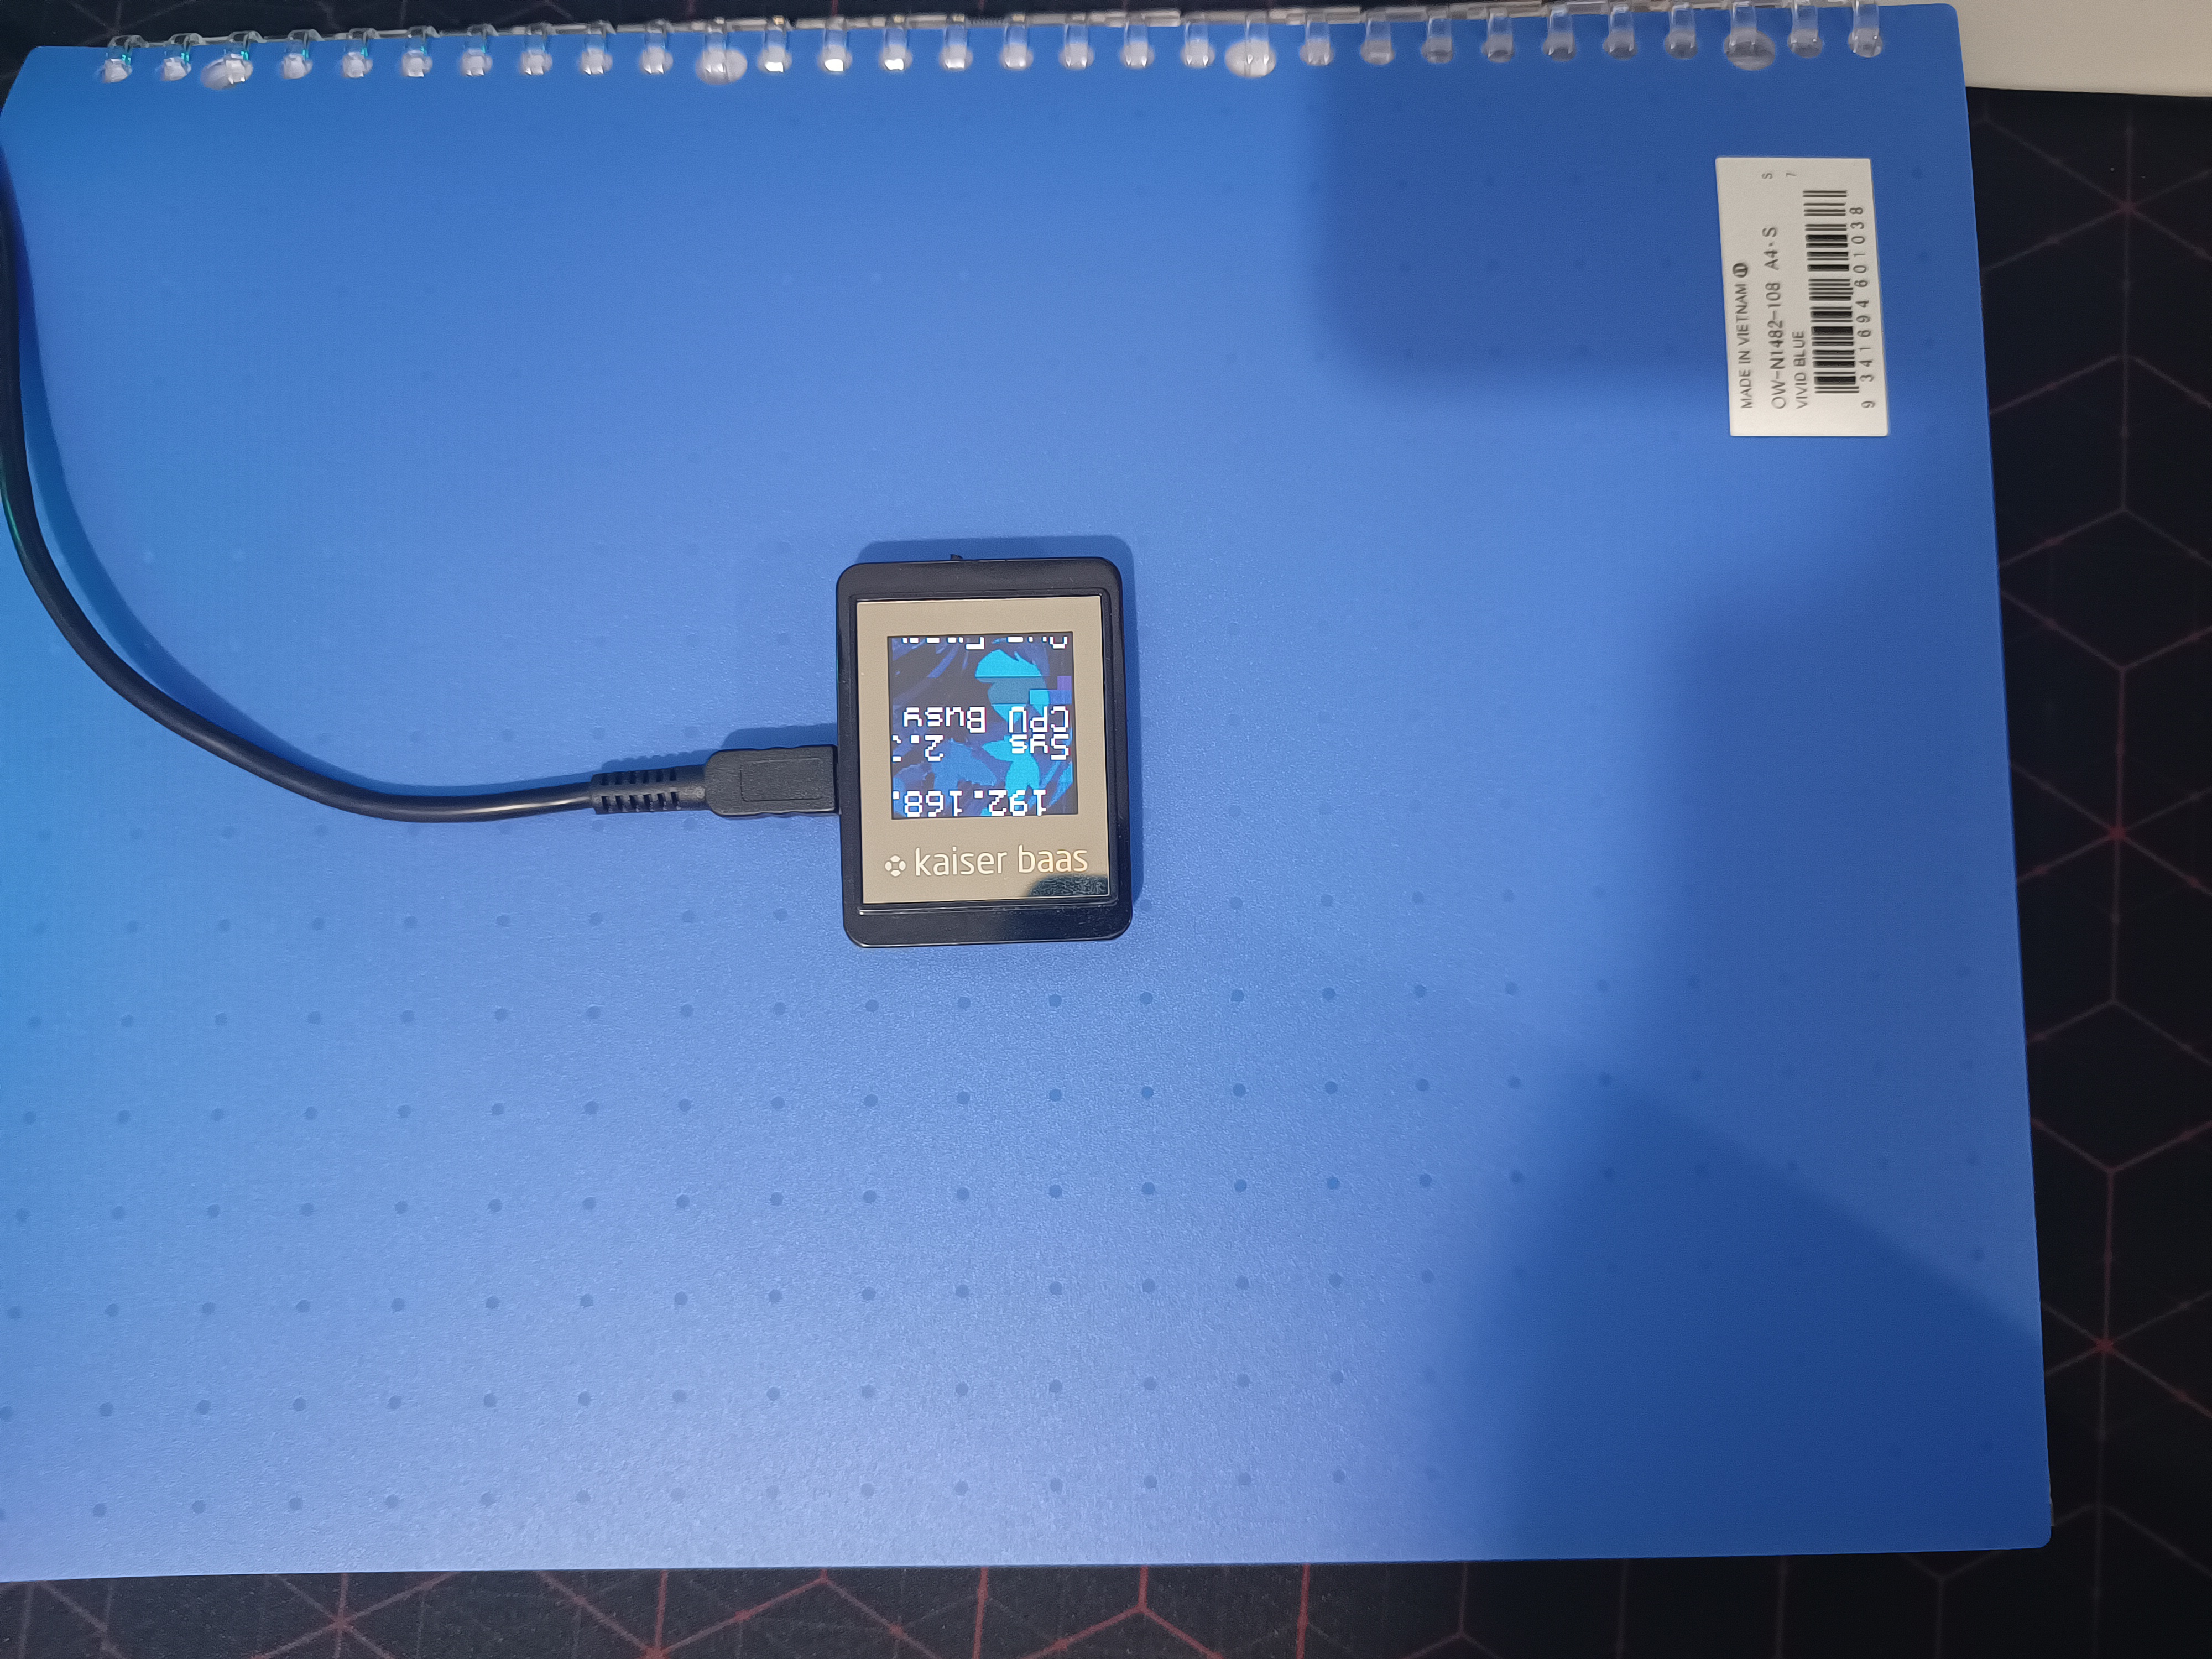
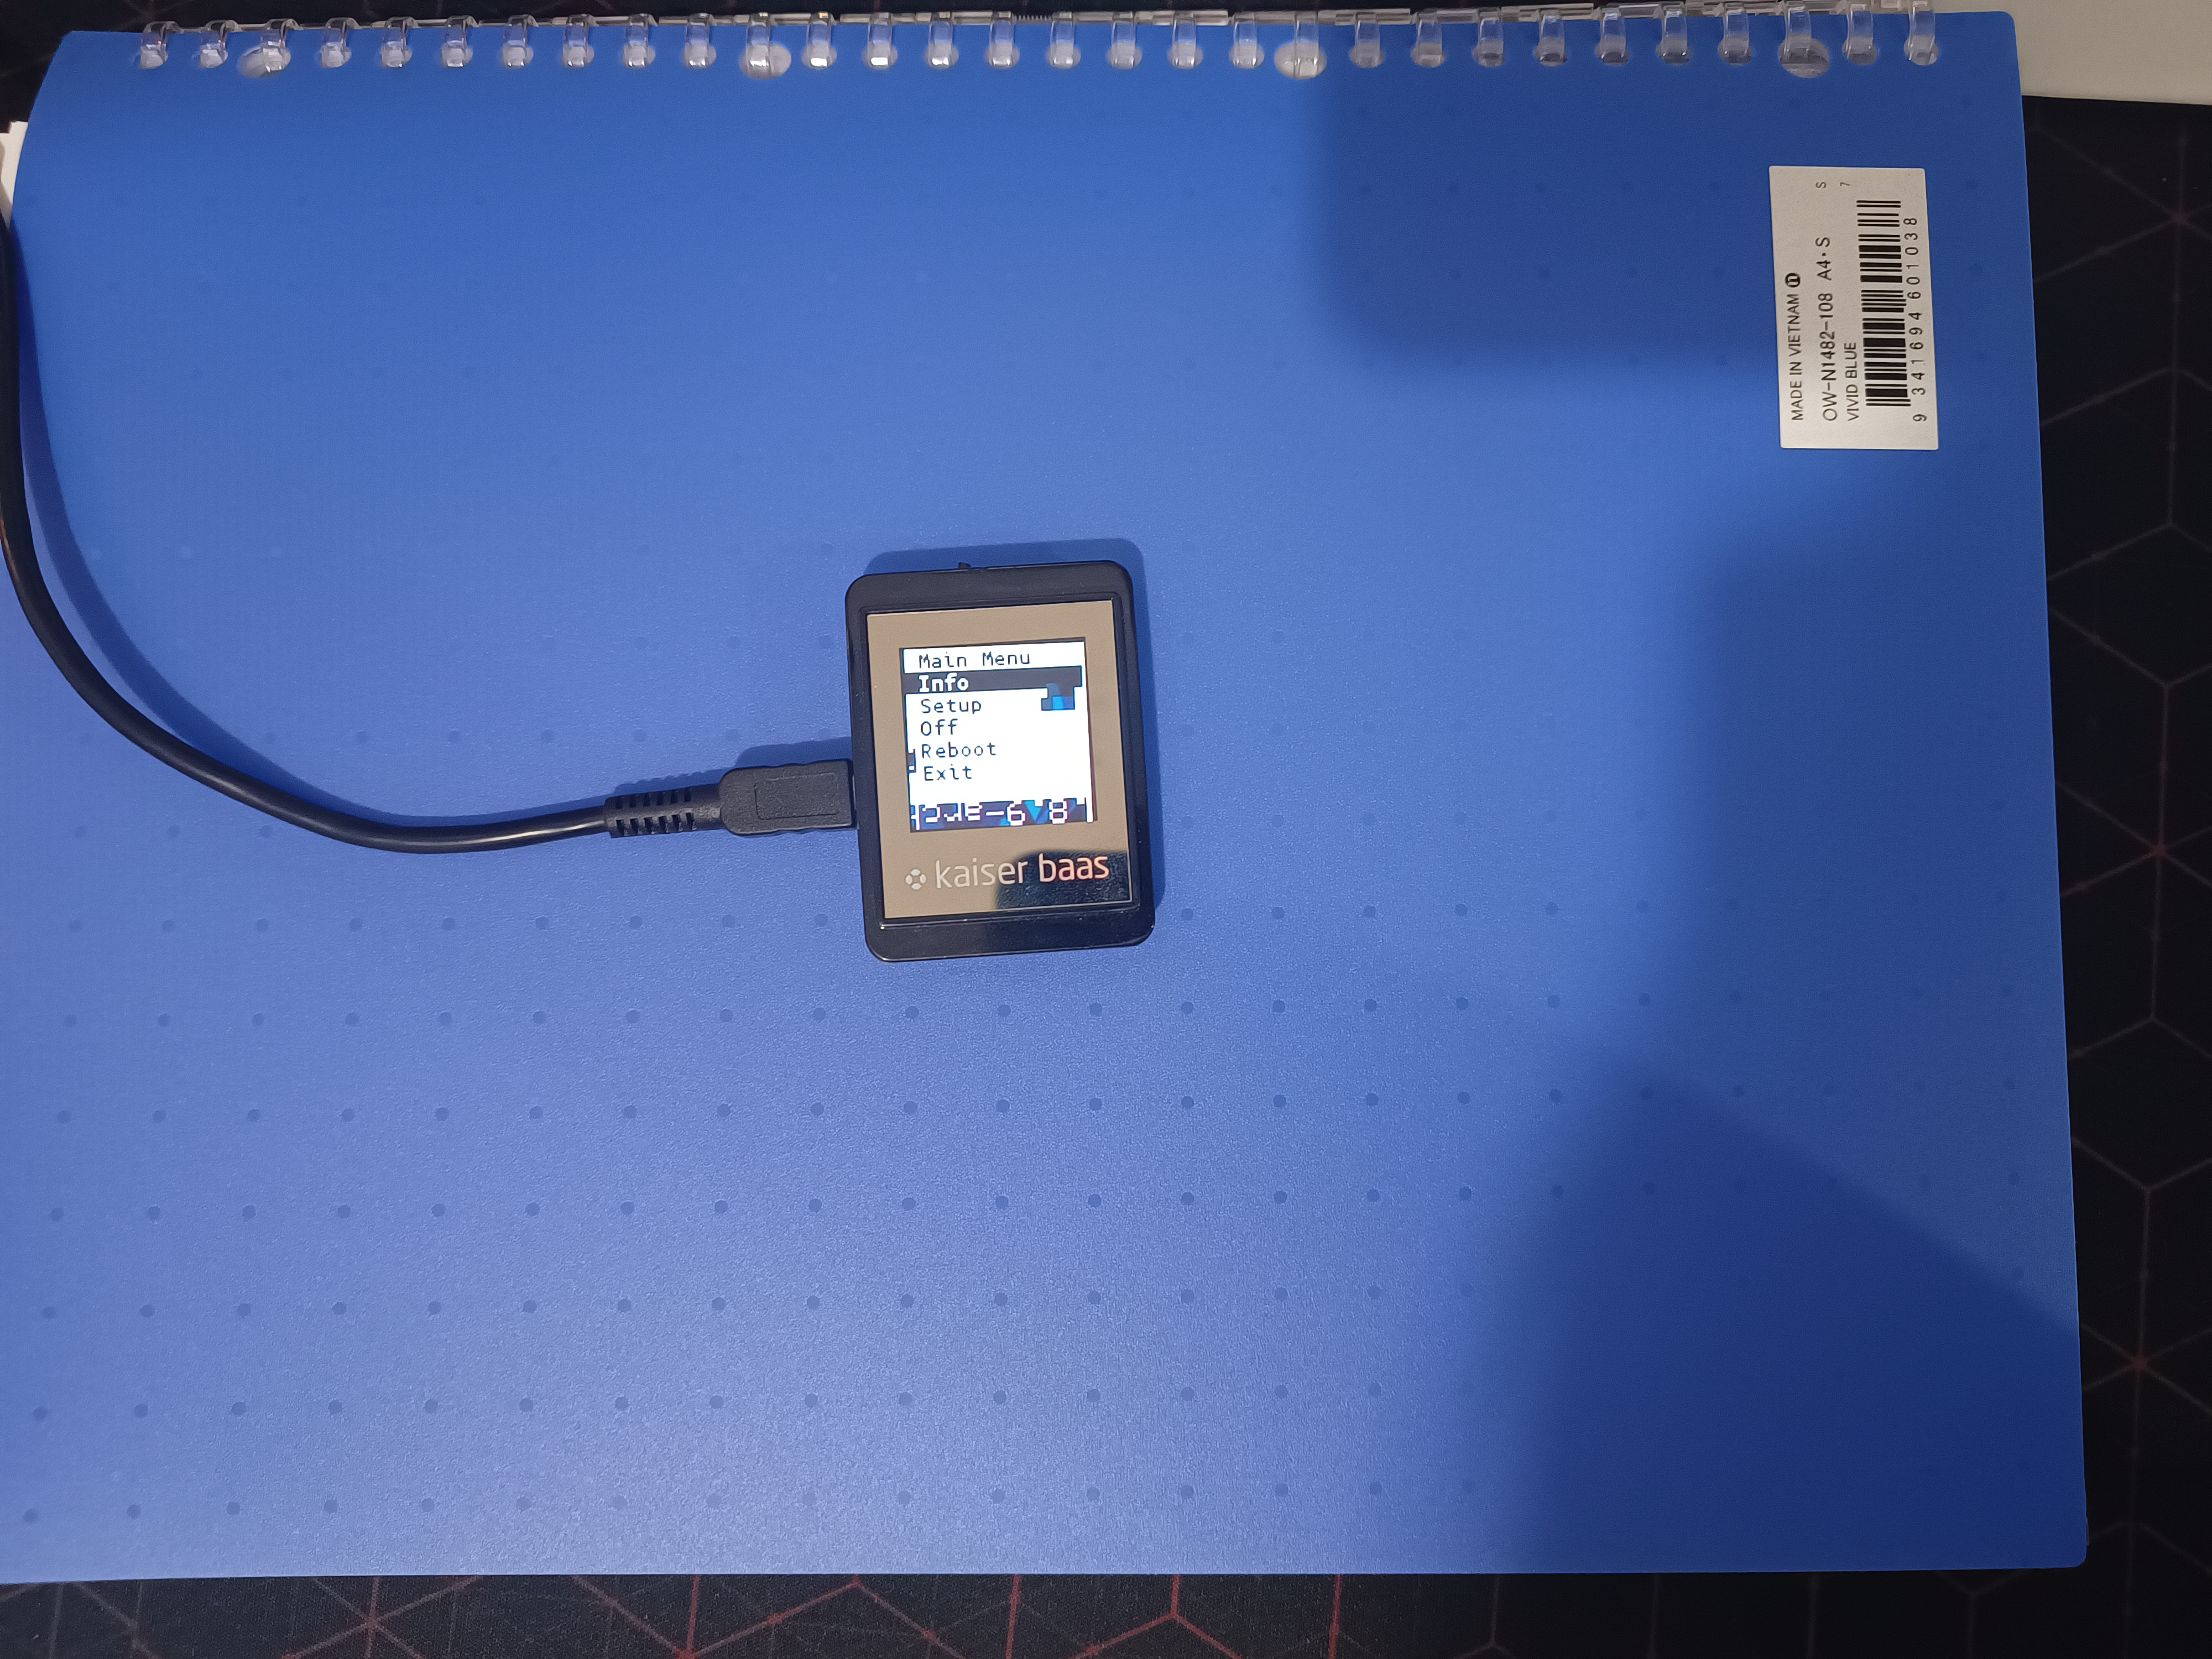
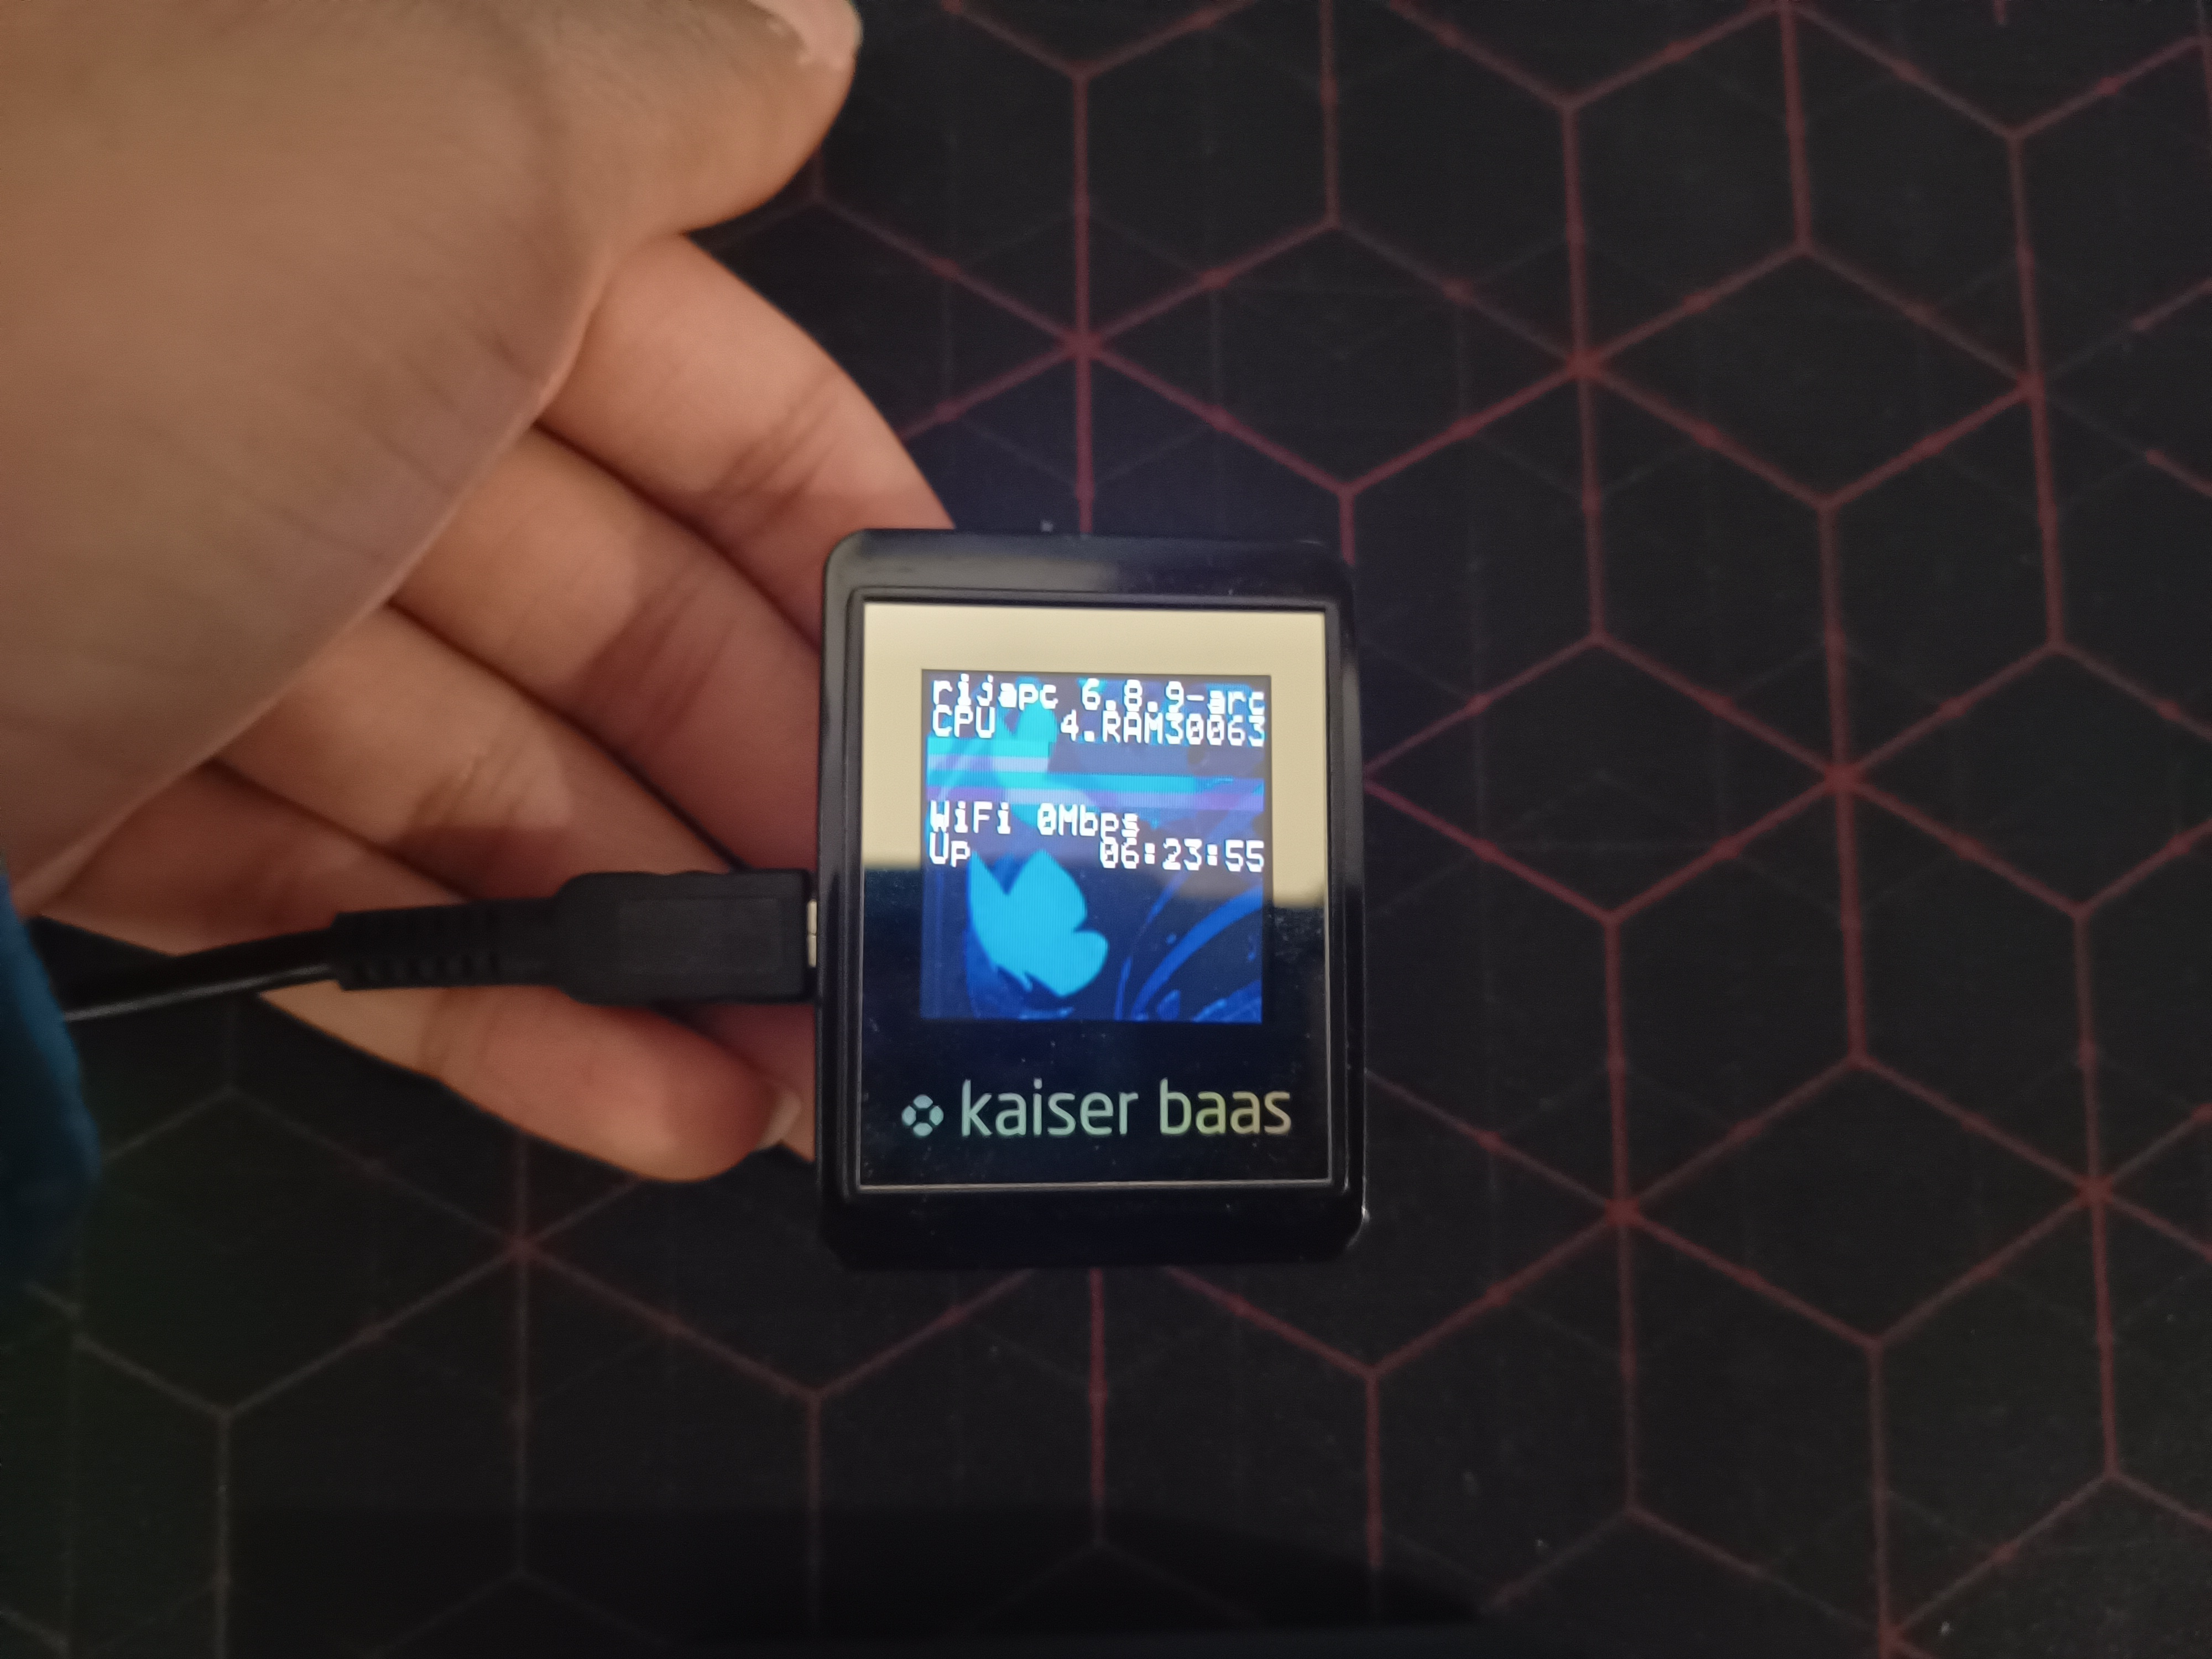
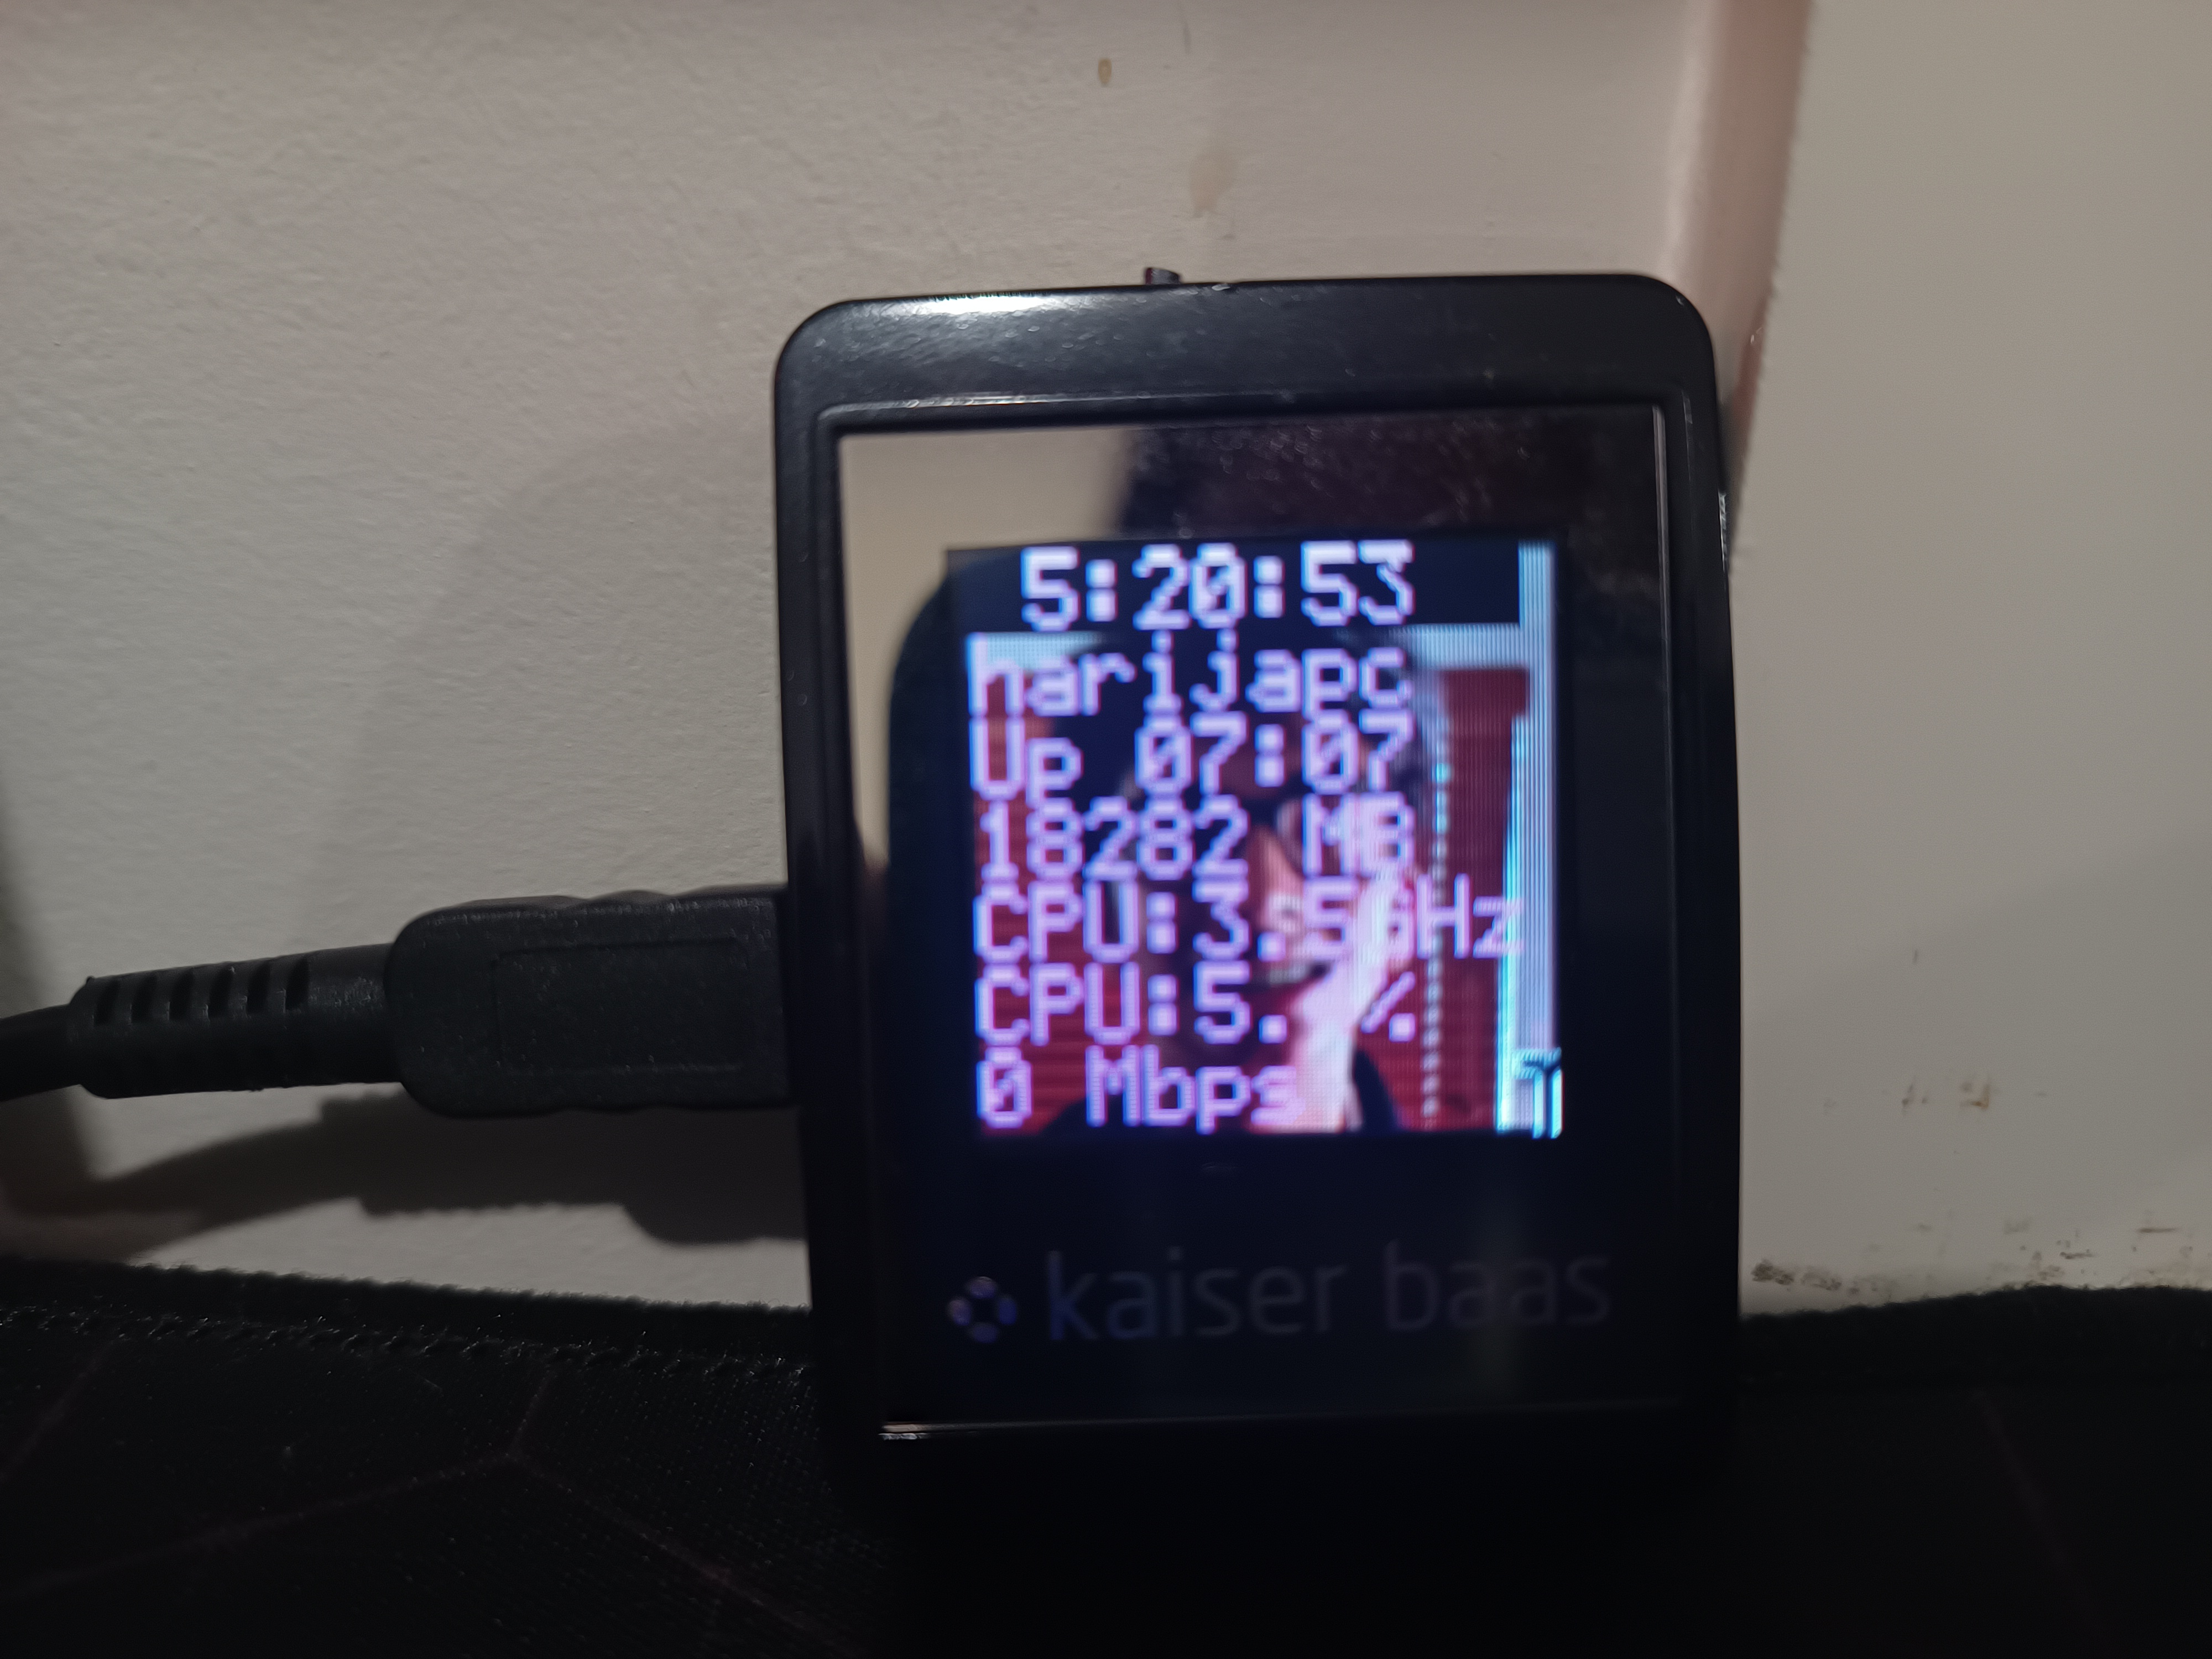
New Firmware + Lcd4linux #
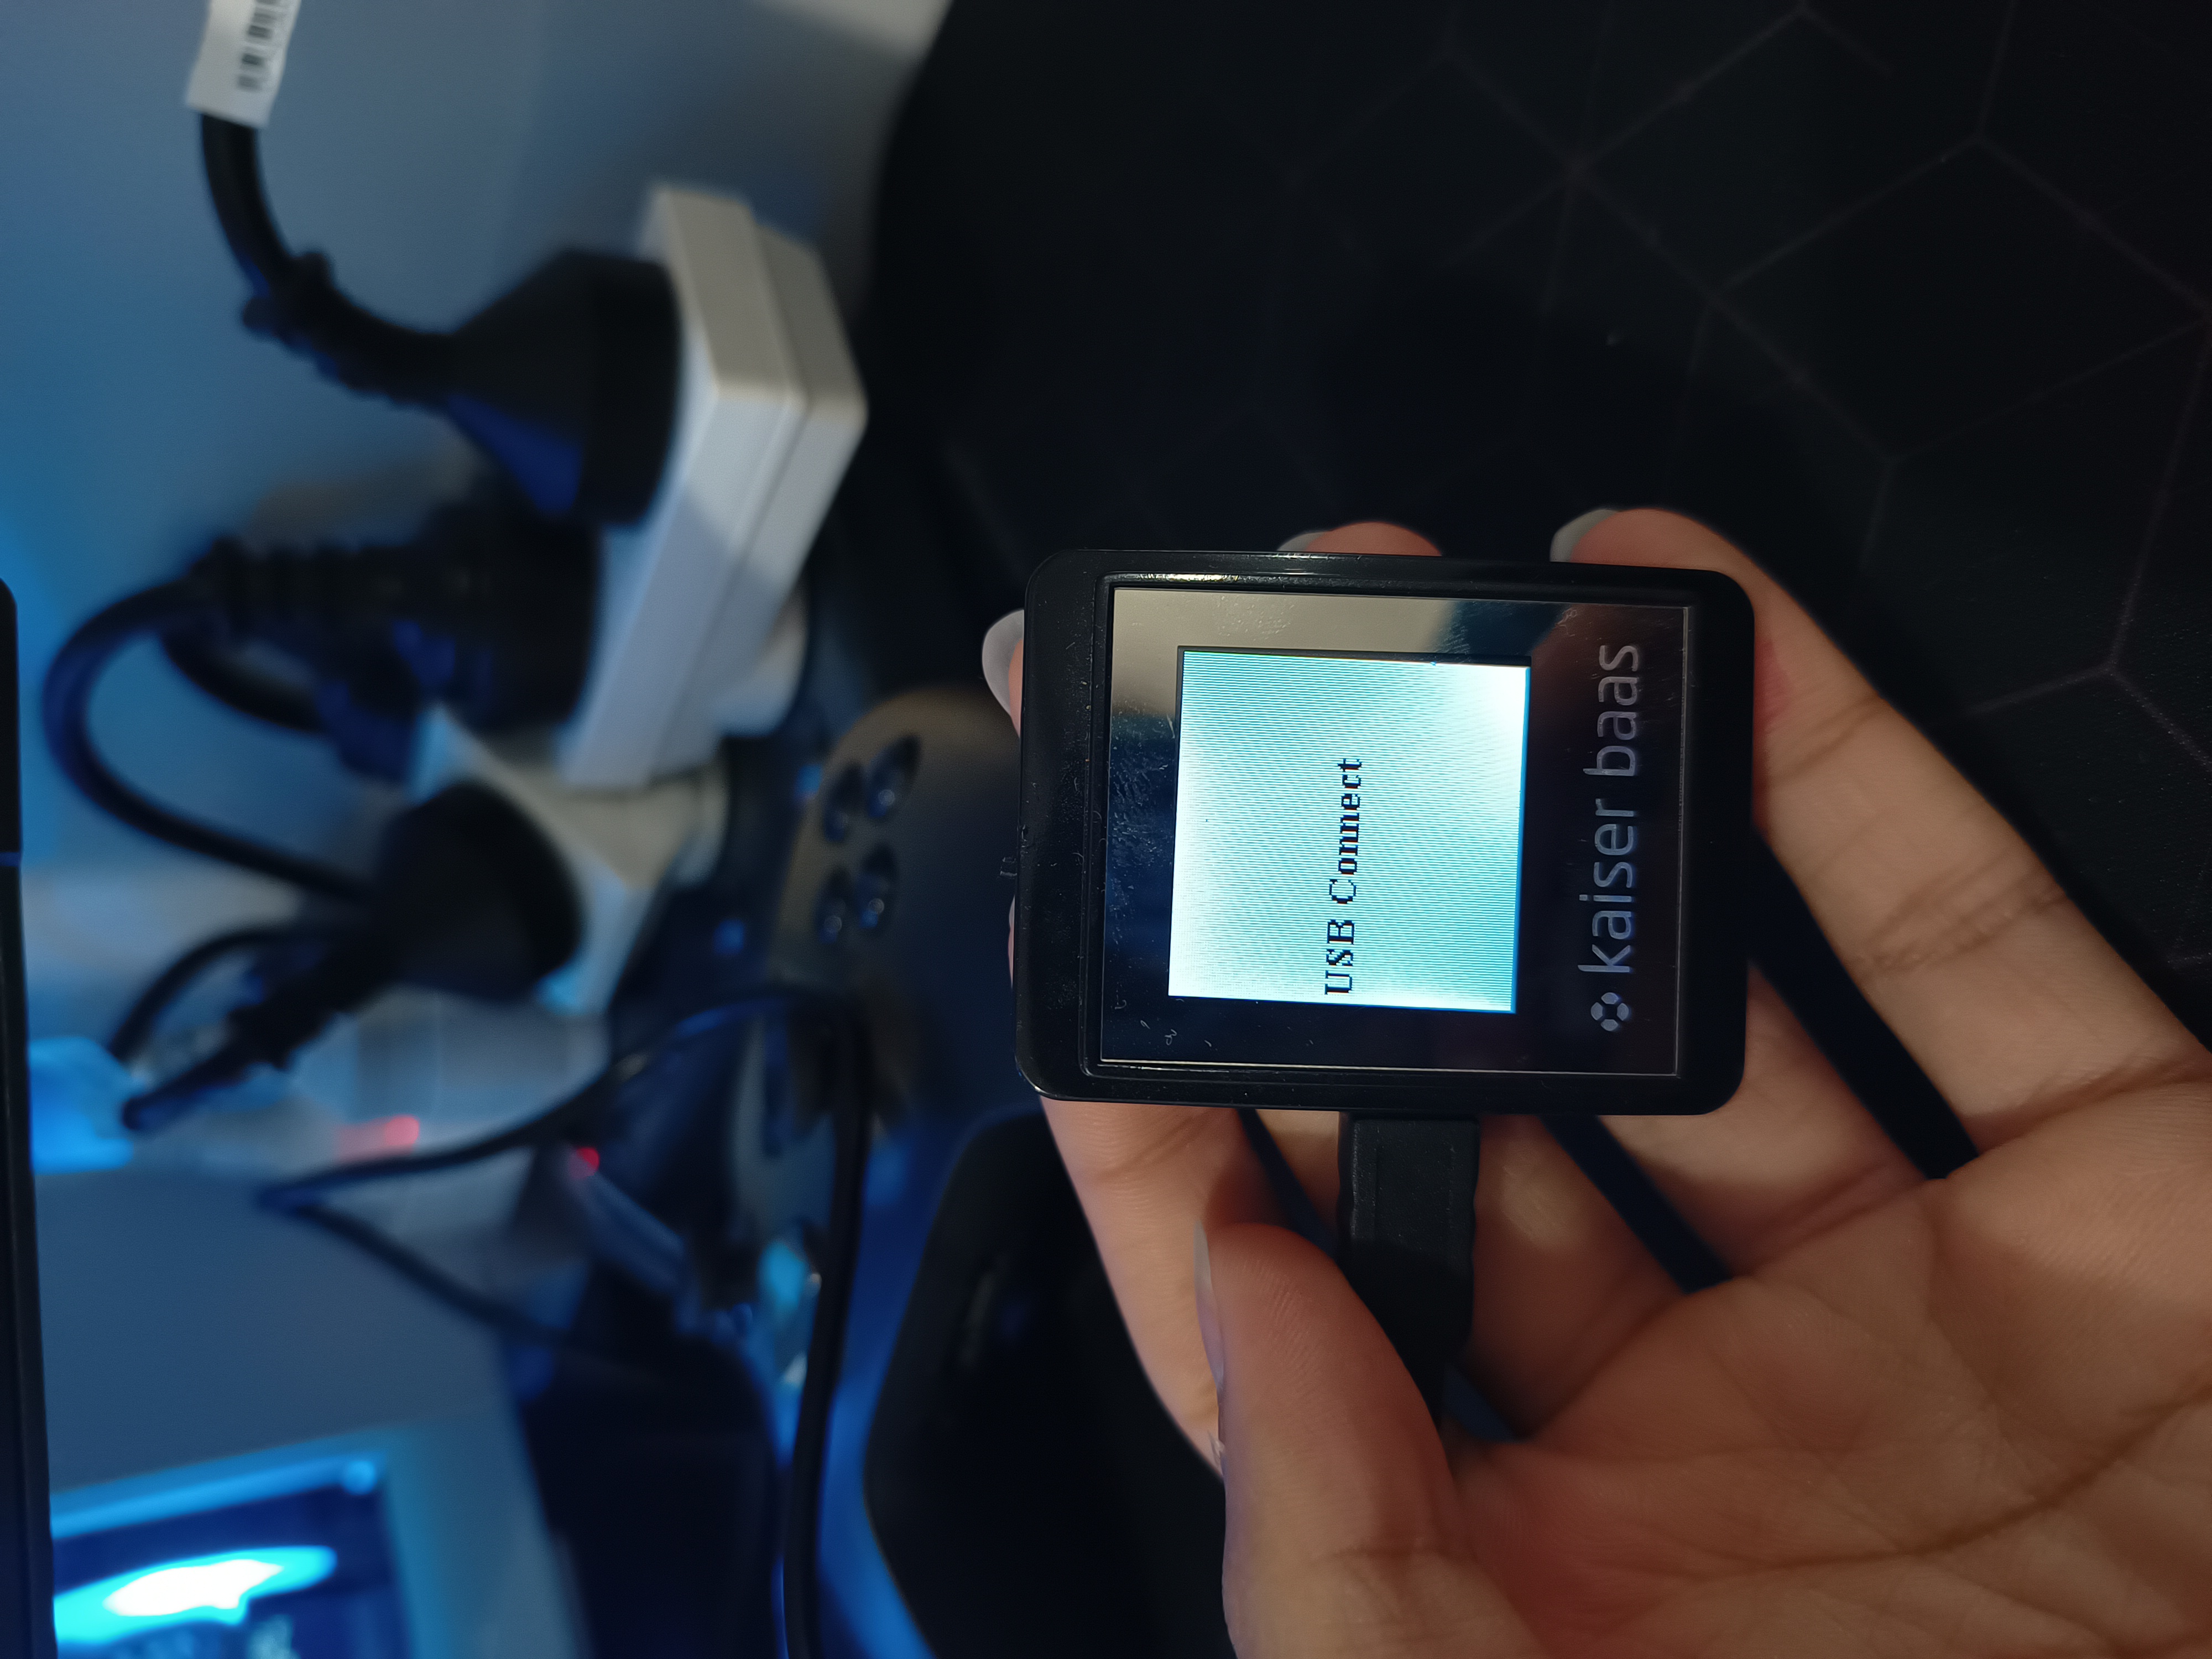
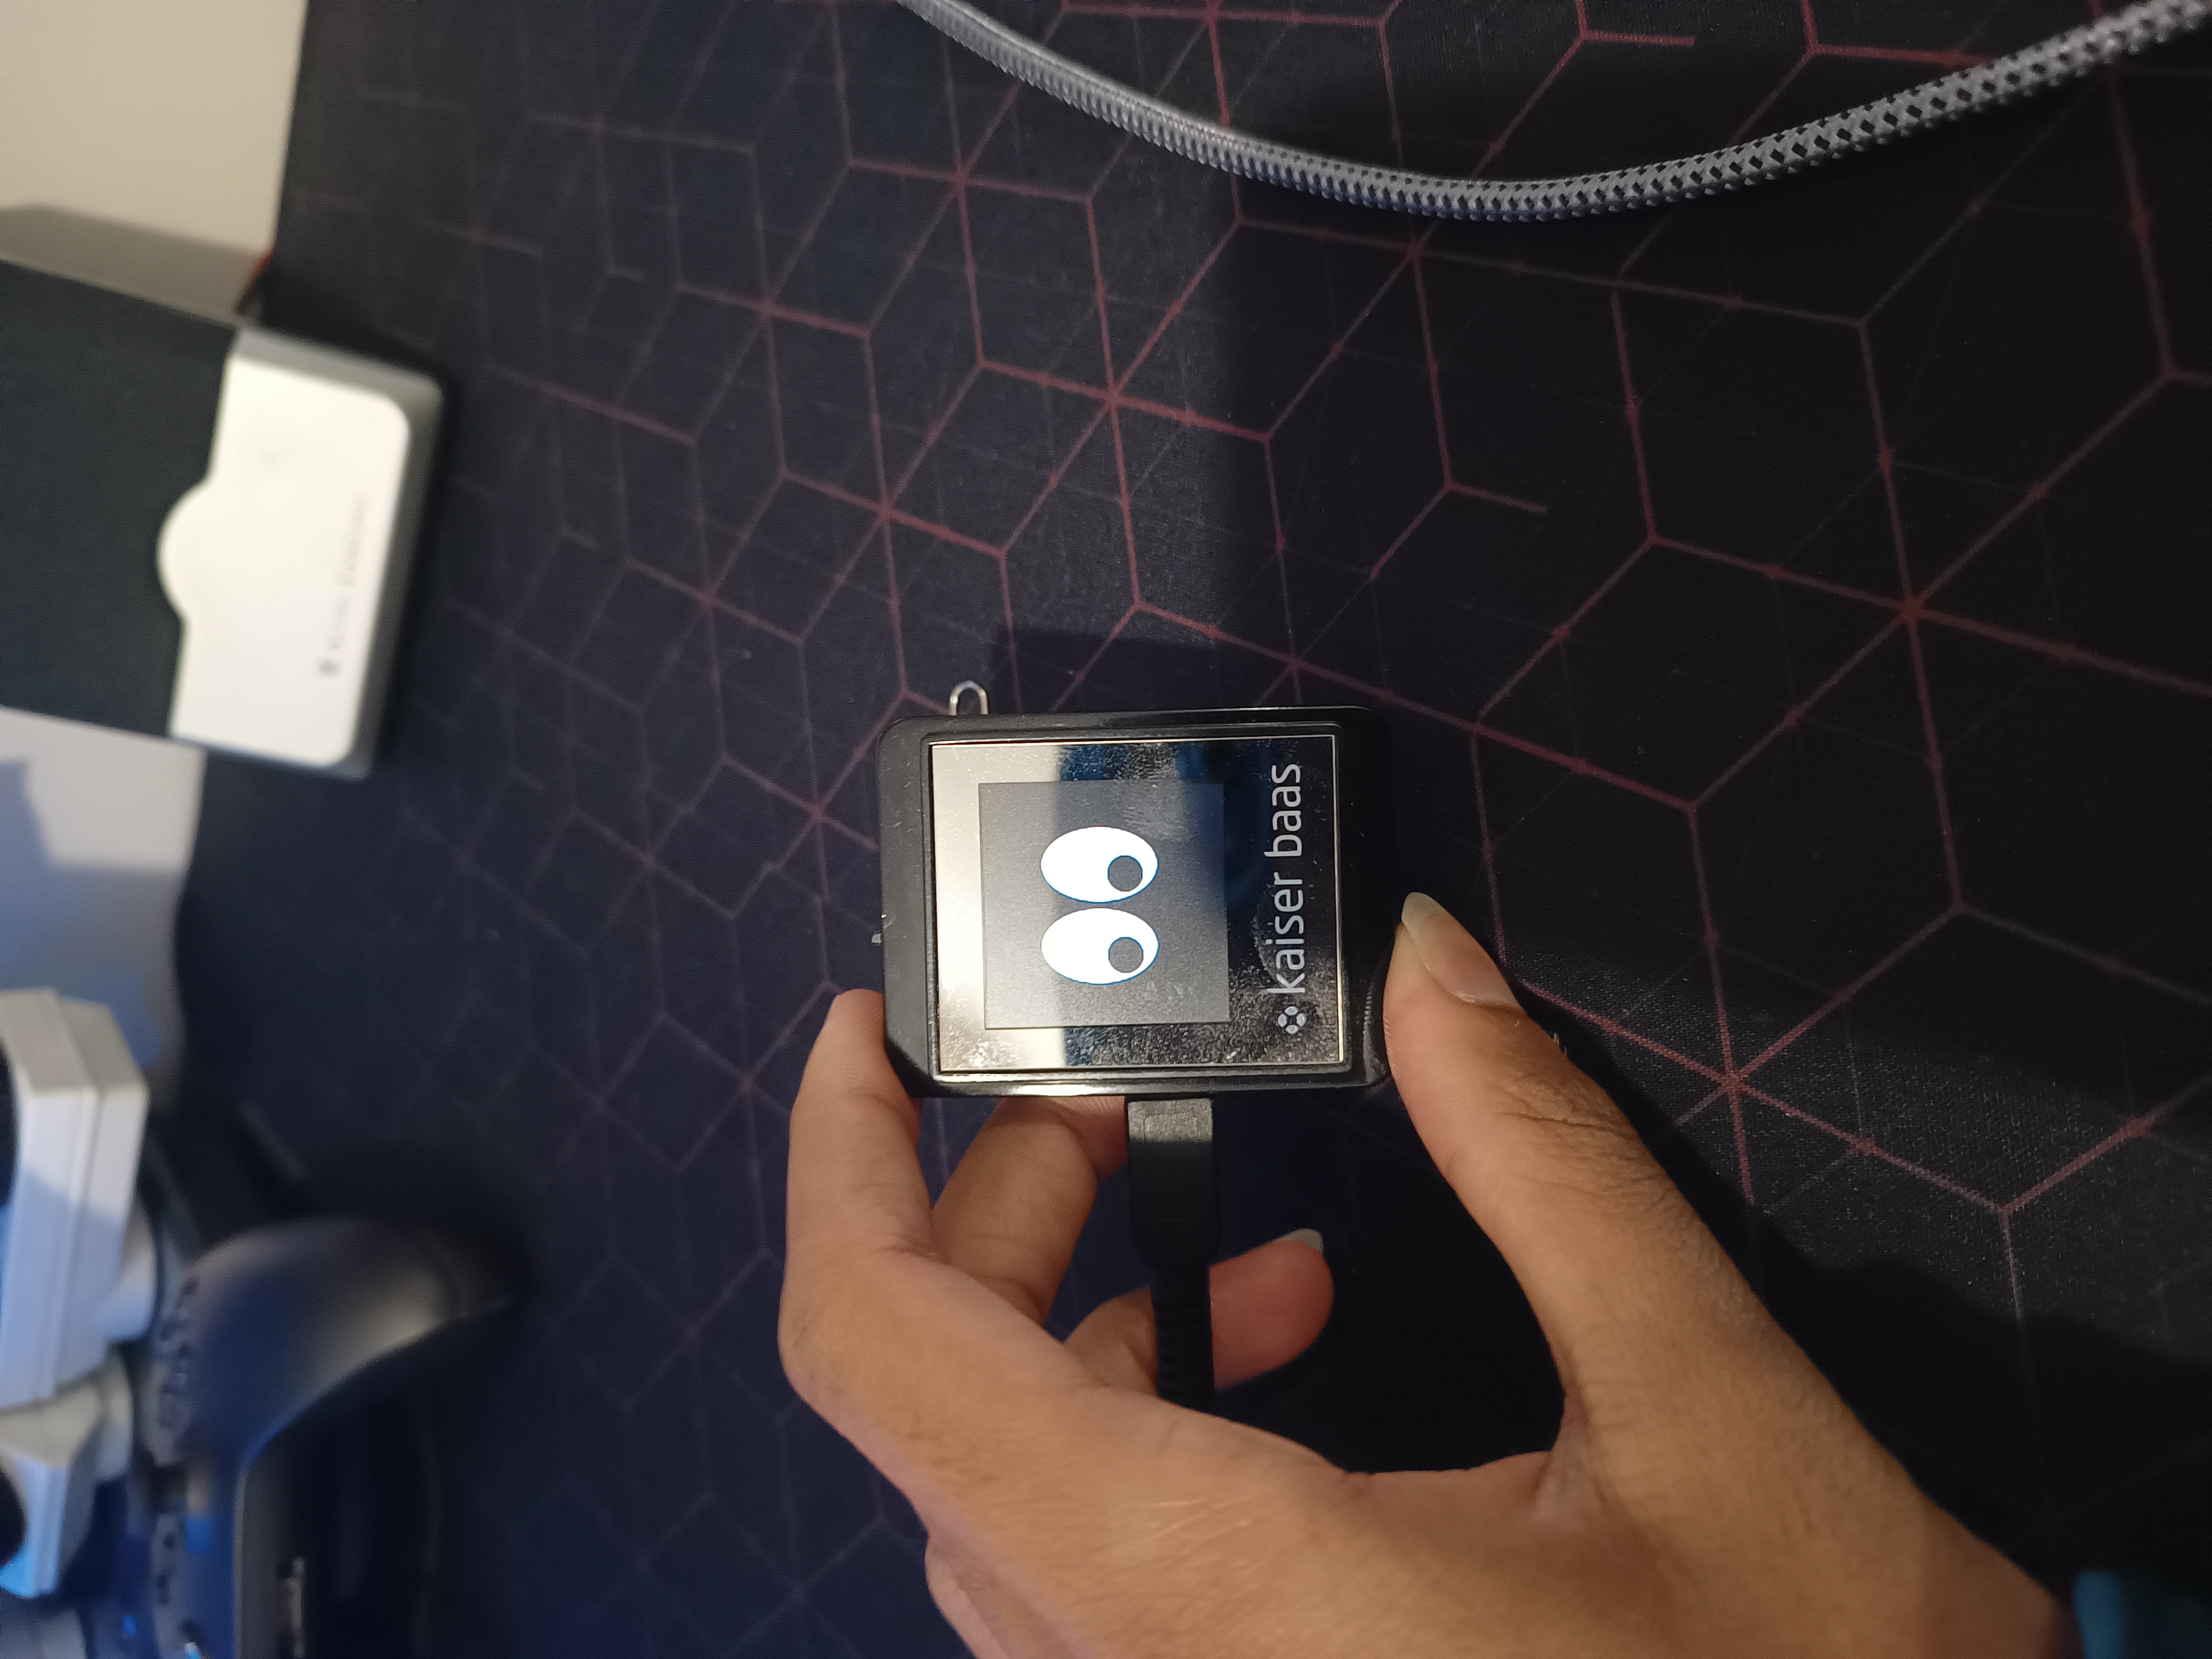
Having flashed the dpf-ax firmware onto my frame using the steps on the GitHub readme, lcd4linux started working after a simple config change of setting my config’s USB id to point to the frame rather than the screen in my PC. Apart from lcd4linux itself, the firmware includes an options menu with a few neat little settings. Plus, when nothing is connected to the frame (i.e., no lcd4linux), some cute little eyes pop up on it, kind of reminiscent of xeyes.
Disassembly #
Seeing as the frame was housing what was now probably a decade plus old battery, which was getting a fair bit toasty when plugged in, I thought I’d try opening up the frame and getting rid of it, seeing as it’d likely only be in use when plugged in with this somewhat unconventional setup as a system monitor.
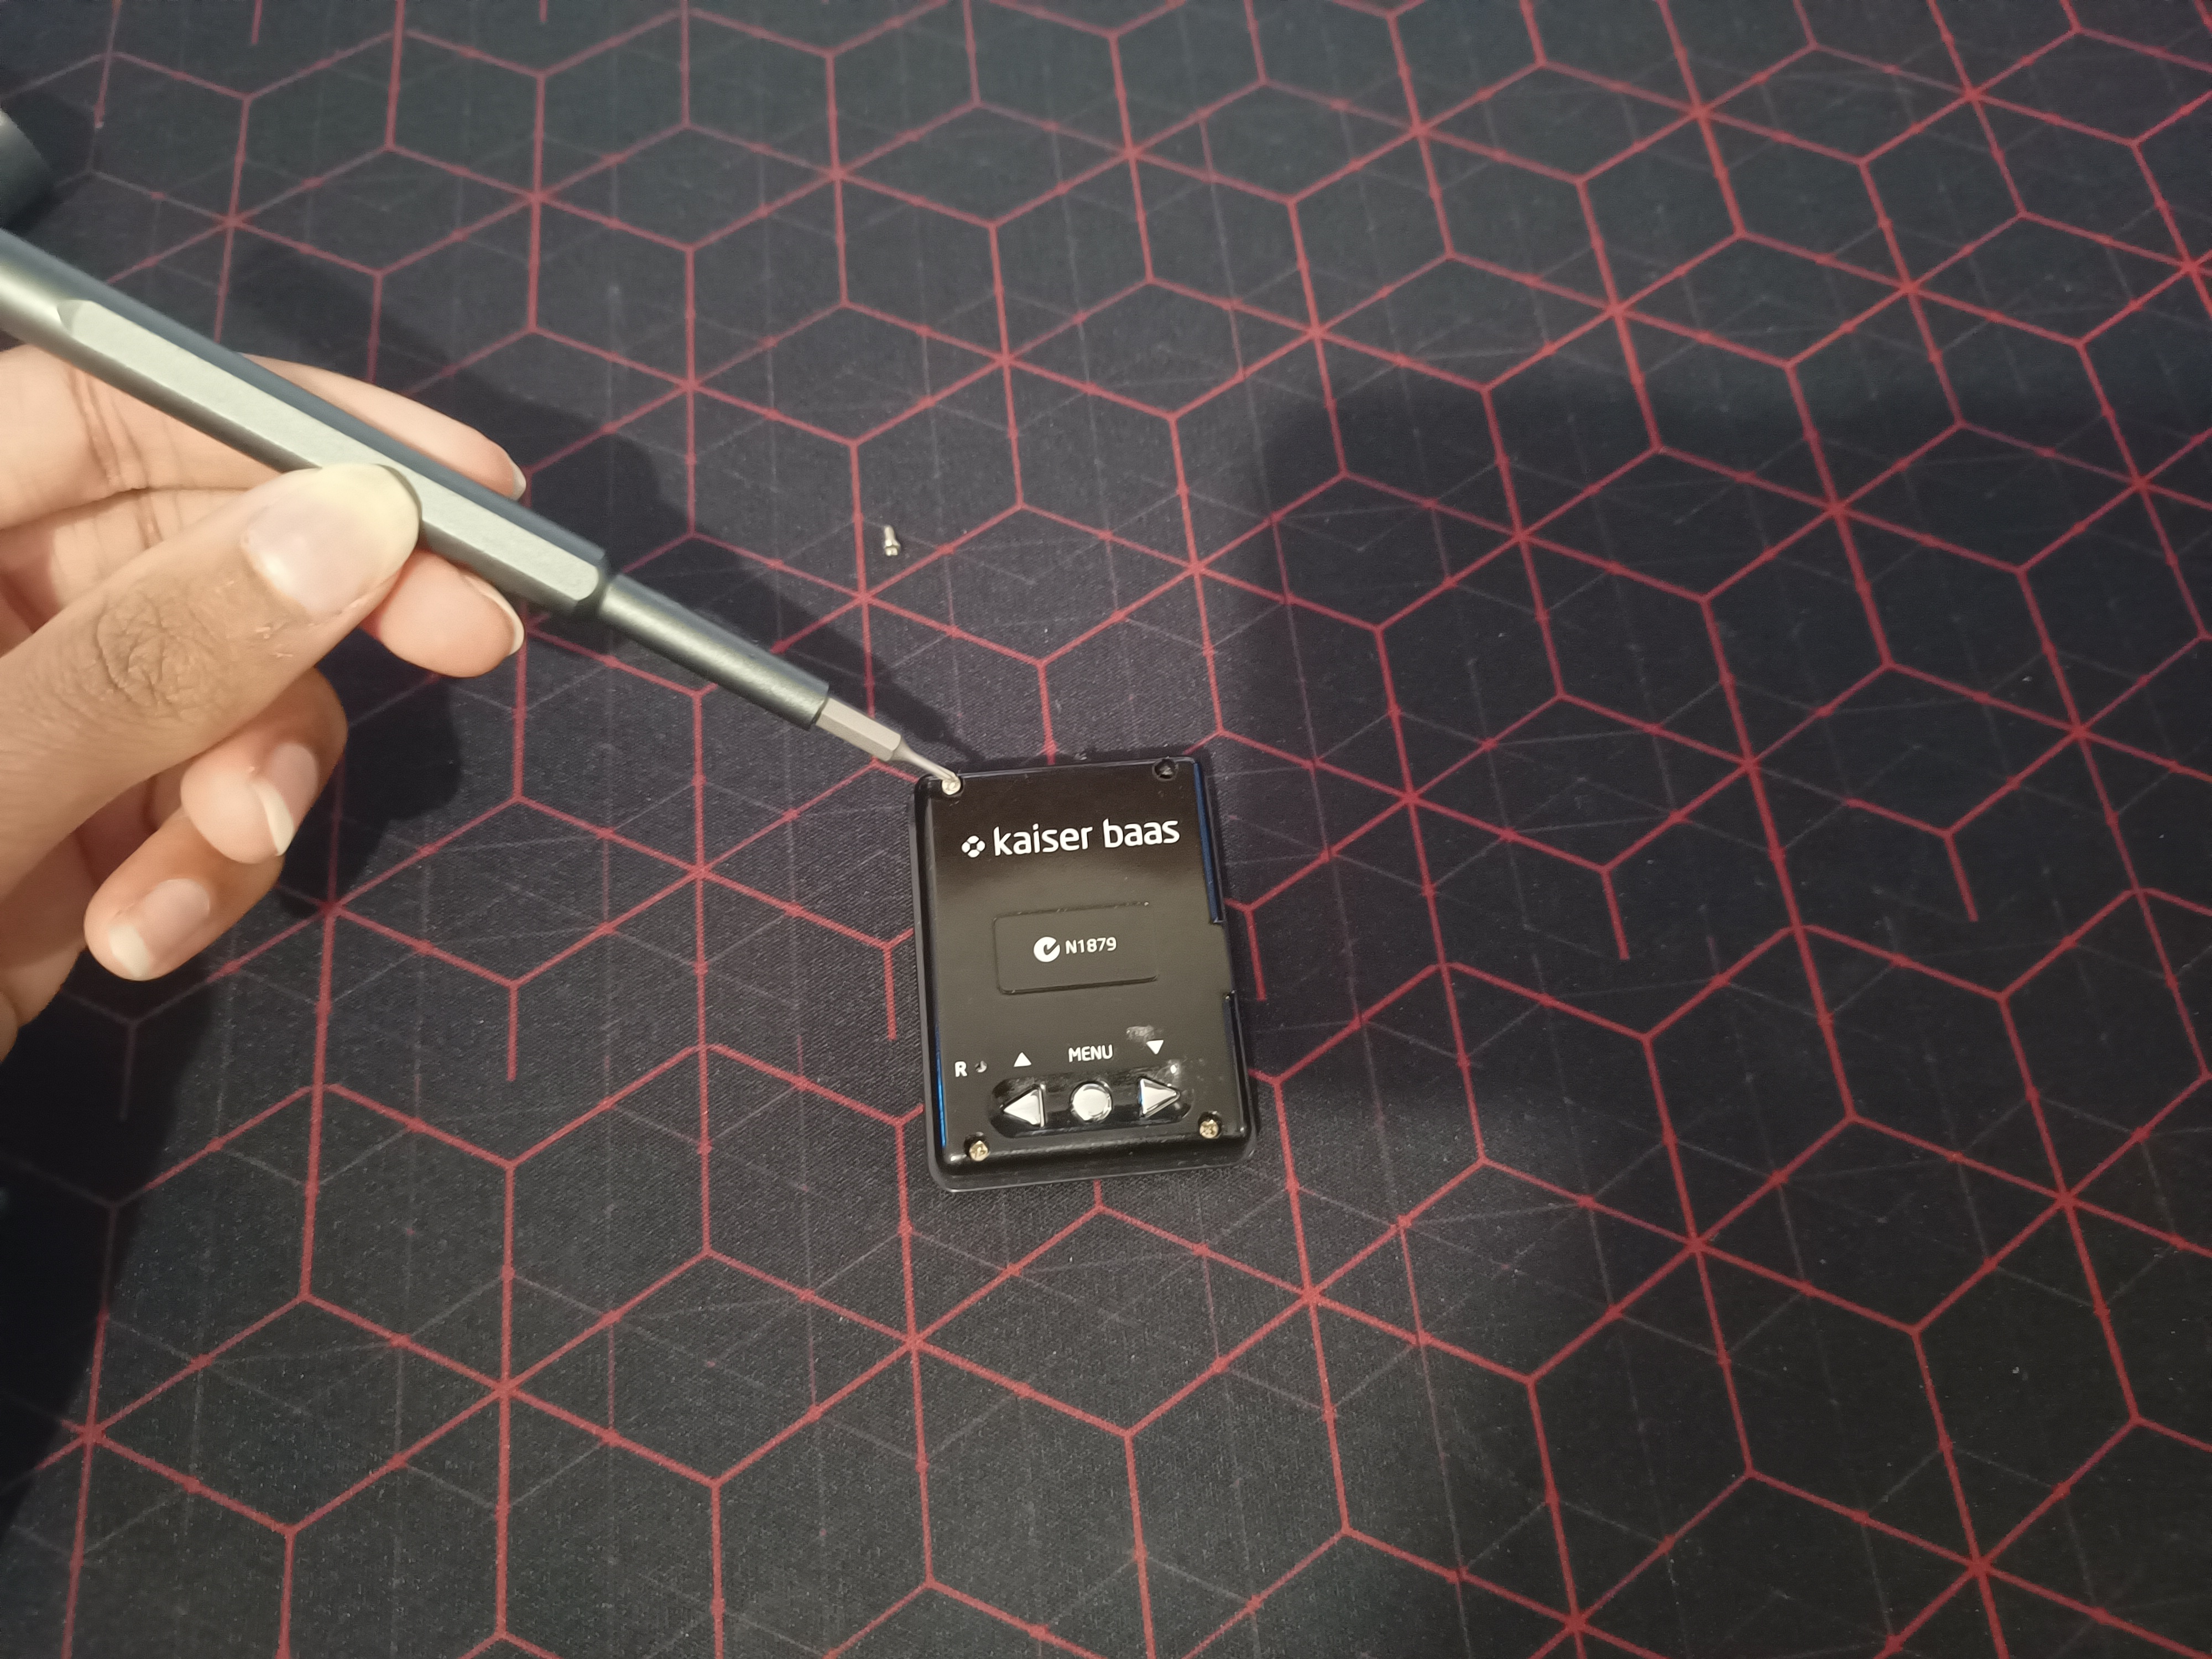
1. Remove Front Cover #
I started by unscrewing the four little screws on the back. These are all Philips head, although I’m not sure about their exact size, so make sure you have a set of bits handy! After that, gently pry it off an opening pick or two, or your nails if you’re feeling adventurous.
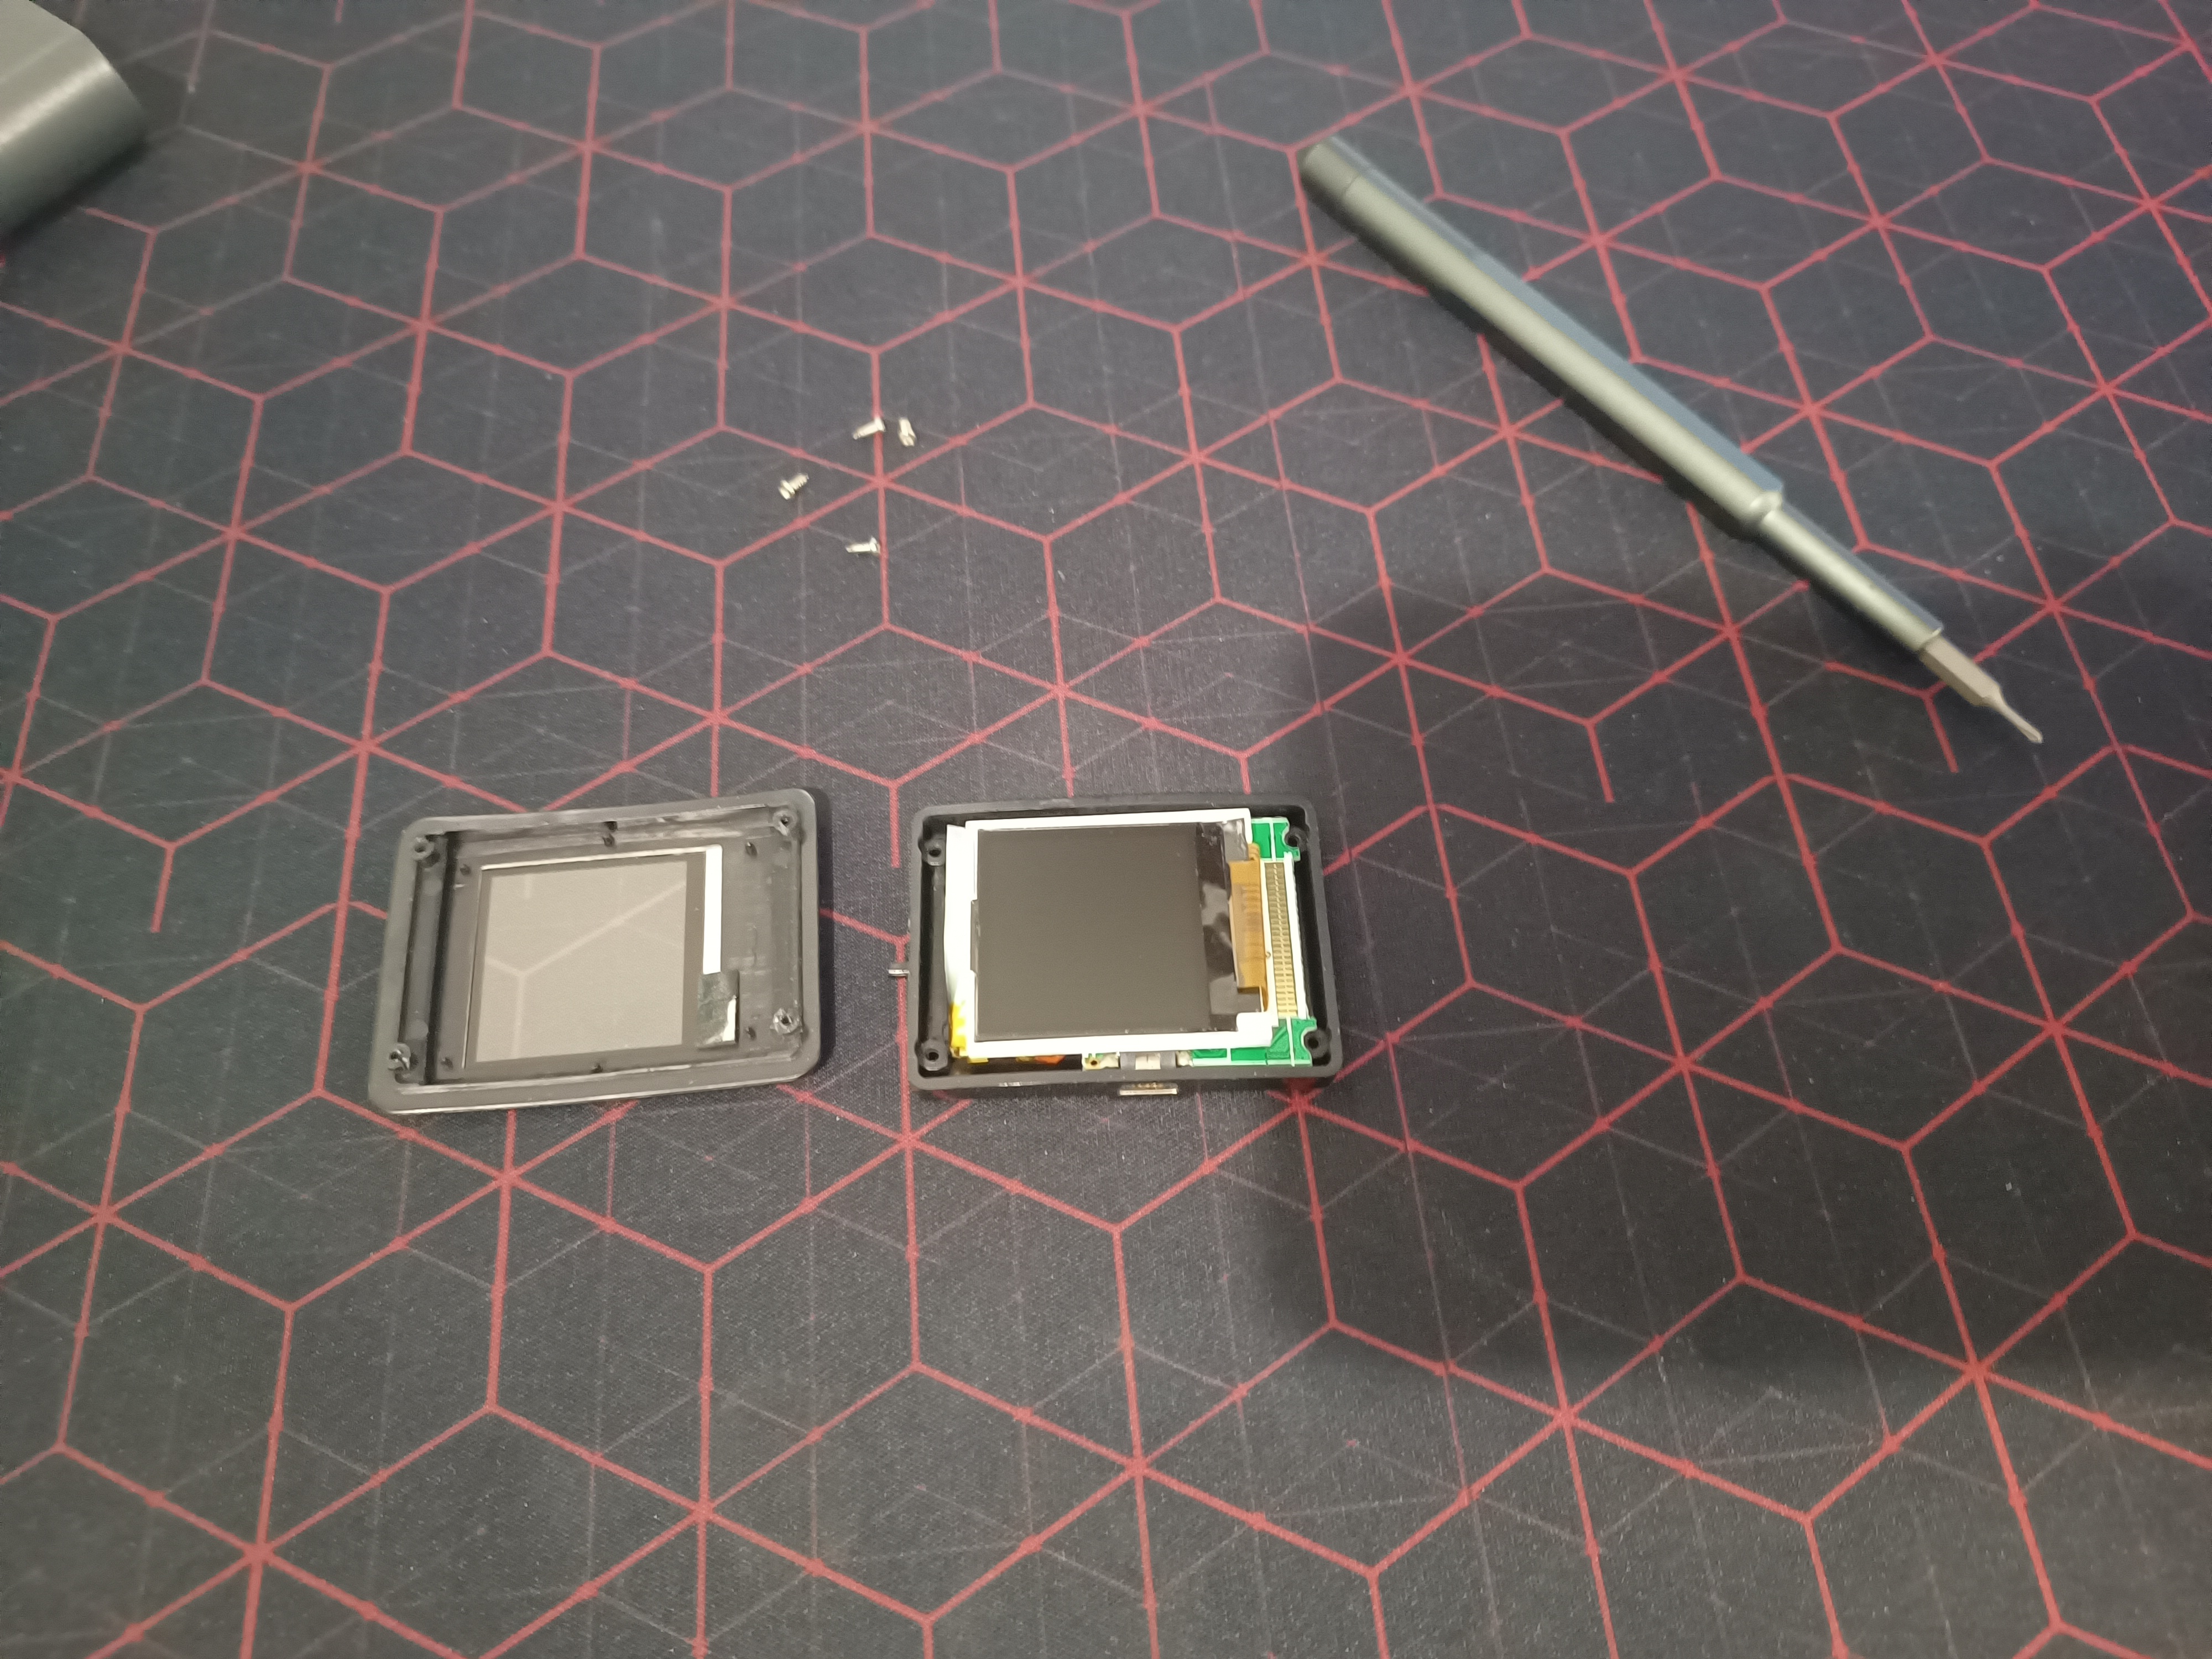

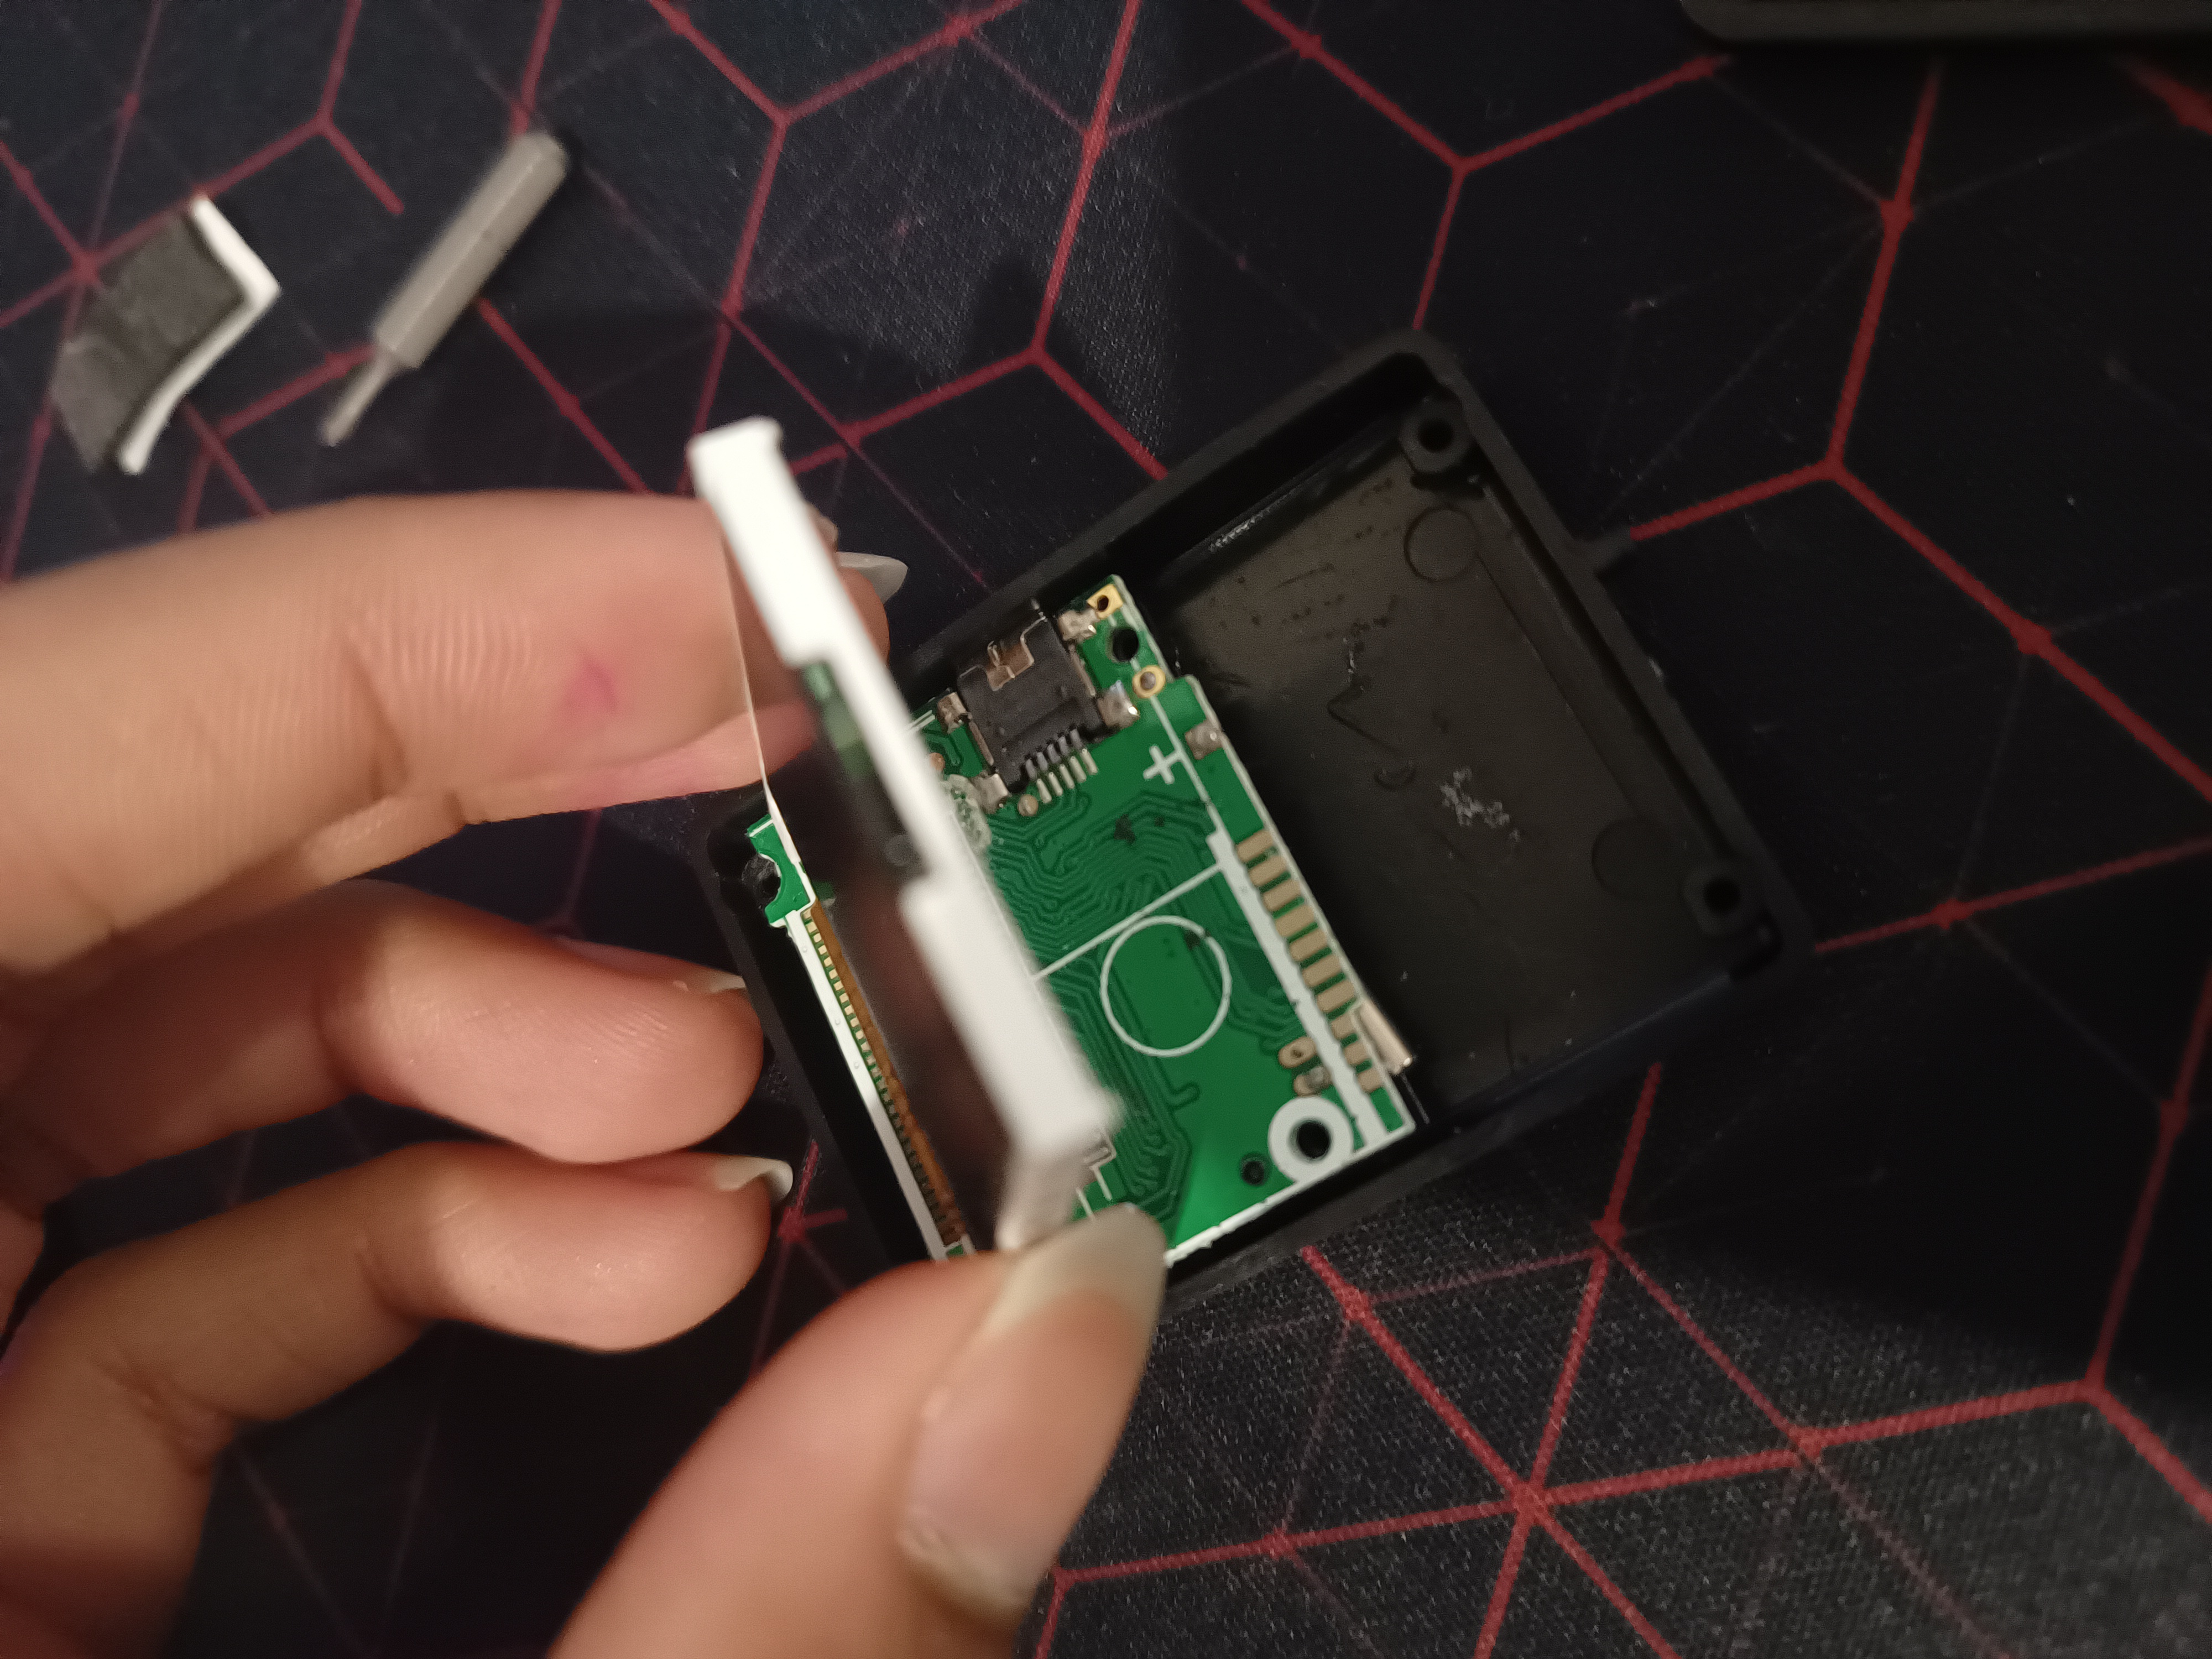
2. Gently Move Over Screen #
Once you’ve got the front cover off, you’ll be able to see the little screen in all its glory, attached to the main board via a ribbon cable. Carefully move it off to the side to see the battery, with a little foam sticker atop it.
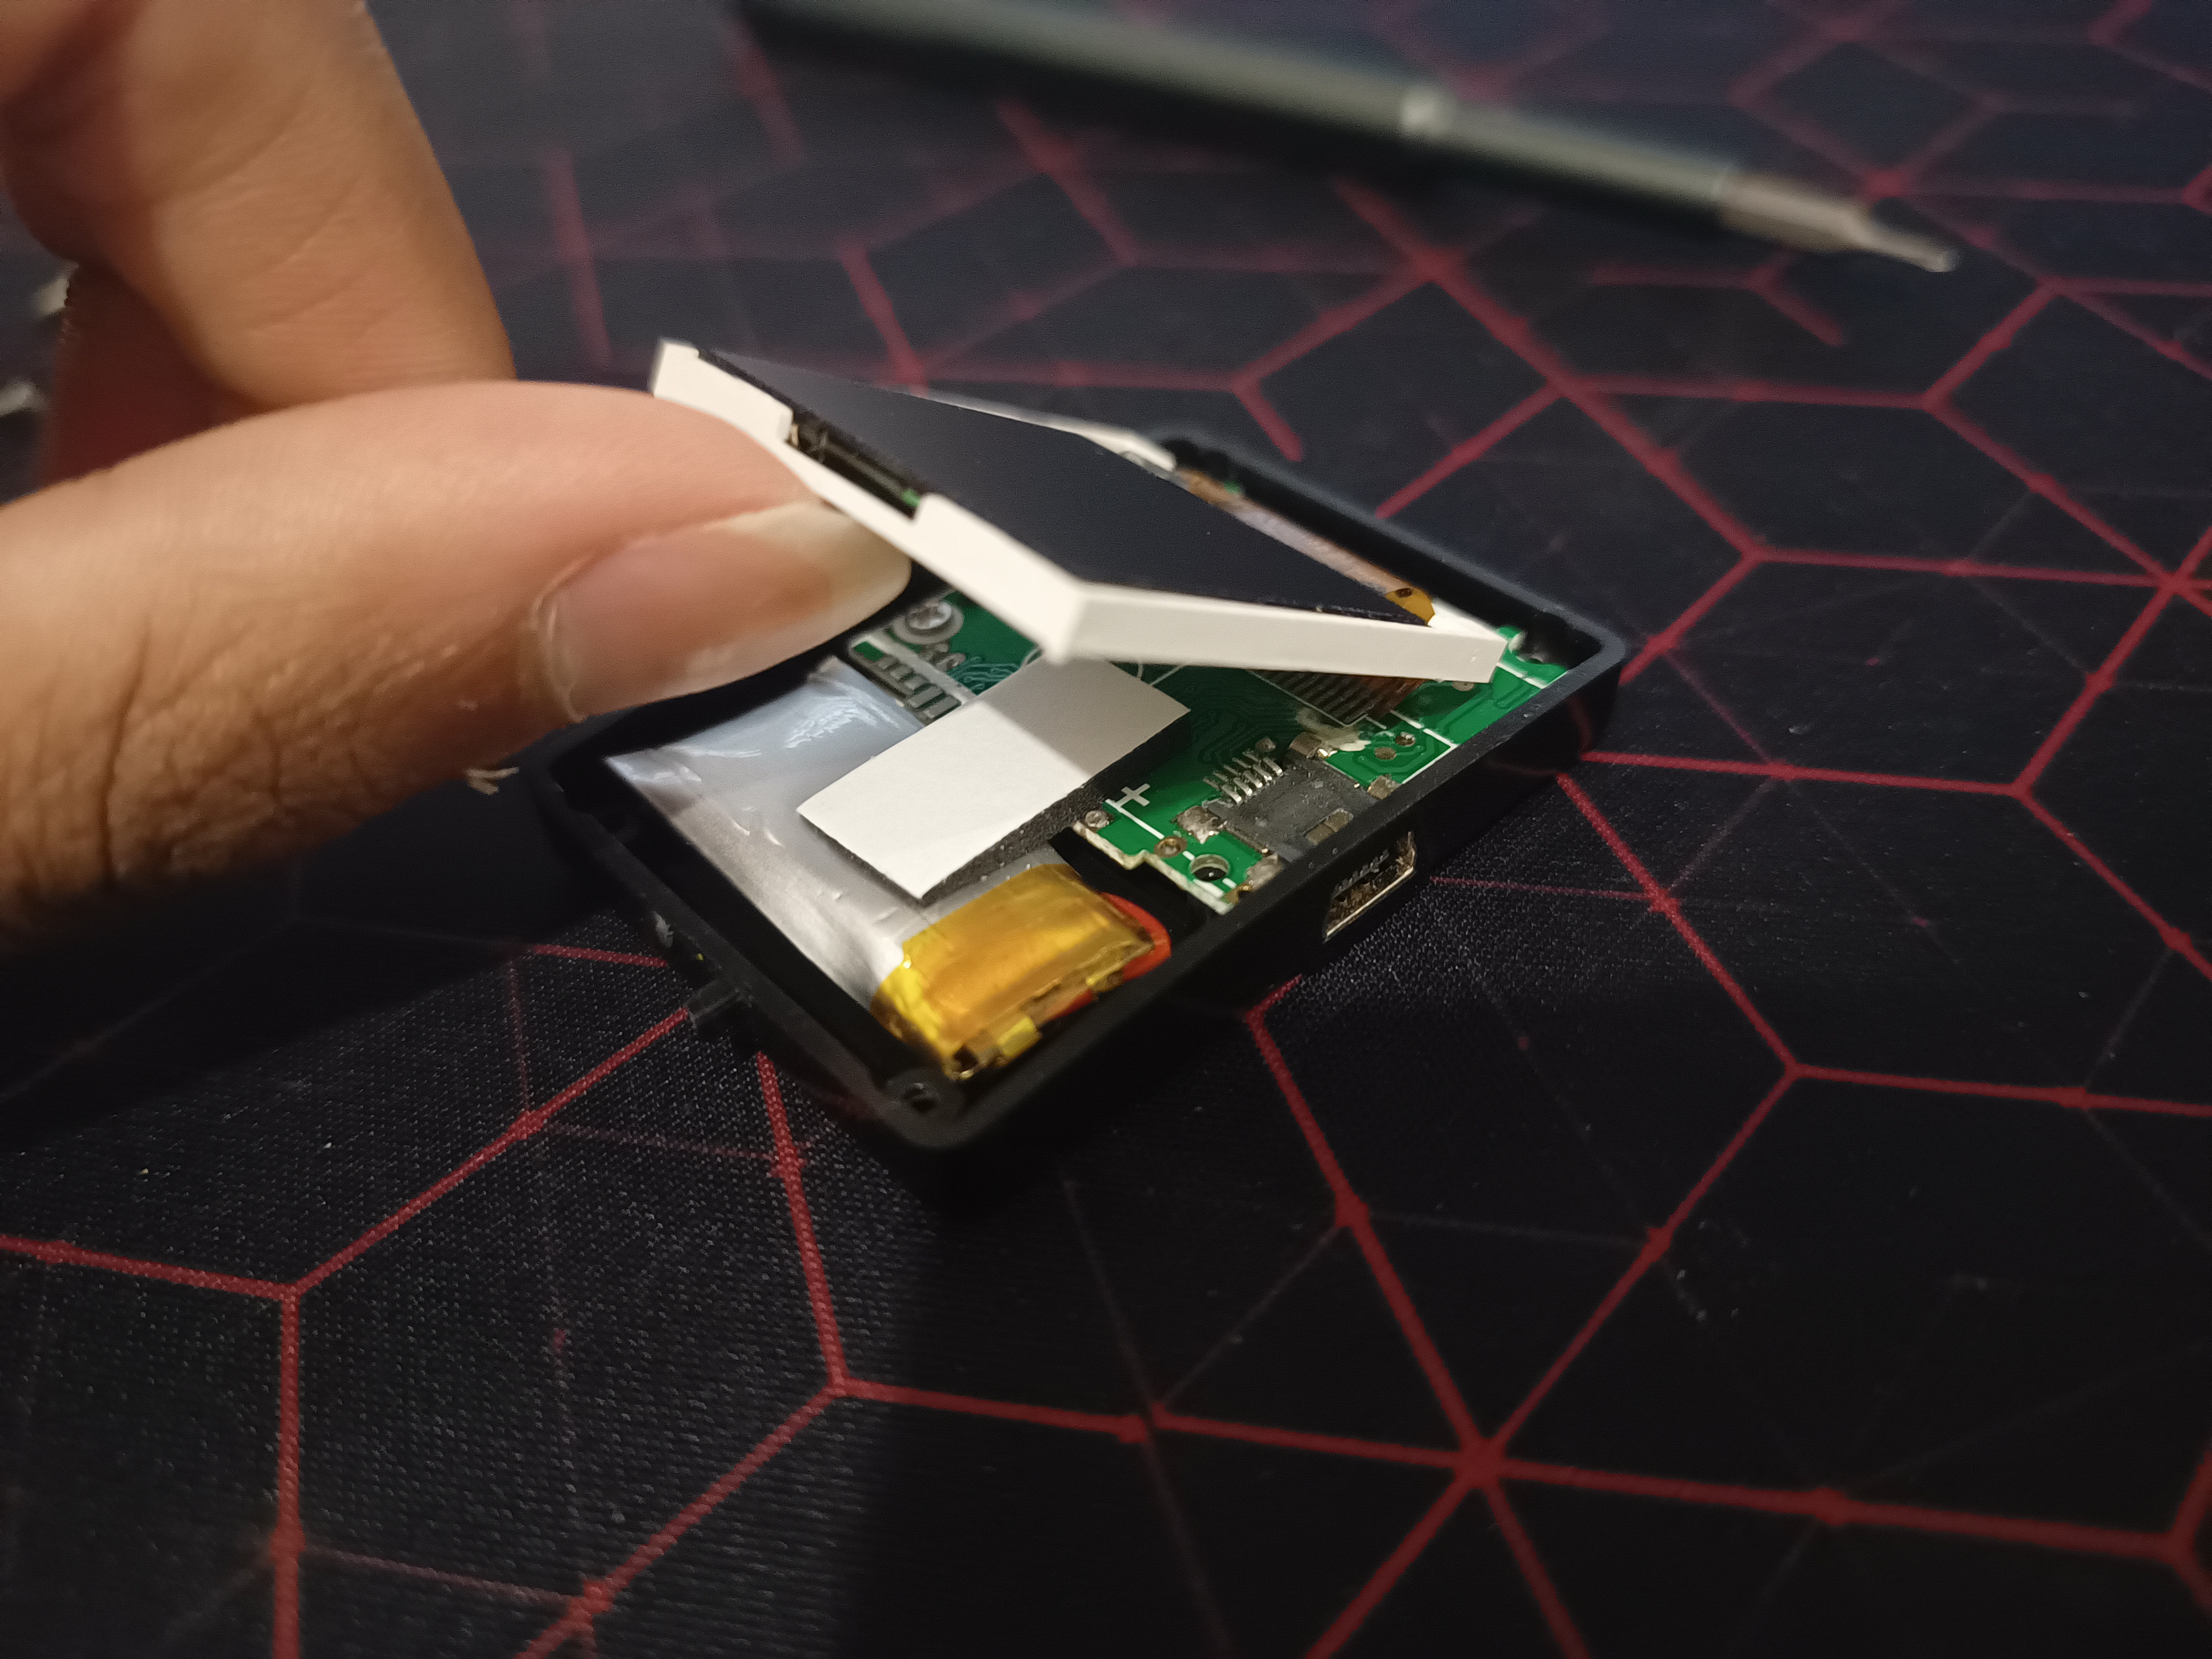
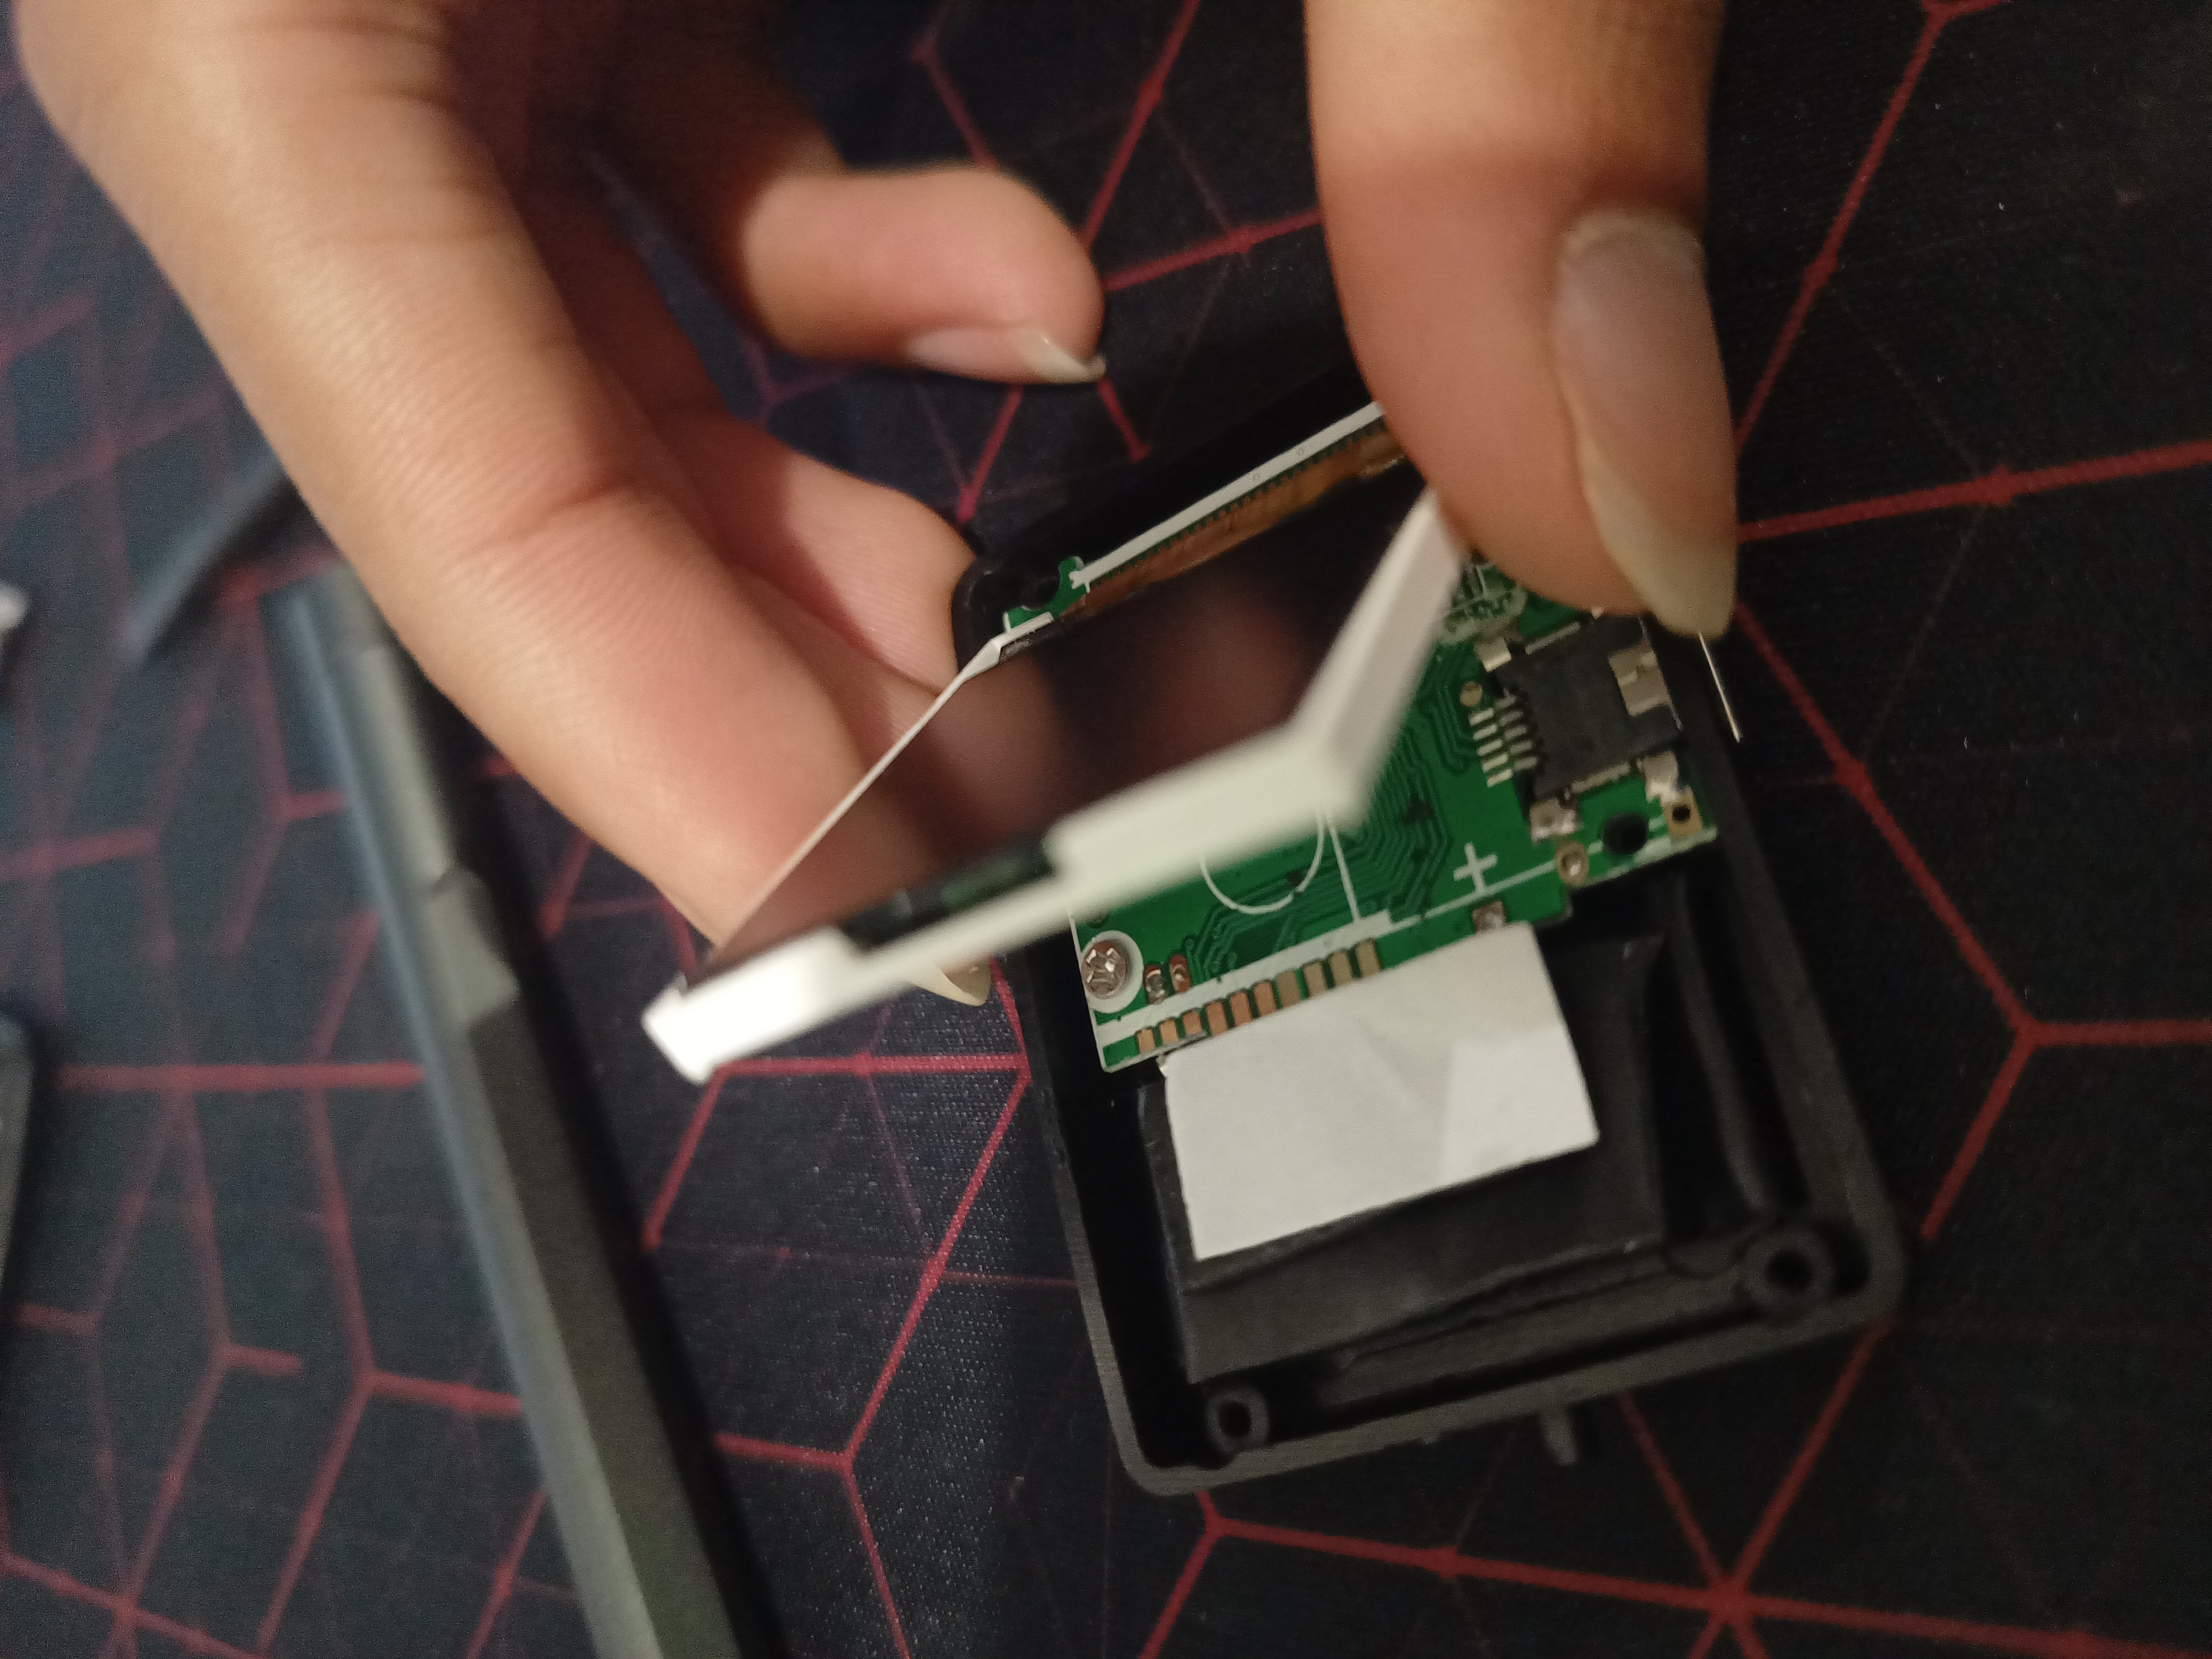
3. Pry Off The Battery #
From here, peel off the foam sticker acting as a cushion for the screen resting atop the battery and circuit board, placing it off to the side. Since the battery is stuck onto the plastic cover with quite a strong adhesive, I used the flat end of a spudger to carefully pry it off. Be very careful to not puncture the battery here.
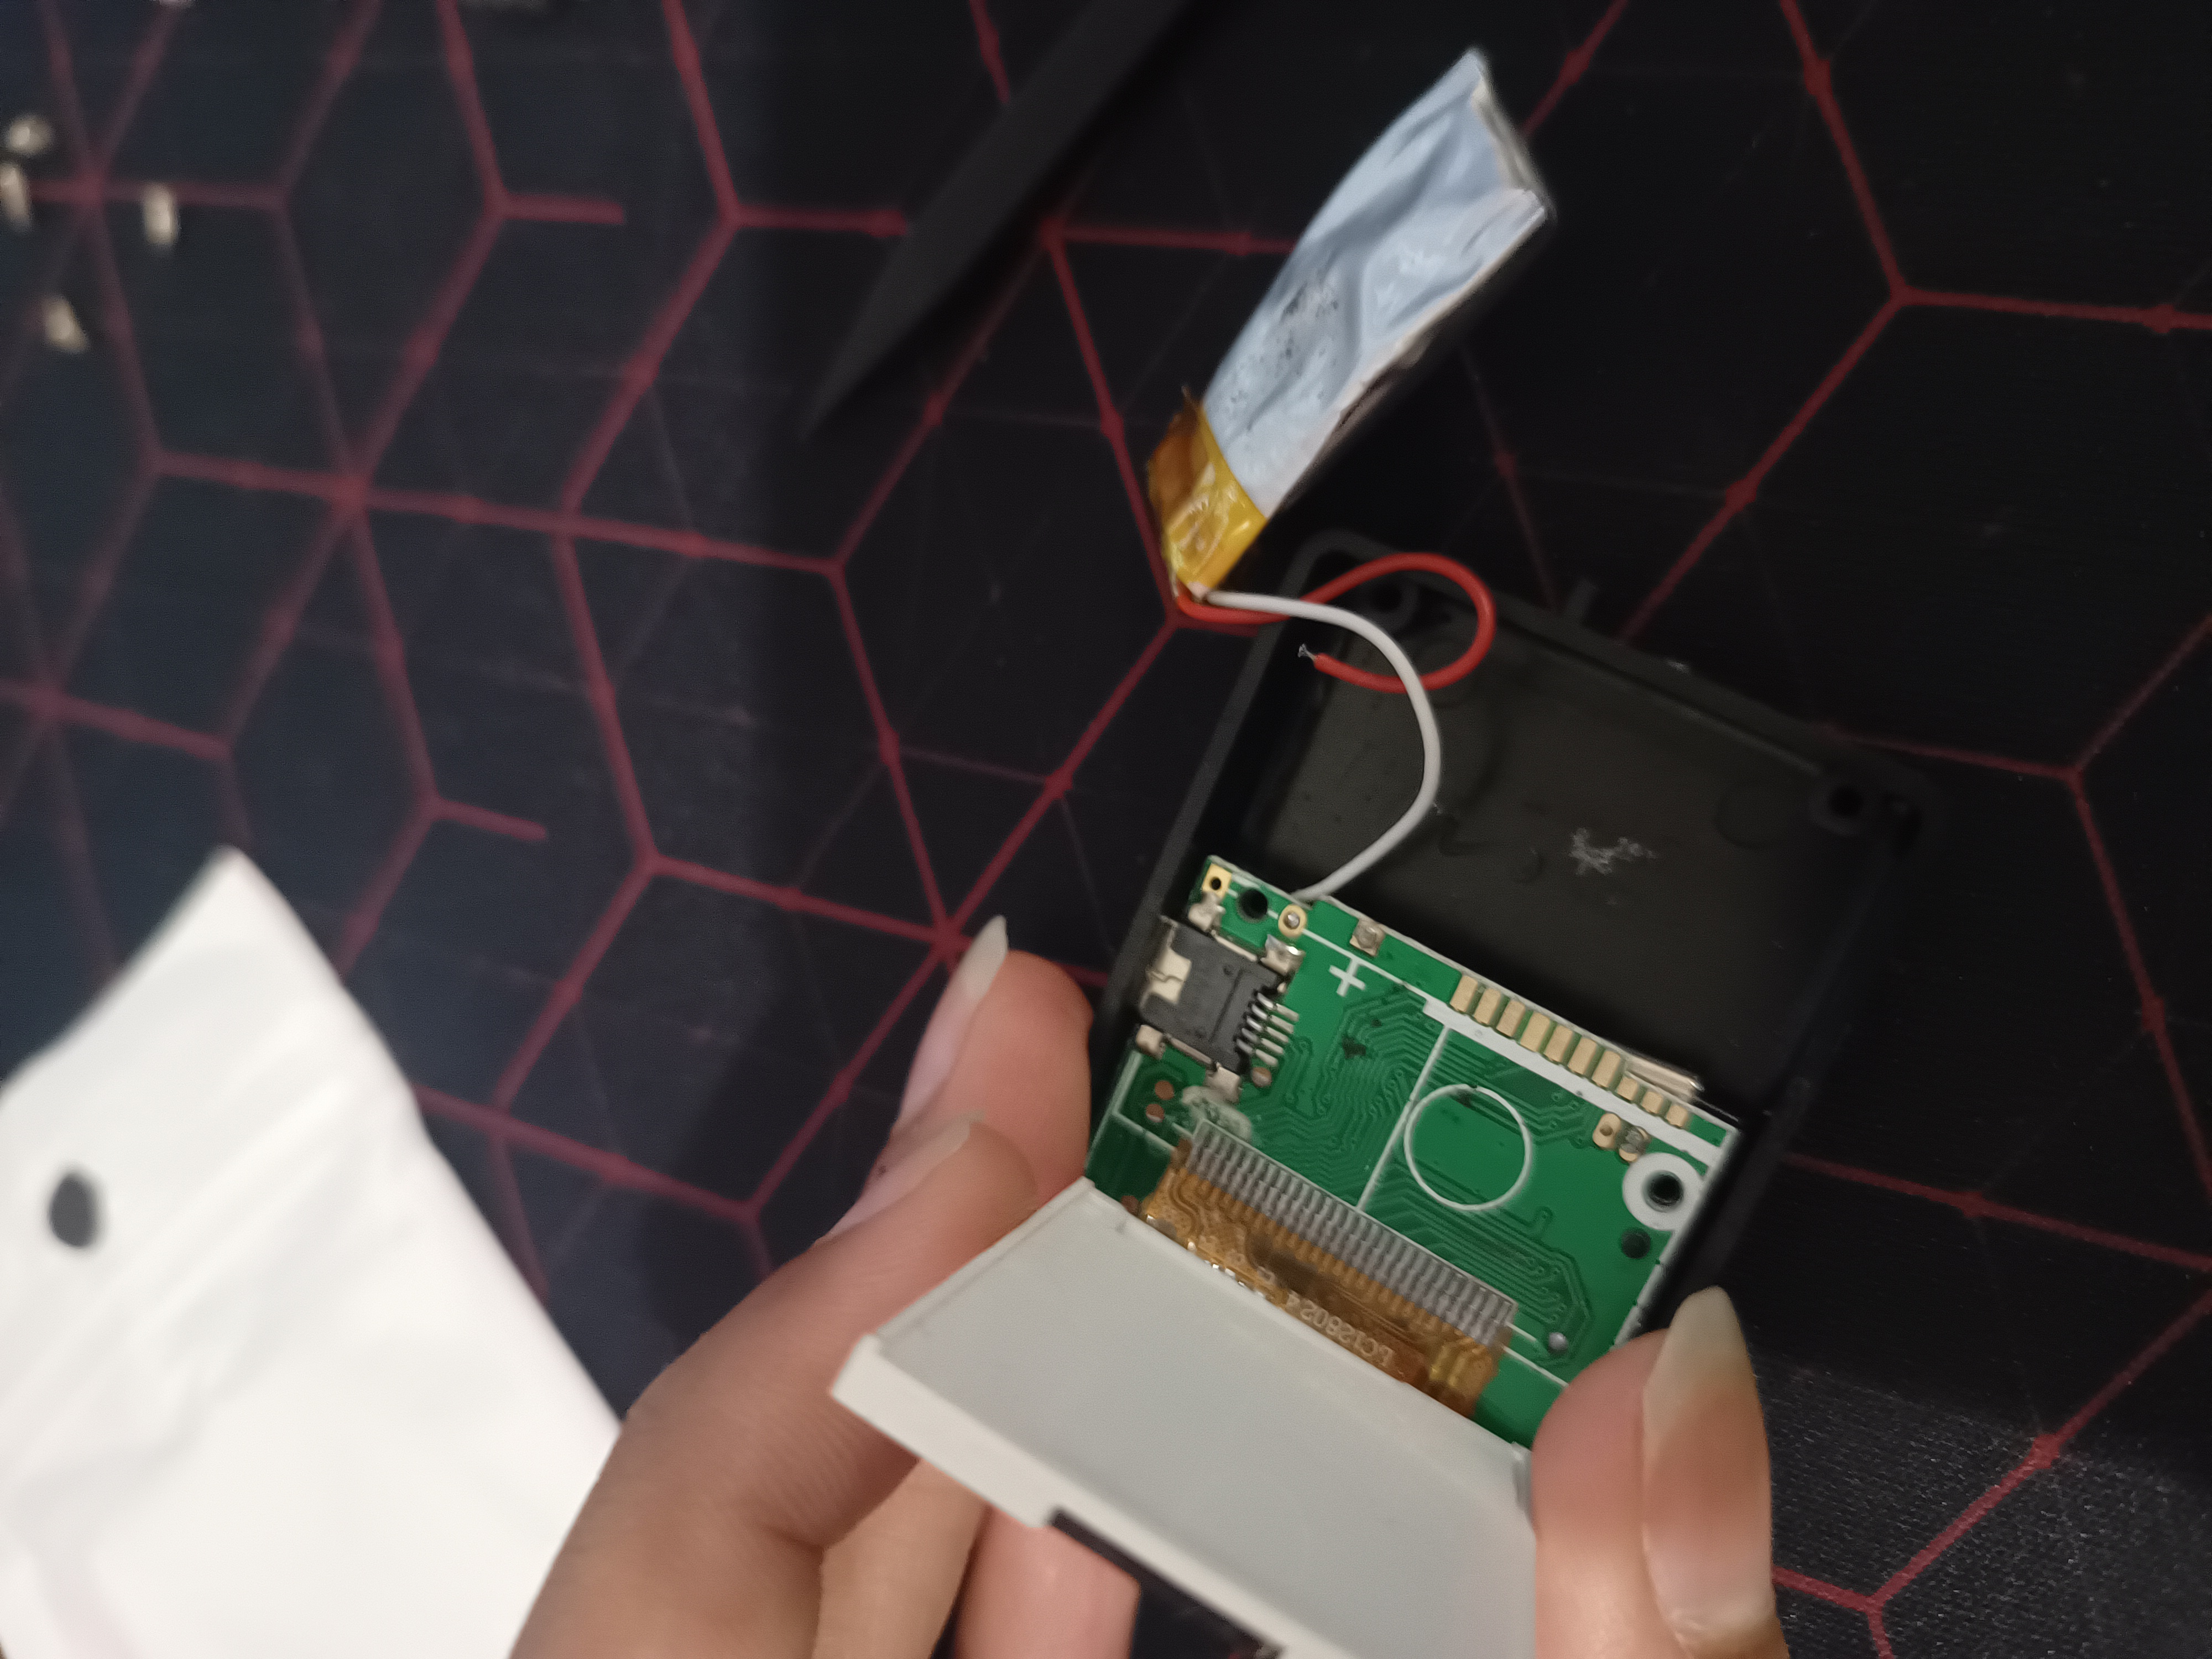
4. Disconnect The Battery #
You’ll be able to see that the battery is soldered onto the board (although curiously, one terminal of mine wasn’t for whatever reason, possibly just coming off itself during disassembly or previously having been thrown around). Ideally you should probably desolder the terminals, but seeing as they were just very lightly soldered on, I did something very naughty and just pulled the ending of the wire off, coming off with very little force.
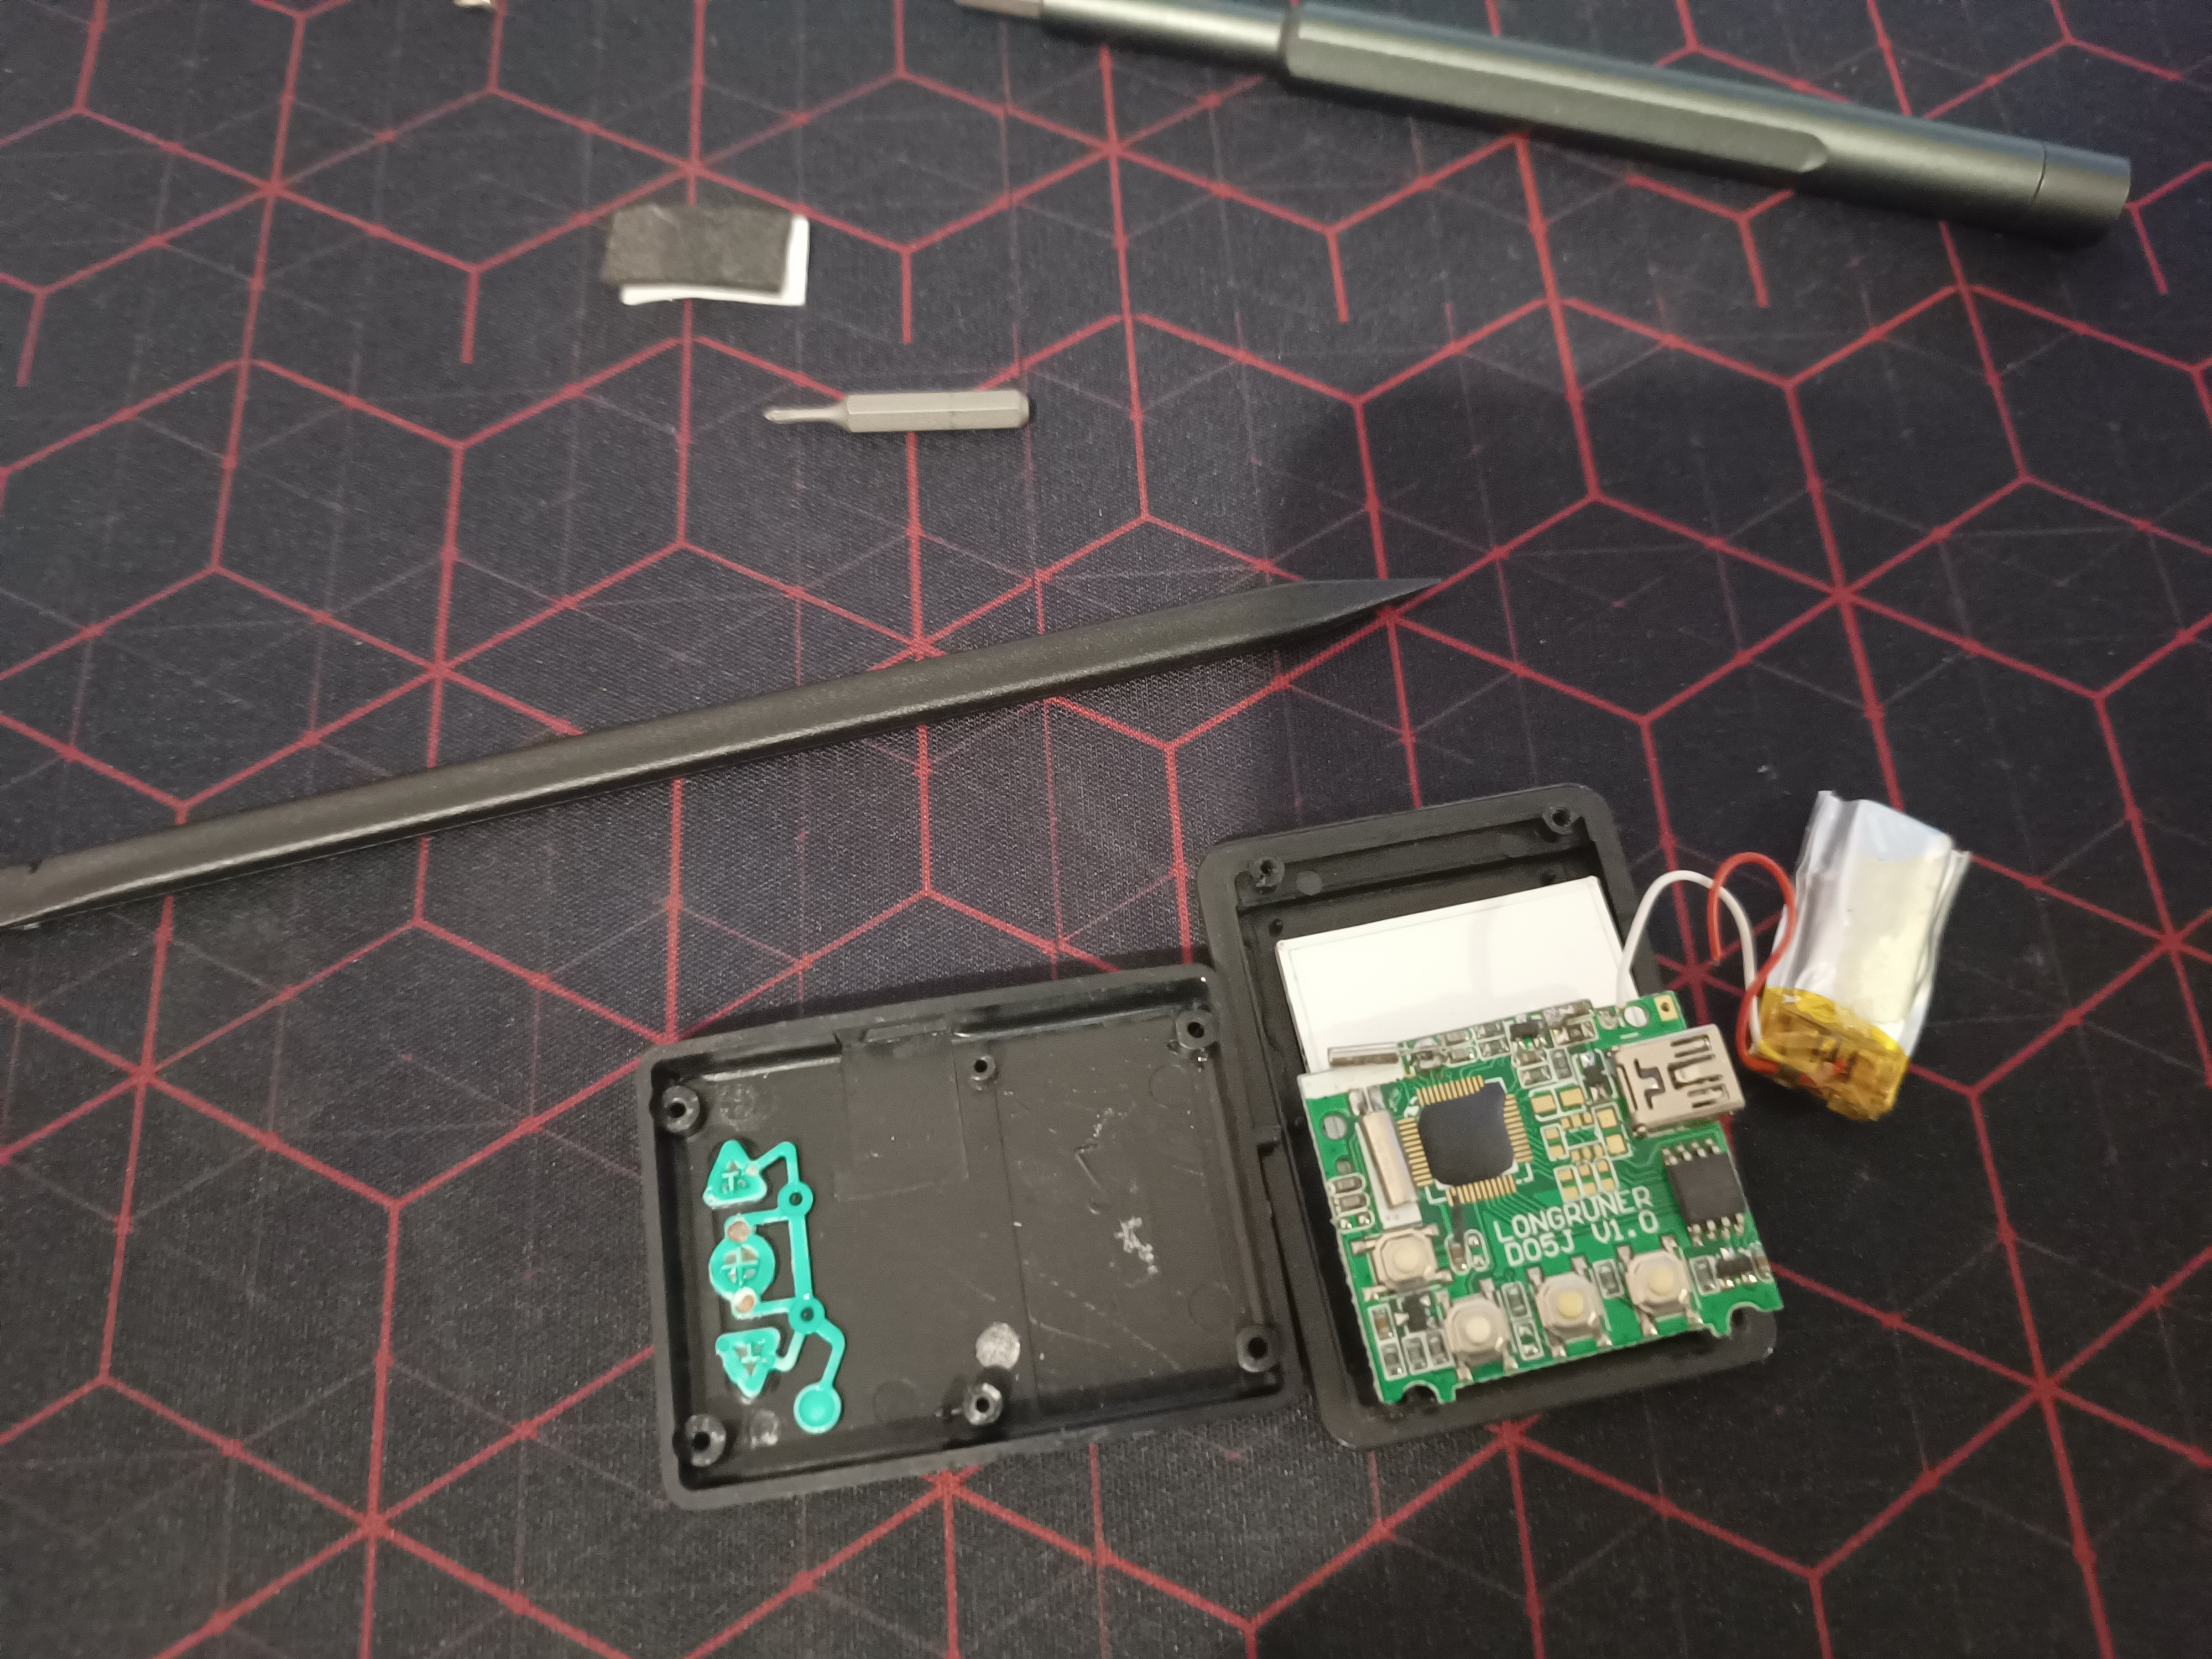
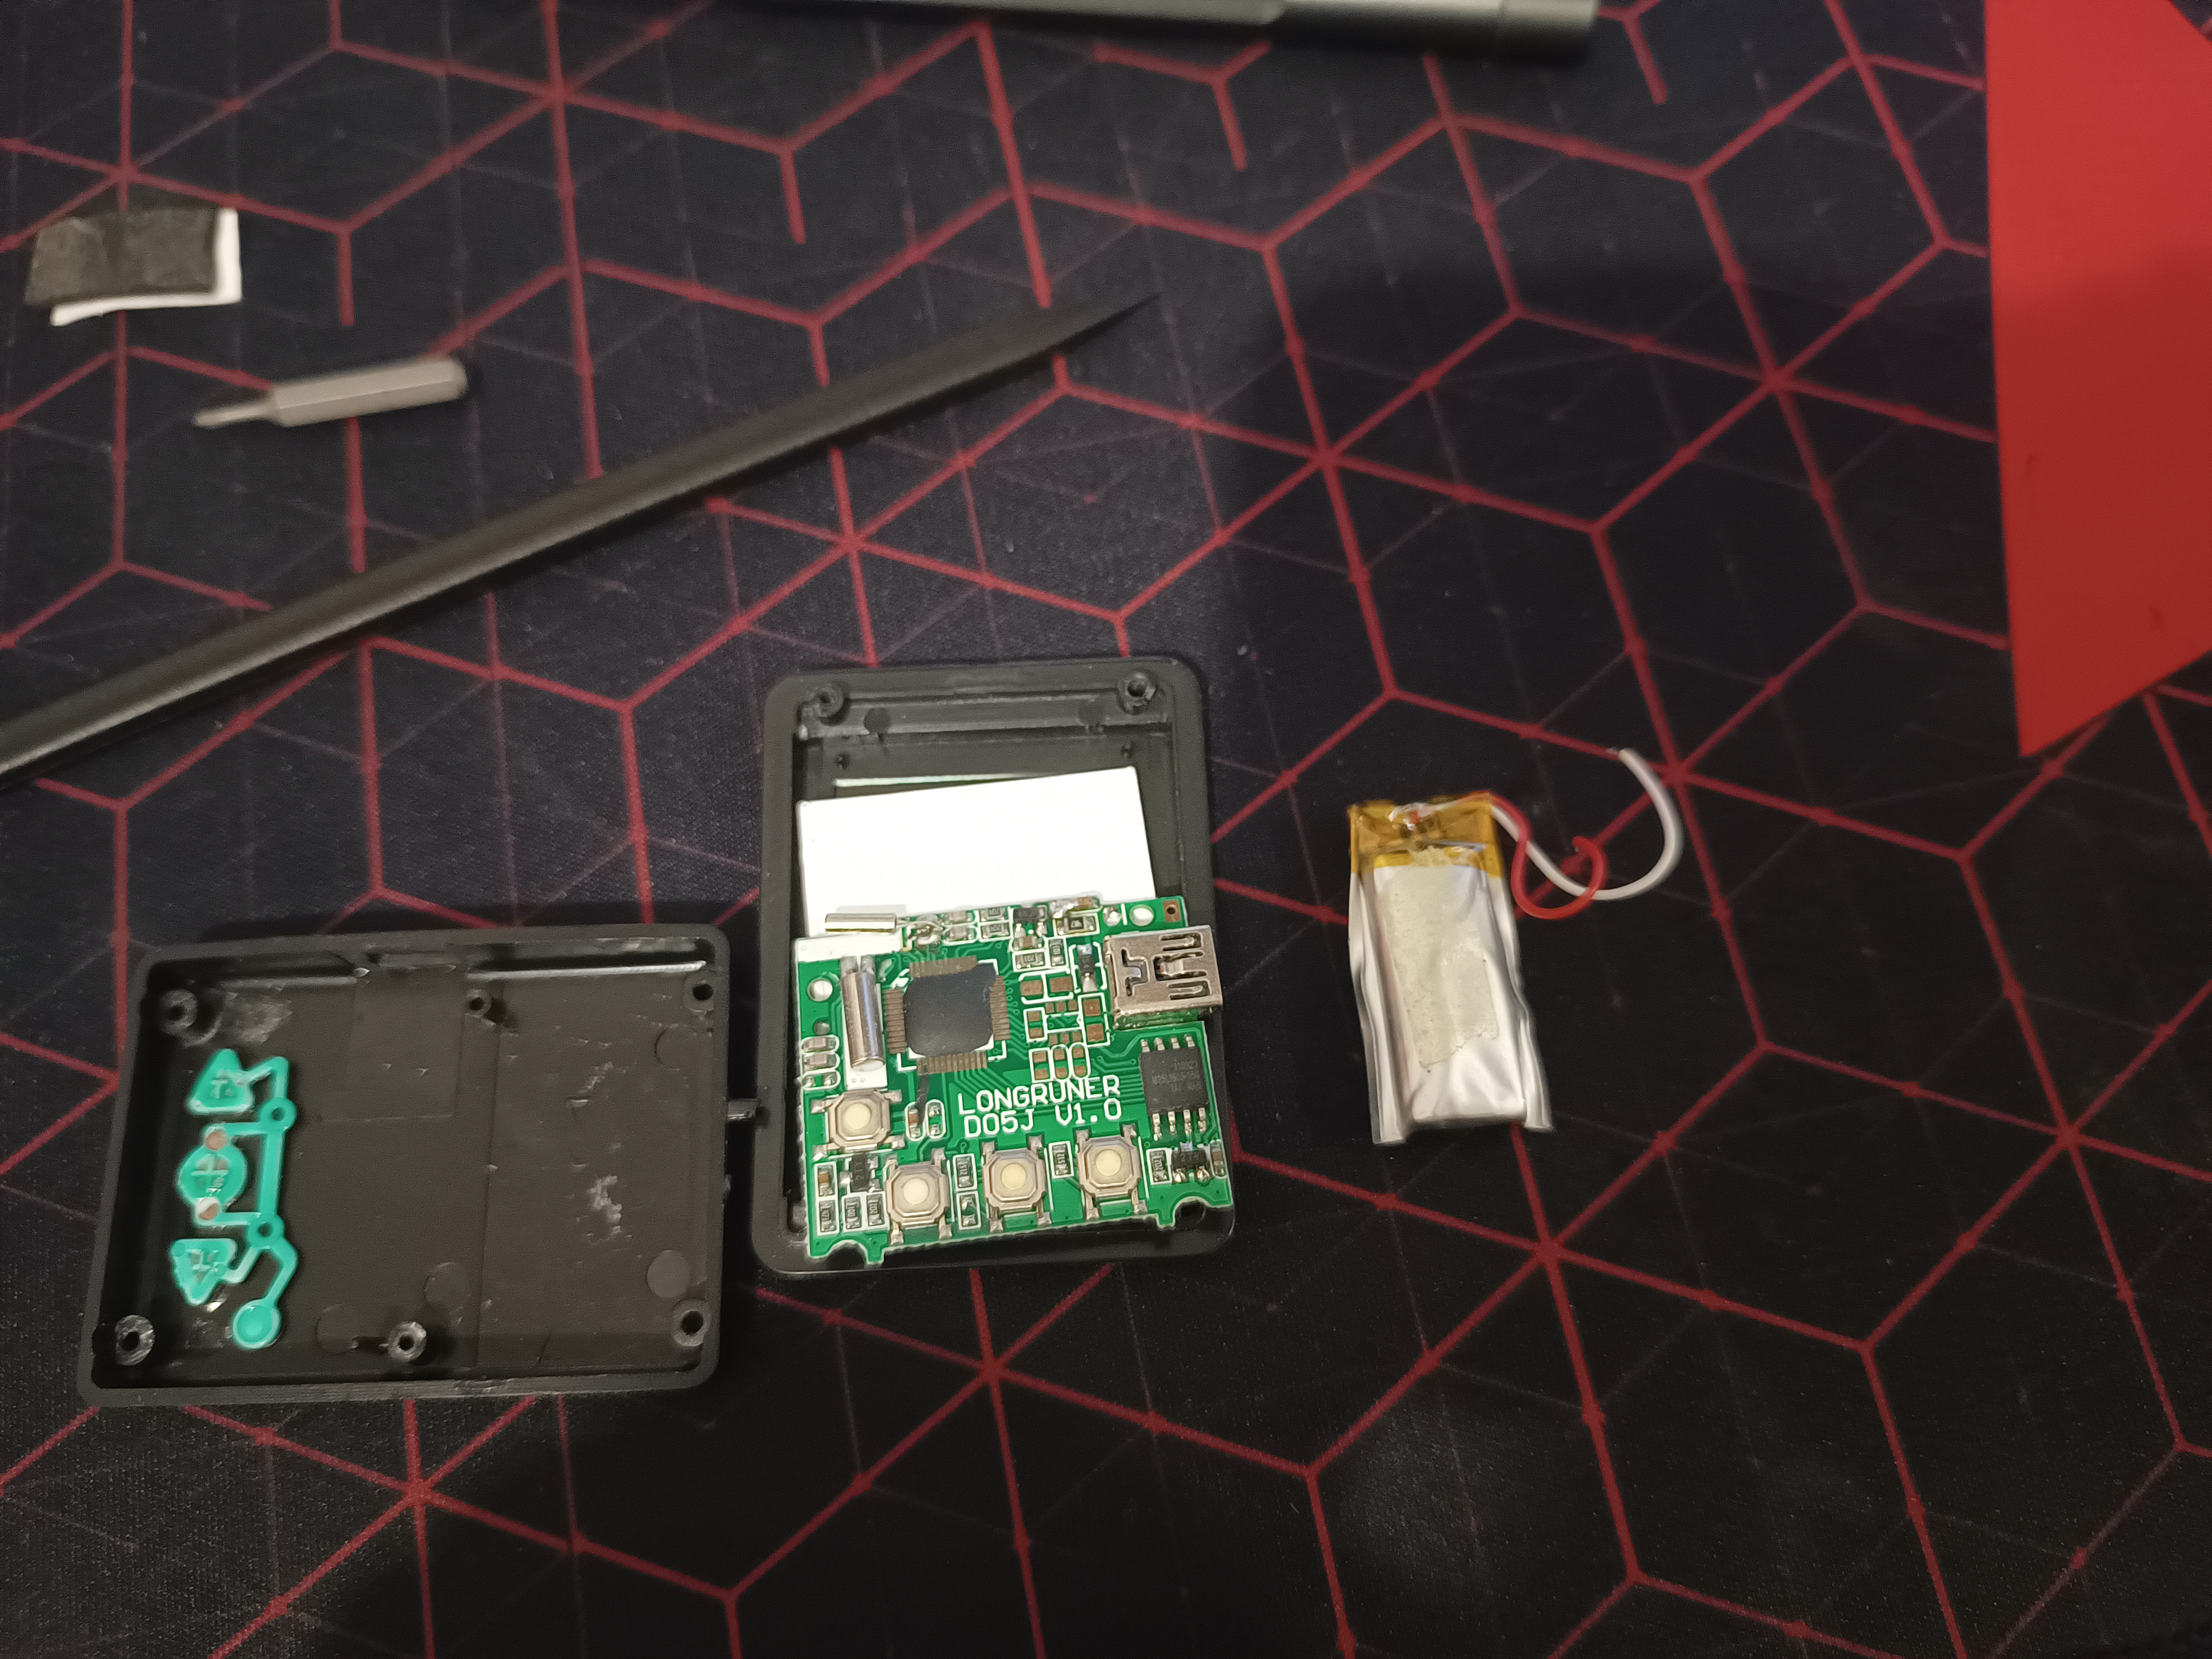
5. Putting It Back Together #
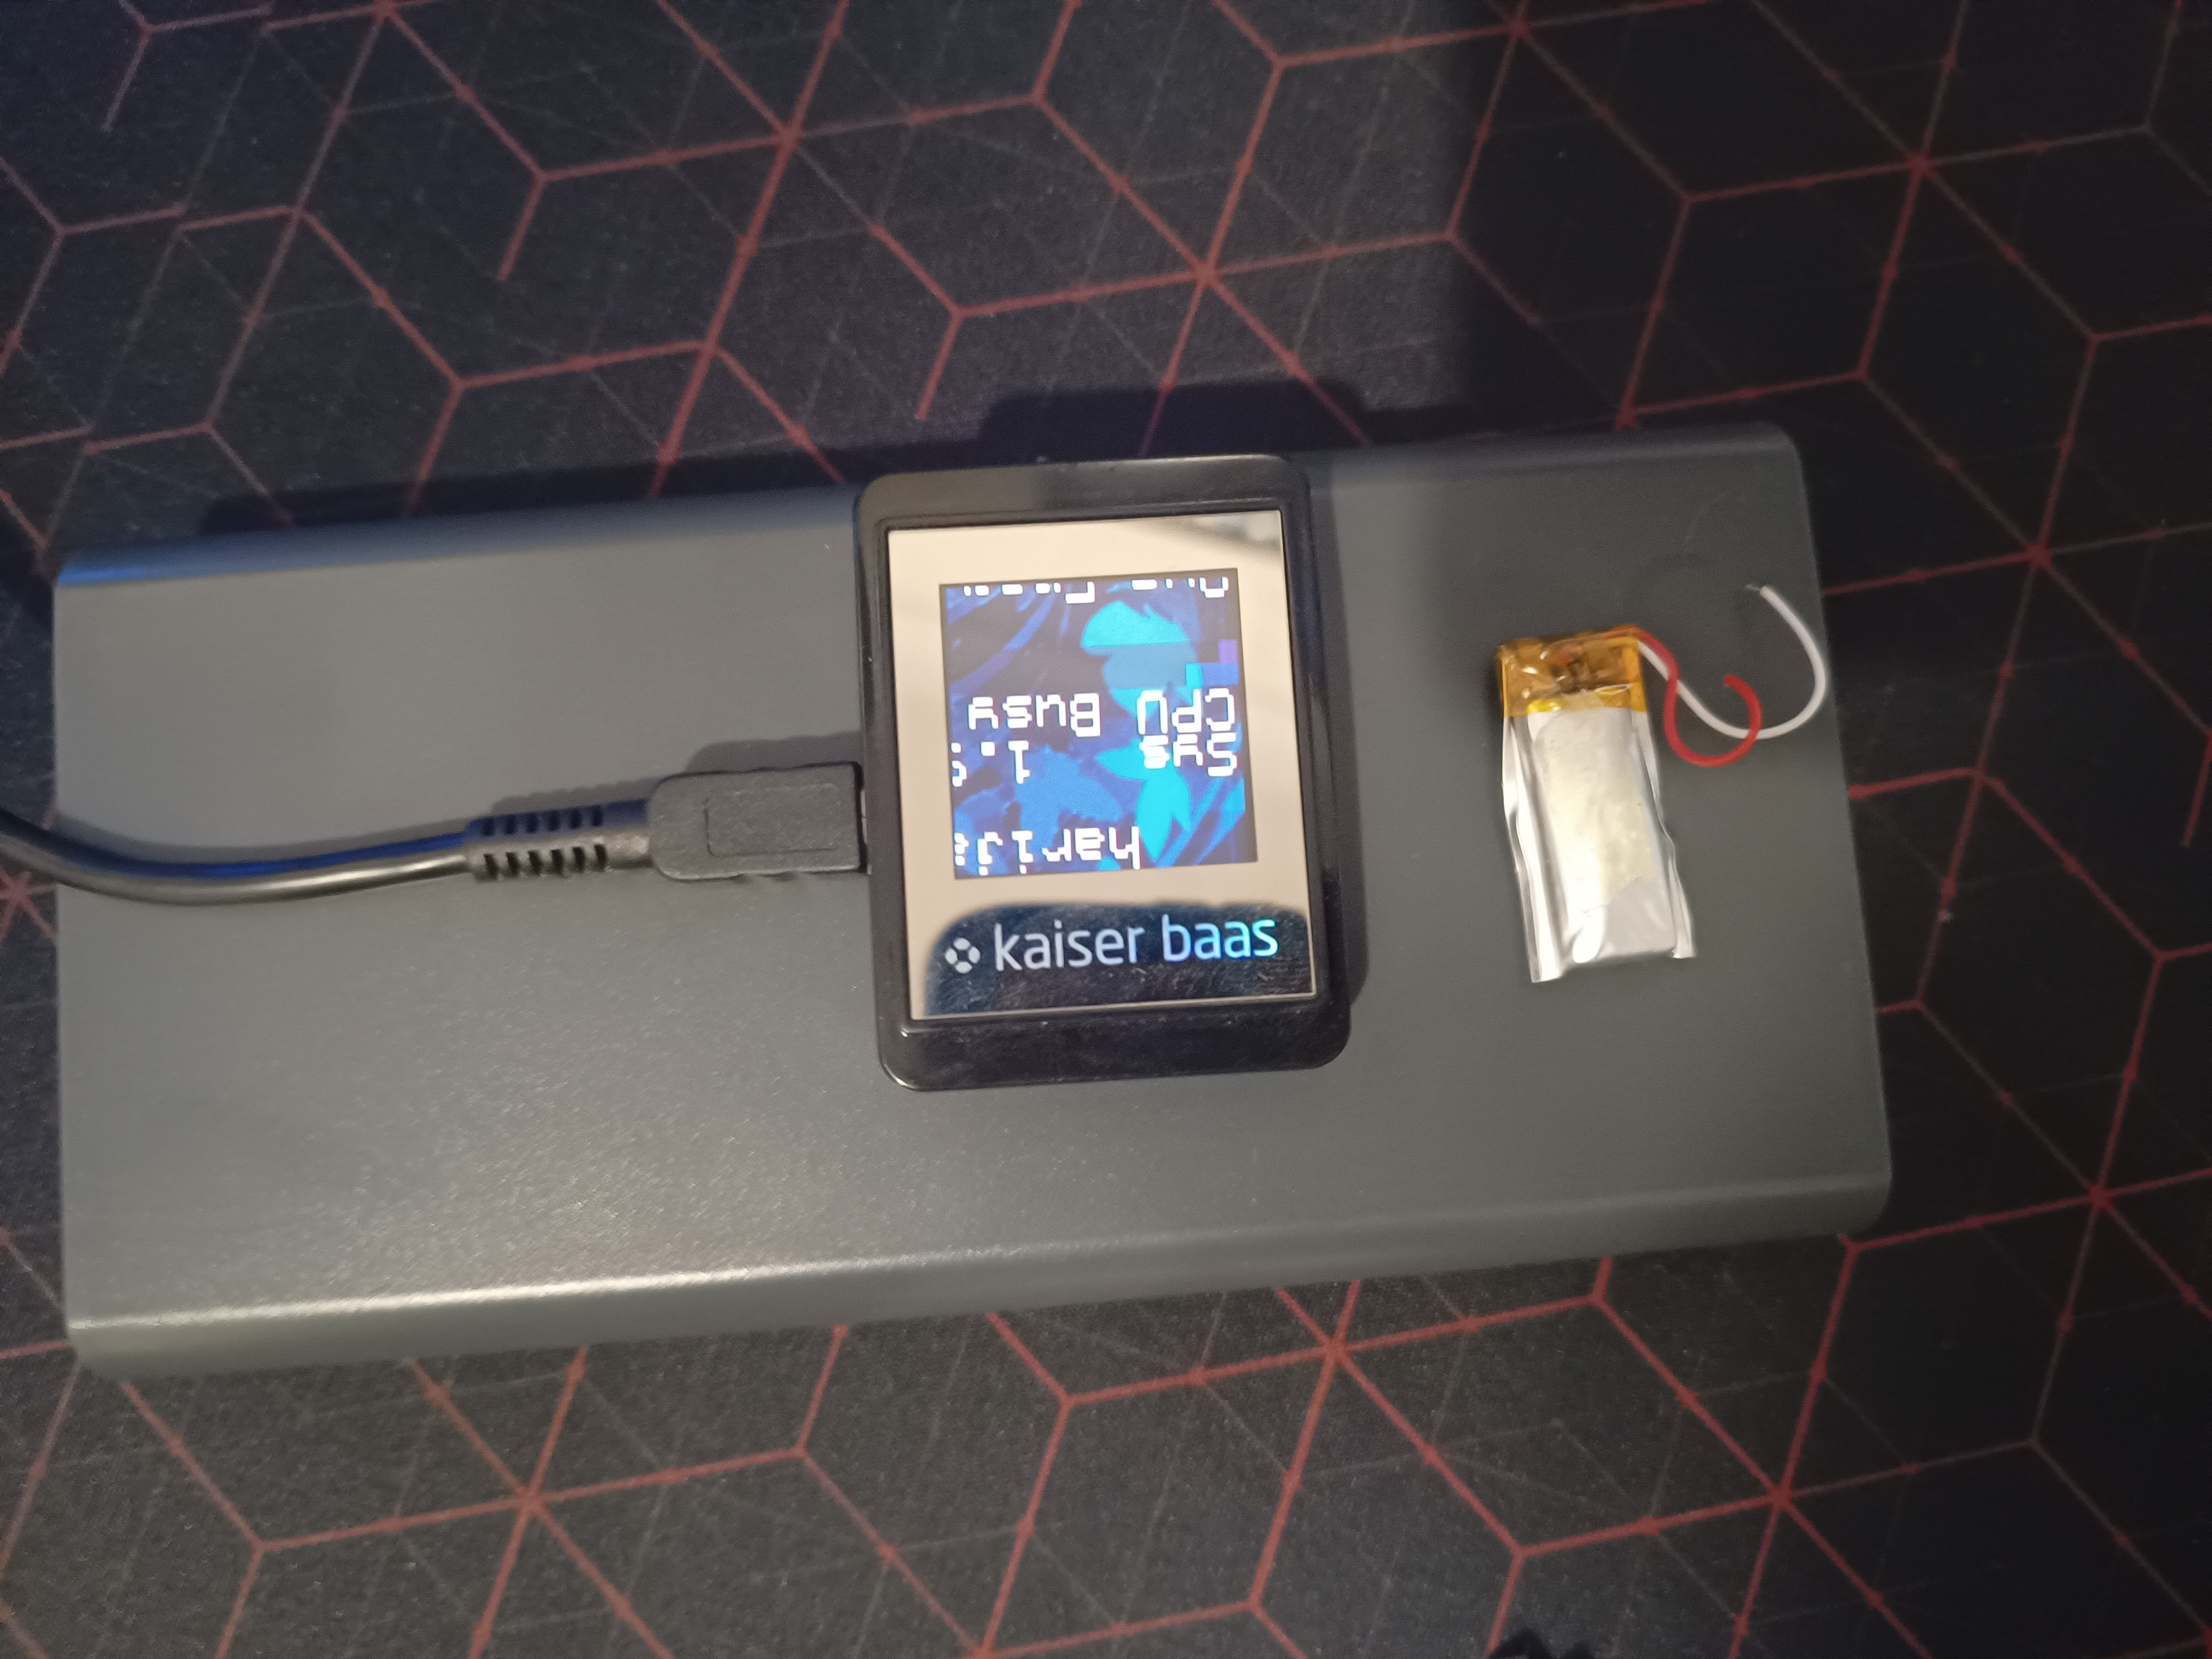
Before putting the frame back together, I substituted the now-removed battery with a bed of electrical tape for the display to rest on, with the little foam sticker on top as well. After that, I slid the screen back in place, and replaced the front cover back on, screwing the four little Philips head screws on the back back on.
Conclusion #
Overall, playing around with this little picture frame was good fun, and could be made to work as a neat little system monitor on a tight budget, especially if you’re able to find one lying around the house like I did.
Thanks for reading!